Showing posts with label OnOne. Show all posts

Sunday, September 23, 2018

More Flavours of HDR vs AI enhanced

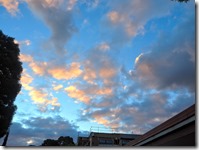
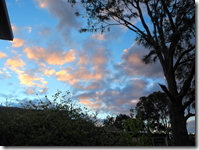
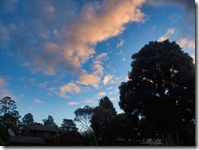
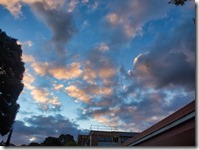
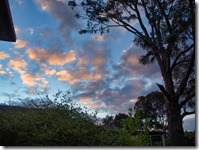
Sunset is a time that it can be difficult to capture a decent (and appropriate) dynamic range (tonal levels) of light. Bracketed exposures are a great way to ensure you get a decent exposure and taking this into traditional HDR merging and tone mapping will usually guarantee a decent picture. Finally how does this compare with my new software toy application PhotoLemur (aka AI enhancer). Is the extra effort worthwhile?

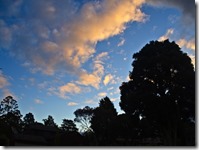
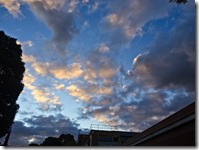
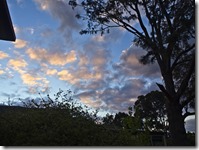
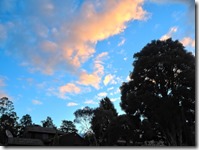
This first row are the original photos (The EV=0 image as a jpeg)

OLYMPUS DIGITAL CAMERAOLYMPUS DIGITAL CAMERAOLYMPUS DIGITAL CAMERA

This second line are the results from processing three bracketed photo through my current favoured HDR application Aurora HDR, using just the default tone mapping and Realistic Balance preset as a start, then small tonal and colour tweaks.

P9230002aP9230008aP9230011a

This third line was prepared with On1 Photo RAW’s new HDR merge which is pretty fast and the default tone mapping is realistic.

via On1 RAW HDRvia On1 RAW HDRvia On1 RAW HDR

This Fourth line is using the AfterShot pro 3 to merge and tome map, keeping the changes to minimal tone stretching and slight lift in vibrancies. This was once my preferred application and approach for HDR (as it was my only application to allow merging of RAW files) but I seldom use it now. It was a more involved process with reasonable amount of adjustment (“slider strain”) required if I don’t use their presets (which all have that “over baked” contrasty saturated look).

via AfterShot Pro HDRvia AfterShot Pro HDRvia AfterShot Pro HDR

Finally I ran the middle exposure (0 EV) RAW photo through PhotoLemur, and accepted the full enhancement.

P9230002P9230008P9230011

Once again the results differ but not dramatically and it is really a question of your personal preferences.

By the way, I actually would not consider PhotoLemur a “toy” application, because unlike a lot of other one click filters (or presets) it makes good adjustments decisions based on the photo being processed. All within a few seconds. Its a toy because I like to play with it, it still amazes me.

Will I just use Photo Lemur instead of doing a traditional HDR? No! (not yet)

Saturday, May 26, 2018

The Tale of Three Panoramas

Originally I was planning to put the Olympus Camera Panorama “feature” through its paces. Well to cut a short story shorter, the panorama feature in my new M10ii doesn’t stitch the images in camera. It just gives you guide lines to follow. So I abandoned try he feature further and decided to test the stitching of images with different lenses and different camera orientations.

Rather than falling back on my favourite panorama stitcher AUTOSTITCH I decided to do all the post processing in On1 Photo RAW, mainly because it seems to handle the Olympus .orf RAW files best.

TESTING LENSESTESTING LENSES

I’ll begin with the simple panorama, just two images shot semi wide with 14mm ( Jpegs shown above straight from camera). Notice the images are exposed differently. I then used the .orf files and began by stitching them, then I took the result into the On1 develop, adjusted the horizon slightly and did a little tonal tweaking. Finally I took the adjusted but barely post processed panorama into the Dynamic Contrast setting in Effect module via the Natural “filter”. The results are pretty reasonable.

TESTING LENSES

Next I turned the camera vertically, added my circular polarizing filter and took 7 overlapping photos of roughly the same scene. I post processed this in On1 Raw following the same steps. Another decent panorama, much bigger and possibly a stronger image (because I include the strong darks of the trees on the right.

TESTING LENSES

For the last panorama I took 15 photos with an 75mm telephoto and undertook the same steps as the previous two panorama. This took a lot longer and created a massive file 26480x3970 (1,154.MB). It so wide I doubt I ever want to get it printed BUT it is massively detailed. I’ve done it now and may never do it again yet I now know how to do it.

TESTING LENSES

Tuesday, October 04, 2016

DNG and the Month of Living Dangerously

Well i’m glad September is over, I can reset the dial of my beloved Pentax back to RAW/PEF not RAW/DNG. This story began several months ago when I installed the new version of OnOne 10.5, and suddenly I started having problems with OnOne Browse not display RAW files. Initially it wasn’t every RAW file but as I tried reinstalling the update and specifically once I had installed version 10.5.1 I was not able to view any .pef (the Pentax native RAW file) other than for a fleeting moment when the file was first viewed. Also .tif files and .cr2 first would intermittently disappear. This made trying to use OnOne software standalone tedious and frustrating. My continued request for support were just answered with trite rubbish about updating drivers and re-installing the software. I got frustrated and stopped using OnOne for a long time.


I got used to using Aftershot Pro mainly for my initial review and perhaps quick processing in the field. Then loading up lightroom back home and finishing images. For a few photos I wanted to do extra post processing I used the plug-ins linked to either OnOne Enhance, OnOne Effects or Nik’s Software.There is really nothing wrong with Aftershot Pro, in fact despite OnOne’s claims to have the fastest RAW rendering I suspect aftershot might be faster. However I quiet liked being able to flag just the images I wanted to further post process and load only those into lightroom or just finish them in the other OnOne modules, as I had been able to in version 10.0.1.  This was ok and seldom more than two steps. usinf aftershot, then lightroom and then a plg-in was three and meant having to generate an intermediate exchange file. Then I remember that my Pentax is one of the very few cameras that can capture DNG files in camera. I had previously looked at using that format but the files where substantially bigger so I couldn’t see any benefit. However if I avoided the intermediate copies I felt I could still be ahead in terms of spaced consumed so I bravely decided to only take DNG files during September.

Where did all the space go?


In september I created 1420 photo files. Most RAW plus jpeg pairs and most of them RAW DNG with a few .cr2 files. They took up a whopping 85 GB (excluding any .tiff post processing versions)
compared with 3710 files taking up only 40gb for my  month long candian month long trip earlier.

Exploding DNG  Grenades

The first hint of an issue had showed up before September but I assumed it was an isolated accident. Occasionally, and I still can not figure out why or which piece of software is to blame, some of the DNG files will suddenly double in size. Typically it is my better shot that I am interested in. Then sometimes they double in size again. as an example most DNG file from the camera are around 23 MB each, then when they first explode they will reach around 54MB then the second explosion will see them at 120mb plus. It is only when I try to view one of these exploded files that the havoc begins. image_thumb2Aftershot nicely reports it has stopped working, and trying to restart it report that it shut down unexpectedly and is set to read that directory again but it nicely reports it is stopping again, and so on. Lightroom seems to disappear for a while and eventually just doesn’t acknowledge that these bigger DNG files exist. OnOne browser however goes into suspended animation and my computer totally locks up. If I kill the process, restart the computer OnOne will refuse toit refuses to restart.


I eventually worked out if I renamed the last directory I had used before such crashes I could restart the misbehaving software. However if I tried to re-access that directory with OnOne browse, it was back to sleep, and crashes again. Lightroom just kept ignoring the big files after long contemplation and aftershot was ok unless I tried to look more closely at those files. Picasa would still view these files but took a long time to load them, perhaps understandably because they were large. These problems occurred on both my new HP Spectre laptop and my HP desktop, but less so on tests on an old Toshiba laptop.


I soon came to the conclusion that these exploded DNG files were not good, possibly corrupted some how. Which left me with a risk, if I tried to view these files before I had a backup I could loose the RAW version (since I take RAW and jpeg I would at least still have the jpeg version). Unfortunately I realised this AFTER I lost a couple of rather nice photos. I do nothave decent DNG version of these now.


As the month progressed this just became a bigger and more frequent problem and I am no closer to knowing why. I just have a mass of DGN files I am reluctant to even veiw.

Toxic Tiffs

When I am working with plug-ins like OnOne or Nik’s software I had adopted the idea of using .tiff files which give me more colour bit depth and preserve the illumination dynamic range compared with Jpeg and are way smaller than using the .png format (photoshop file format). Again occasionally to start with these .tiff files derived from DNG files began to refuse to load. I could work on the file to begin with, but once i quit the plug-in concerned the file would not open. Worst once this occurred within a session all other tiff files I tried to access would suffer the same fate. Exiting the software and starting a new session sometimes fixed the problem till I hit another toxic .tiff. the file sized does not seem to be altered in the case of the .tif files, so there is no easyway to figure out which fie will or won’t open. So opening any .tif file has a risk!

At this stage I also started to suspect a photo/dng targeting virus or malware, but I can not findany reports of such a beast and my virus and malware scans do not report any problems,

So I have stopped recording in DNG for four days now and guess what? no problems for two days!


Is the problem in the Pentax version of DNG, or is it in the software, or even combination of software I’m trying to use?


The fact that the new apple IPhone 7 will save optionally save in DNG format could see others finding similar problems. I’ll let the do the debugging. I’ve had enough for now no more DNG for me!
Saturday, September 17, 2016

PhotoProject :: Surreally into the Night

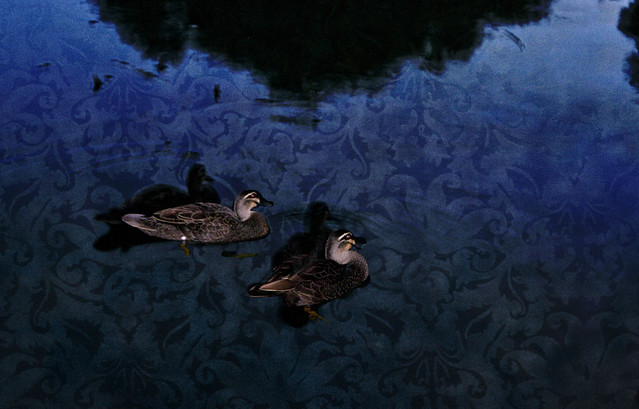
I have been interested for sometime in multi-exposure and superimposing subjects across time. This image is not a multi-exposure in camera instead it combined two photos taken only a short interval apart. It was just on dusk and there two ducks where lazily swimming by. I already had though of the idea of using flash and non-flash for the multiple images so I grabbed my camera and two a couple of photos, trying to keep the ducks in the center of the frame.

IMGP3596IMGP3597

Back home I put the two images together but it was quiet boring because light water in the normal exposure cancelled the dark water  in the flash photo (it a boring blue/grey)and the ducks where cut in half because they did overlap. So I had the idea of using a luminosity mask in OnOne 10. First I used a dark brocade textures layer and replaced the lighter values in the photo (the water) and kept the darks (the ducks and shadows). Next I overlayed the flash image and using an inverted luminosity mask let the blend bring the modified original photo and texture into the dark background. A slight crop, leaving the illuminated duck swimming on a surreal surface, with their available light selves becoming living shadows,

#261 IMGP3597 Surreally into the night

Tuesday, July 05, 2016

PhotoProject :: A chance to compare

This is an alright photo for an overcast drizzly day. Actually I was waiting in hope of catching a rainbow, but the sun never shone for me so I didn’t get a rainbow, just the last of the oak leaves falling. Being adventurous and warm back inside I figured this was perfect for a comparison of how I might post process the RAW version of this image in my software on my HP spectre 2 in 1 laptop.

Picasa (no adjustments) After Shot Pro 3 (Perfectly Clear)
_IGP7040 _IGP7040asp
Lightroom (Tonal & Colour Adj) OnOne 10 (Enhance & Effects)
_IGP7040lr _IGP7040-OnOne

I have included the unaltered render of the .pef RAW file, just to show that an unedited RAW file usually looks flat and often a bit dark. My goto tool for the first pass look at photos at the moment is After Shot Pro and the perfectly Clear filter (in this case it has the colour a bit loud and the sky blown out, not that wasn’t pretty much blown out in the unedited version). At this stage I think the image has potential and flag it was a keeper and even give it a couple of stars.

I then fired up Lightroom and set to doing a fairly standard tonal tweak, recovering some shadows by mainly looking to pull highlight down and deepen the blue of the sky (moving the blue channel viberance to the left) I also cropped the image to avoid the leading lines of the edge of the road drawing the veiwer to the bottom left corner. I felt this was better than the Perfectly Clear. Next I used OnOne, I’m having trouble with the browser not display my RAW filesin version 10.5 so I took the unprocessed lightroom rendering into OnOne 10 Enhance and tweaked the total range similarly to lightroom and I also used the magic eraser to remove a couple of post a swing and BBQ and performed a similar crop. Next I went into OnOne 10 effects and started with a soft dynamic contrast, added a little sunshine and finished with the big softy vignette. Happy with this and it becomes my photo of the day, albeit a dull day.

Friday, June 17, 2016

ArtInspired :: The Banksia in the rain

Still thinking of the process used by artist to create an image versus how a photographer might capture that image. It has been a overcast and drizzly day but I managed to get a photograph of a banksia cone in flower. A almost good photo in itself and I had run a bracketed set (handheld) but it was windy so it was hard to merge and properly register. Rather than commit them to the reject bin it was a worthwhile starting point to reconstruct an image in the manner an artist might.

I’m just using my HP Spectre Tablet in tablet mode so I started with the original image and used the Polarr app to add a little contrast, contrast and strength to the red (both luminance and saturation, but not two much). I might have normally preformed this in lightroom and/or OneOne but they are not as touch screen aware as Polarr, which is a pretty neat photo edit app with really intuitive and easy to use basic tools that can easily be used by hand in tablet mode. An artist might start with the background and the overall colour, so I switched to Corel painter essentials and first set up what they call smart blur (which help highlight the strong compositional elements) and also refined the colour palette (I just wanted to enhance the two colours red and green, classic complimentary colours so I pulled back the saturation of any other colours). I use painter essential to do a very quick starter clone painting of the background. Unfortunately this smeared out the red so I use a soft clone brush to bring out sharper edge  of the Banksia flower (this helped later registration of the images). Next I re-ran the HDR merge using Aftershot Pro, with particular focus on getting best registration on the banksia. However the droplets of water where no longer perfect.

_IGP6049 original photo enhanced in Polarr prelim clone painting in Corel Painter HDR created with After Shot pro

I now had three separate and subtly different images and used OnOne 10.5 layers to blend them together.  The background from the clone painting, the foliage and water droplets on the upper stamens from the original photo and the flower itself a combination (a soft blend mode) of the original photo and HDR image (mainly to enhance the colour).  With a Brush Border from OnOne Enhance

Between Painting & Reality

I’m not sure how to refer to this style of image. Is it digital art, a faked photo (aka photoshopped which of course it isn’t) or photomontage or something different (and new)?

“We called it photomontage because it reflected our aversion to claiming to be artists”  …Hannah Höch

Wednesday, May 18, 2016

Time for a coffee & creative ideas

Its later in the afternoon and not a daily photo taken yet. So I was finishing a coffee and contemplating what to do. I had an idea to try a series of my self looking at the camera and painting as if it was a self portrait, perhaps to make into a time series collage. So I set up my canon on my tripod and set it to take a series of images. I finished my coffee and then played with the brush.

A blurry series that should have been rejected

However it was one of those session where nothing worked as planned. Just as the cameras started firing the sun came out, brilliantly, casting unfortunate shadows. Collage of dreamscope images of me finishing coffeeThe camera was still manually focused, and everything turned out  blurry. There where many other problems especially that I had other more urgent duties to attend to, so I didn’t get a chance to repeat the photos. All I had was 12 terrible exposures, normally they would be deleted BUT I often tell people to keep a few rejects to experiment on. These were terrible and thus perfect for an experiment. My first thoughts was to try some simple dreamscope transforms and build the collage, but the three initial images of me finishing my coffee told the best story. Yet the simple transforms didn’t exactly look creative enough.

I decided to build three layers, The painting ground I made by leaving the image blurry by increased luminance and saturation. Next I made a simple stipple pattern and used it back in dreamscope as my custom filter, and created some line work. Then I recreated the the final patterned overall with the watercolour cartoon filter. I finally I experimented with OnOne Layers and different blend modes to give a composite image, that was once a rejected photograph.

#139 Coffee Drinker & Yellow Vase

Saturday, April 09, 2016

My thoughts on collecting Photo Reference for Painting

Whilst there is a school of artists that still insist the only landscapes are those painted plein-air. The vast majority will finish their big painting in the comfort of their studio, a few from just sketches but the majority will use photo reference. I love to sketch and paint outdoors but time and the light seldom let you finish a big work outside. However I know that when you try to slavishly copy all the detail in a photo it can make a painting look very flat. Whereas a sketch hurriedly dashed off is more likely to be dynamic and truly capture the sense of the place. So my take on this is to spend time to do a sketch or small composition painting to capture your impressions of the view, and record the important aspect you see. Start with a sketchDo this on site. I like to use a watercolour wash, then add the the detail with a soft pencil afterwards (I’m not filling in a detailed sketch with colour, I’m putting down the area of colour and main composition elements then adding a bit of detail.) Or alternatively I just sketch monochrome in pencil of graphite stick.

So My First Rule of taking reference photos is

Start with a sketch

  • Put your camera down
  • Do some compositional sketch to capture you what you first see and feel. Just the main elements

Waiting for the Sketch to Dry

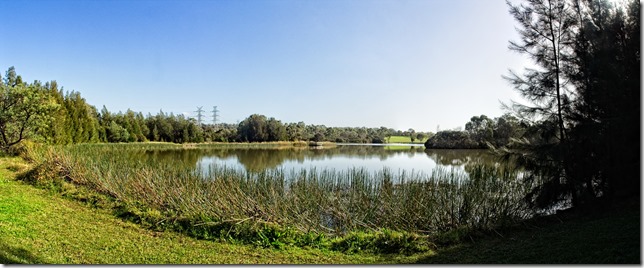
Whilst I wait for the watercolour wash to dry enough to sketch without damaging the paper. I find this is a good time to pick up the camera and take those reference picture because you now know what is important in the image. The first photo being the obvious, the same view you are painting. This is where a camera with a zoom lens comes in handy because it is likely that your composition will not match a snapshot from your camera. You will probably have to zoom in or out. In my example I have taken two images side by side and then stitched them together, using Austostitch, because my sketch is a little wider than by camera can handle (alternatively I could walk back behind me before I took the scene, assuming their is room and the full scene if not obscured)Lake Pano

However don’t stop there, take at least an additional 4 views, zoomed in (or walking close) to key aspects of detail that will help you finish or zoom out to get the broad feel of the place (you might like to add some slightly out of view detail or subject into your composition). If there are large areas of colour or texture photograph them, they could be the key to visual appeal in your photo.

 Detail of Comorant on postDetail of walkwayDetail of Tree TexturePatern of Ripples & Duck

So My Second Rule of taking reference photos is

Take Five

  • The composition you intention to paint.
  • Plus 4 details zoomed in or out, or concentrating of a key texture or colour

The biggest limitation of trying to copy a photo religiously happens with tonal issues. Whilst modern digital cameras are great they still have limitations with Dynamic Range and photos typically look flat compared with what you saw as you where sketching. There are two approached here that can help here by they may require a upgraded camera.

_IGP3787_IGP3788_IGP3789

The first approach if to take a bracket set of images (many but not all point and shoot cameras can take a set of three EV settings, older camera usually don’t have this built in but there are several camera apps that add this capability. The bracketed set gives you an underexposed version (to focus on the highlight) a normal exposure and an over exposed version (which will give you a lot more details in the shadows). These three images should give you the ability to play with the tonality to suit your composition. If you want to take the tonal representation further you could investigate processing this bracketed set as a HDR image and refine the tonal mapping to bring out the tones as you remember. HDR is an advance post processing technique that requires specialist software but it will give you a lot of freedom adjusting the tonal range._IGP3787_8_9_HDR with simple tone mapping

The second approach is to take RAW format images (probably as well as jpeg). This require software that can handle RAW images (like Lightroom, Aftershop Pro, OnOne or RAW therapy). The advantage here is the raw format records everything recorded by the camera sensor and it is possible to “pull” extra detail out of the shadows and often bring back the highlights. This requires learning how to use this software and extra time to refine the RAW images. However the ability to refine tonality and colour can be wonderfully inspiring. I started to like having the overhanging tree as part of the composition._IGP3780 Post processed in Lightroom

So My Third Rule of photo reference, if you have the technology to do it, is

Why not Take Ten?

  • Use Bracketing
  • Take and Process RAW images