W
W
I haven’t really had the opportunity to test out my higher rate burst mode (continuous shooting) on the Olympus OMD EM10iii. Mainly I had not been in the desirable position of the sun behind me and a cross wind so any birds where taking off while they fly past as I panned. The magic happened late yesterday. Well the camera performed well.
I was shooting in RAW+jpeg and I got the above sequence in a little under two seconds. Not exactly 8fps as claimed but it does give a great range of the full graceful wing movement of a bird in flight. I’ve cropped in a little on the RAW versions, not perfect but I am impressed.
I’ve decided to finish my TWIL project (This Week in Litter) not because highlighting litter is not an import reminder of how us humans treat the natural world but that I have learnt a lot making the photos and have probably reached the point where I can confidently shot from the hip using the back screen on my new olympus camera, without interrupting my walk, by more than a pace or two.
As I started this project I would stop, nicely frame the rubbish in the view finders and take the photo bending over. Worked fine, but people tend to give you strange looks if you are photography rubbish on the ground. I soon figured out I needed to be more discreet. Just facing the camera down at hip level and using the back screen to compose worked better. The only other obstacles were getting focus and exposure right (because both are hard to gauge off the back screen at the best of times, harder when this screen is essentially arms length away). Well I just needed to trust the camera, put it in P mode and used the Autofocus. A couple of early photos showed camera blur, but I took hundreds of photos and the muscle memory soon kicked in. Stop switch the camera on, move the camera to frame the rubbish, press the 2X button if necessary, half press the shutter, wait a fraction of a second and then roll to fully press the shutter (all in a second or so).
The results where very suitable. The photos not the rubbish

The two images below are default rendering by ON1 Photo 10 and just default tone mapping from Aurora HDR of the single .orf file. Once again I was using the 2x digital tele-converter, so the jpeg is enlarged whereas the .orf RAW file isn’t. I must admit I prefer the Aurora rendering, interestingly it is also much closer to the out of camera jpeg.

However I then did my own cropping, tonal & colour tweaks in ON1 photo develop.
Confirming that the jpegs out my little Olympus EM 10 iii are really decent but if you have the time and motivation you will be able to bring out a little more from the RAW file. RAW+jpeg is still my preferred setting
I’ve deliberately left this just a simple comparison, so you can decide yourself.
Which photo do you like best?
Move you mouse over each image to find out more about it
I am conscious that the jpeg version of any photo from my new Olympus E M10iii is pretty damn good straight from the camera. Potentially alleviating the extra effort to post process a RAW (.orf) image file. So let’s do some comparisons. The original photo is on the left. The default render of the Olympus is shown on the right, I'm guessing it is not a surprise that they seem very close (if not identical).


Compare these with the default RAW Rendering by On1 Photo 10 & Aurora HDR images below.

Once again this does convince me that the jpeg file straight out of my Olympus are very good and probably perfectly adequate for typical social media uploaded (eg like this blogs or Instagram). The rendering from different Raw processors find a little more colour and tonal range, however this stars getting into personal preferences (and the time to tweak).
I needed a break from the angst of my microsoft upgrade frustrations and the Melbourne weather was being itself and changing dramatically everyf ew minutes and going from decent rain to glimpses of sunshine, perfect for seeing a rainbow. So I had my new Olympus OM-D M10iii and the great little pancake EZ lens all ready to capture its first rainbow. Well that never happened!
What really happened was that towards dusk there was a very brief few seconds where the sun broke through the clouds and the clouds turned beautifully but subtly colour. I just had time to grab my camera and take a few photos and then the colour was gone. Back to more grey clouds and darkness soon set in. Nice
Then I turned on the Wifi in the camera (a really well thought out implementation) which makes the cameras a private Hot Spot. Started the Olympus Ol.share app on my phone, selected the best photo, downloaded it to the phone and clicked the share to instagram feed. I was straight into instagram and able to upload the above image within a couple of minutes of it being taken. Also I am constantly amazed at how good the Olympus jpeg files are straight from the camera (ie there is no post processing of filters applied just the cropping to a square within instagram.)
Originally I was planning to put the Olympus Camera Panorama “feature” through its paces. Well to cut a short story shorter, the panorama feature in my new M10ii doesn’t stitch the images in camera. It just gives you guide lines to follow. So I abandoned try he feature further and decided to test the stitching of images with different lenses and different camera orientations.
Rather than falling back on my favourite panorama stitcher AUTOSTITCH I decided to do all the post processing in On1 Photo RAW, mainly because it seems to handle the Olympus .orf RAW files best.
I’ll begin with the simple panorama, just two images shot semi wide with 14mm ( Jpegs shown above straight from camera). Notice the images are exposed differently. I then used the .orf files and began by stitching them, then I took the result into the On1 develop, adjusted the horizon slightly and did a little tonal tweaking. Finally I took the adjusted but barely post processed panorama into the Dynamic Contrast setting in Effect module via the Natural “filter”. The results are pretty reasonable.
Next I turned the camera vertically, added my circular polarizing filter and took 7 overlapping photos of roughly the same scene. I post processed this in On1 Raw following the same steps. Another decent panorama, much bigger and possibly a stronger image (because I include the strong darks of the trees on the right.
For the last panorama I took 15 photos with an 75mm telephoto and undertook the same steps as the previous two panorama. This took a lot longer and created a massive file 26480x3970 (1,154.MB). It so wide I doubt I ever want to get it printed BUT it is massively detailed. I’ve done it now and may never do it again yet I now know how to do it.
I’m not sure how many other cameras have a similar features but the Olympus OMD E M10iii has two further features to assist the new camera user.

If you use the shortcut key in Auto mode, you will see a small set of live guide button on the right hand side of the back LCD screen. Pressing it a second this key with your eye to the viewfinder will show the live guides in the viewfinder (not sure why you would want this, because the best way to use these guides in in the Live View screen). This set of Live view guides lets get sliders to change the obvious things about the image you are about to capture, and you can use the touch screen to adjust the sliders much like you would do on a smartphone.The best part is you see the resulting changes on the Live view screen, its a lot like post processing before you take the shot.
Just changing these three things, along with good framing (zooming in, or out of perhaps moving closing and filling more of the picture with your subject is probably enough to take a good auto image to a great photo. So many former smartphone photographer will probably be happy to continue using this approach for some time.
There are also a couple of specialized function, but you would probably leave those till later
Finally right at the bottom of the Live Guides is an item called Shooting Tips, which bring up more guides for common shooting situations and gives advice in example pictorial form. These are actually pretty neat and much more useful to a new photographer than a traditional boring manual or think how to book. Yet they are buried at the bottom of the live guides, I probably would have missed them if I had glanced at the manual and deliberately looked at all items in the Live Guide list. However it you are new to the M10ii definitely press the short cut key and scroll down to the bottom of the live view items.

These features work with jpeg file output. If you are shooting in RAW the camera will switch to jpeg+RAW and while the the jpeg files will be adjusted to match the Live Guide or SCN mode the RAW file will not be adjusted. So stay tune for working with RAW using tradition settings of the P A S M modes. For now just play in Jpeg, and enjoy getting great photos.
This was not a surprise. My lightroom (still ver 4.4) could not read the Olympus RAW format .orf. The same thing happens to most owners of new cameras, they have to wait for an update from adobe and they complain a lot on the internet. Please don’t think I’m just complaining, I understand the issue but I not interested in the adobe subscription so this probably marks the beginning of the end for lightroom in my photographic tool set.
On the left is the jpeg image straight out of the camera, shot in Auto. On the right is the same image but the .orf version read by Aurora HDR 2018, which can read the Olympus .orf RAW format. To keep with the spirit of using Auto I have only used it’s basic Tone Mapping (just stretching the tonal range) as a fairly basic thing you might do with any RAW file. I like both but the one of the right feels more like being there, so I made it my PhotoFriday post this week.
I am always advising those with a brand new camera, to start in Automatic (the green box) because that's where you get to know what the camera will do in any given scene. As opposed to starting in M (manual) which is the implied place “real” photographers hang out. Ok that’s just the myth on Youtube, Vlogs and social media. However pretty well all digital cameras (and smart phones) these days will take really good photos just by themselves. So my theory is, it is better getting some good photos and getting to know your camera (and those situations that the camera hasn’t done such a good job). Compared with struggling with manual setting and getting a lot of disappointingly over and underexposed or flat photos, That would be very discouraging to you, and its not your camera’s fault.
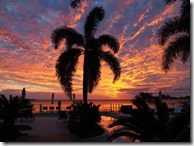
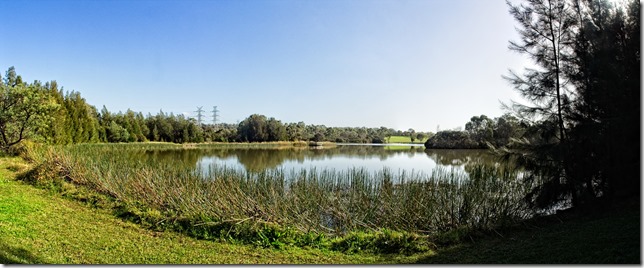
So its time to follow my own advice and thus today is A for Auto. Its the first day with my new Olympus and rather than go crazy and snap everything. I figured I’d go green, and look at straight out of the camera photos. All of these images are just the Jpegs direct from the camera with no post processing (including no straightening, which bugs my sensibilities a bit but I needed not to touch the photo after its come out of the camera)
With the exception of those with strong light and shadow (two on the bottom left which had a very high dynamic range) the photos aren’t bad. My advice seems to be justified.
Ok what about jpeg versus RAW, well that’s another post.