 |
| Clouds on the Eastern Horizon at Dusk |
Monday, September 28, 2015
Sunday, September 27, 2015
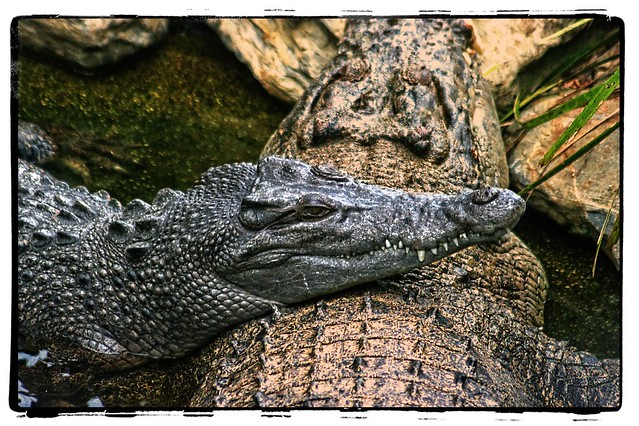
Some Hungry Visitors

![Long-Billed Corellas [Cacatua tenuirostris].](https://farm1.staticflickr.com/564/21784382285_e9ec1c8717_z.jpg)
Saturday, September 26, 2015
PhotoProject :: Knowing a bit about Notan
 Picasa, which you can still download for free, has a wonderful little posterizing filter that is ideal for investigating the Notan of an image. This filter is in the second last filter tab on the main tools panel displayed when a single photo is selected. It is design to reduce the number of colours actually being used (the top slider) and this is original of the name posterization because the image begins to look like older style posters which where printed with only a few colours. In the case of investigating notan we are looking for just a black and white image, and all you need to do is move all the sliders to the left (BTW In picasa you never get a pure white using this tool but it is very close), Our eyes are always drawn first to edge of sharper contrast, so it is easy to see that the movement all flows along there strong boundaries of dark and light shapes to the wheel of more particularly the hub cap ( and this puts the main point of interest right on the edge of the frame. Poor design and bad composition. This is so called two value notan, and some artist recommend including a third tone (the mid grey) three value notan. In picasa you can tweak the top slider a fraction to the right an get the three value version (see centre image below). There is also a very useful detail slider which will progressively display more detail (smaller bumps and shapes).
To see how this might be applied to photgraphy I will use couple of photographs I took for this week’s PhotoFriday’s topic clean. My original idea was to have the foam and green bucket being the focus to covey the story clean(ing). Ok the photo is really bland, so lets look at the notan.


Once I saw the black and white shapes I realised that the cleaned section of the car and the soap suds where lost in the composition. Worse still is the light and shapes just break the space in two and the movement and point of focus are on the wheel at the edge of the photo. Even when I consider the mid tone I am not gaining any interest around the cleaning story. Luckily I took more photos including some of me actually cleaning.


")
The balance of light and dark is no longer so symmetric, and thus more interesting also, the dark shape of my arms help draw the flow of interest into the area being cleaned. With this insight I could them focus on this balance when doing my final post processing.
This video nicely covers the concept of using notan in building the underlying strength and composition of a painting, but it does also use notan examples created from photos
Friday, September 25, 2015


Thursday, September 24, 2015
ArtInspired :: In Search of the Essence
 My search for what might be the essence of a subject or landscape bought me to investigating google’s Deep Dream (aka Inceptionism) This is a fascinating bit of serendipity, some google researcher investigating how neural nets might learn to recognised objects in computer images were looking for ways to visual the way neural networks learn when they showed what was happening in the layers of the network starting with a base random noise image. The results are surprising, they include the embedded echos of things that are significant as the neural networks progressively classifies what is important in discovering the subject’s essence. These have variously been described as trippy and surreal dreanmimages (see the many echos of eye’s in the “Extra Trippy” version of my self-portrait on the right).The researchers have even publicly shared the code to do it, but for the less geeky of us I found a truly amazing website/service to help create this deep dream style of image called dreamscope.com. (its also available as an iPhone app)
Wednesday, September 23, 2015
How Disappointing

However it is a bit depressing to think that a tiny quip about google+ changing its logo is the most popular post over the past month.
Tuesday, September 22, 2015
PhotoProject :: Making My Own Layers

I photograph this scene (which is at the end on my street) many times throughout the year. Whilst it wasn’t a spectacular sunset, and I’m looking south in any case, the sky is nicely dramatic and I felt it woild suit to the HDR treatment. I’ve even tried the HDR three ways, Google’s auto awesome HDR*, Aftershot Pro’s new HDR & Picturenaut. They are all ok, somewhat blurry, some with noticeable halos and/or don’t quite capture the time & place.


Which is all well and good but I would rather be experimenting with what is inspiring me at the moment. I am currently fascinated with what make Fred Williams’s work so appealing. Part of this related to scale, and it is pretty impossible to convey that here on a small screen. 
My initial idea to find the colour ground, was pretty simply just create a background layer which is simply the image blurred. There are Gaussian blurs in most photo editors but in this case I am experimenting with picasa’s soft focus filter which is like a vignette only instead of darkening the edges it puts thing progressively out of focus.


This image looks nothing like a Fred Williams painting and not a lot like a photo of the scene. Yet it pleases me. I am staring to understand what is important. I feel I’m on my way for an interesting journey.
Monday, September 21, 2015
More Copyrights & Wrongs and Thinking About Editions
 |
| Create Your Own Provenance |
With that semi-rant out of the way, another photographic misconception that sit uncomfortable with me is that having a media that is easily copied makes the works less valuable. Such artificial marketing actions like limited print editions and destroying negatives, are the realm of gallery owner and art dealers and don’t benefit the creative person behind the image. There is only so much you can do and thus your output will always be limited. I recently came across the marvelous artist statement/manifesto of Brooks Jenson, which cover my sentiments exactly and his analogy to the printing of books and numbering of editions strikes a powerful cord.
I’m not sure how or why I have missed Brook’s wonderful LensWork for so long, it has a wealth of content covering much of the wider aspects of Photography and the Creative Process, and it is definitely worth bookmarking.
Sunday, September 20, 2015
Sketching in the Presence of Original French Masterworks


I had a wonderful time sketching again (it was the second event at mga, thanks also to frank of last peek drawing events) in front of original works, sketches photos, prints and poster of the french masters Degas, Lautrec, Daumier and Atget. This session of figure drawing was based on a ballerina, perhaps not a theme I would pick but the challenge of the short poses and trying out a range of medium keep me focused and enjoying the situation, It forced home my concern that so much of what folk take as experience living on the social web is a poor reproduction on a tiny screen of the reality of life and art.
 |
| Some of my sketches |
Saturday, September 19, 2015
What of that race?

It only seems like a short while ago but it was back in April & May, both flickr and google where re-inventing themselves as the place to store all your photos. So in June I frivolously started a race to let them do what they wanted (just on my phone). It began simple enough but Google Photos kept administering self-inflicted injuries in the form of upgrades. Too many of them. Mostly that just meant I had to restart the autobackup (or turn off of the upload features to tone down the bandwidth usage). However I now notice the Google Photos logo has gone (I do realize that google have been updating logos and typography) and been replaced by the little green android robot with an obscure title that it is an android app. The underlying app is still google photos but with a screen that is at least a fortnight old and nothing showing for the current phone gallery (it looks like its in hibernation). My original concern that this race might end in tears was perhaps a bit prophetic. I trust you, my readers, have not put all your eggs in the google camp.
For the record the clear winners are Dropbox (which wasn't even supposed to be in the race) and Flickr.
Monday, September 07, 2015

Wednesday, September 02, 2015
New Google+ Logo
") I haven’t totally given up on google photos or google+, just yet, and I wanted to report in my blog that google+ had a new logo. I could get a url link easily enough but not am image that I could share. I’ve had to download the image, use Paint.net to fix an uncooperative transparent background and seek the assistance of Window's Live Writer to display it. All of which just really conforms that google+ (and google photo) are not really the place to share with the world ( Thus I prefer using flickr at the moment).
I haven’t totally given up on google photos or google+, just yet, and I wanted to report in my blog that google+ had a new logo. I could get a url link easily enough but not am image that I could share. I’ve had to download the image, use Paint.net to fix an uncooperative transparent background and seek the assistance of Window's Live Writer to display it. All of which just really conforms that google+ (and google photo) are not really the place to share with the world ( Thus I prefer using flickr at the moment).I must admit I seldom visit google+ anymore. It doesn’t show many post by people in my circle (perhaps they have stopped posting), just lots of other stuff that doesn’t interest me much. My blogger post are still often cross posted into google+, This only seems to be when I post or edit a post via the web interface of blogger. Such posting does bring extra views reported to my blog analytics (well according to google, but I am suspicious it just means it has been displayed on someone google+ stream, not they have read my blog). I am continuing with google photos BUT …
Flickr’s embed and sharing simplified but improved

The options for embedding now include adding a header and/or footer and controls of embedded size (very You Tube like). You can now share albums, which I can not remember being able to do with a photo display before. Now you get a wonderful yett simple click through slide show.

It is not fair to accuse photographers of "not seeing the forest for the trees" since trees alone are seldom the subjects for photographers. My Secret Life of Trees Album is different
PhotoEditTool :: Another good pair of add-ins


The magic happens if you see that one zone overpowers the image (in this case the shadows are very dark and lack detail and represent a large portion of the image) so you can then adjust the appropriate bez sliders. I prefer the 5 tone sliders at the base of the Bez panel. Remember each of the 5 tone sliders crosses two zones in the zone system.
It is also very important to turn zone off, once you are happy with the tonal balance, So that the final photo is correctly rendered (in colour).

There is no HDR technique here, although I am capturing a AdobeRGB colour image (thus high bit colour). All I have done is looked at the 10 zones of Ansel Adams system and made sure I have balanced the tones in each zone. It this case it has bought detail into the shadows and midtones, at the same time this lifts the apparent intensity of the green foliage.
Tuesday, September 01, 2015
Thinking about PhotoFlow, rather than WorkFlow

It would seem everything on the Net that is photography oriented will at some time try to sell the perfect workflow. I’m not a fan because these formalised workflows soon become constraints that limit what you can do. In other words I see a rigorous workflow as anti-creativity.
I much prefer the idea the physical flow of the photo has a lot more to do with being able to work flexibility. (I know it is not truly physical but a spatial workspace is a good analogy). For start I have several mistresses (photosoftware like Picasa, Lightroom, AfterShot & OnOne) on all of my computers and they don’t exactly play together well. Next I am progressively changing how I organise my photos. There is still an archive of everything (less the photos I cull on import). I now have four places (separate folders on network drives) where I save and work on photos, The most important is Portfolio which is the place I store my best photos, they are not necessarily shared on the net. I have become increasing convinced you need to save your favourite photos in their fully processed view. The three other grouping are PhotoScrapbook, VideoScrapbook & Family are more work places and photos can come and go. If these get post processed the sidecar gets sent to the archive. In all these workspaces I use albums to group the photos (Rather than folder location on the disk). Finally I have two different ways I share via the Net, the obvious social network places (to open up the image to anyone), and more importantly “private” sharing (where I can select those to share with and only them).
My workflow is still essentially a simple Shot, Edit & Share but I also see it as simple steps to move working photos into a suitable workspace.
Subscribe to:
Posts (Atom)