Showing posts with label photography. Show all posts

Wednesday, May 10, 2023

What can we now believe?

I like Sean Tucker am moving to the view that the greatest threat from the current crop of large-scale neural networks, which currently indiscriminately scrap the internet for their training data, is that they will destroy the potential credibility of everything on the internet. Particularly the veracity of photographs.


Yet, I also agree that at least some people will appreciate the real. "We'll always want to know whether what we are looking at is real or not and justice like with Photoshop and CGI will come up with systems and rules to differentiate where it counts." Fingers crossed.

Wednesday, June 15, 2022

Don't Worry, Stay Happy Taking Photographs

 Go figure I'm a keen photographer, but not really into Stories or Reels, bit over all the ads popping up on YouTube and definitely not in into Facebook or Tik Tok. I set up this blog primarily to share what I was discovering about digital photography. So, what happened?

My suspicion is the rise of social media has gobbled up original content, and used it to keep you watching so they can charge advertisers (and they make squillions). The actual creatives get lost in the millions of copycat wanna-bees and if they receive anything it's a pittance. See my post about Danny Gregory's recent essay.

Really unfortunately we the viewers of social media gets suck into the black hole of the death scroll, picking up the photo to look at social media way too often, swiping and swipe again without really paying attention, not properly looking, swiping and swiping some more. At the end you don't feel refresh, you are more likely to feel frustrated or depressed. As Adam of Firstman Photography points out you are much better off spending the time actually out photographing, getting the benefit of exercise and being out in the real world, perhaps even nature.


It worth watching to the end because Adam gives some very heart-felt encouragement for those of us with a deep passion for and care about photography to stick in there

Well am I doing anything about it! YES

You can make the change too. It's easy to put down your phone and pick up your camera (or click on a different icon/app on your smartphone, phones can be good cameras too).

Ok what about sharing your photos? That will be an upcoming post (soon but not exactly sure when),

Tuesday, March 17, 2020

Social Isolation and the Photowalker

The cancellation or postponement of large Photowalks need not be an end to your photography, in fact, social distancing and working from home could give you the opportunity to practice more. Firstly allocate some time each day, it could be a short art 15-30 minutes. Now go for a walk with your camera. It might take a refocusing of your mindset, thinking more locally even around the home or garden. If your town isn’t totally shut down and your feeling well take the opportunity to get outside.

I’m lucky I live close to a large natural park in the middle of suburbia and I walk in there two or three times a week, there is always something to photograph. See my Year in Jells Park album on Flickr. It need not be a park, it could be local road signs, letterboxes or interesting street trees. Your imagination can be let free, with a digital camera there is little penalty if you decide to throw everything away and start again. The key is to really look around before you take the picture, so you are not taking the obvious snapshots but photographs that interest you.

If you’re in a total lock-down or confided to a 14 day self-quarantine, or suffering Flu like symptoms and need to self isolate, look for favourite spots in your home or garden, places that catch a special light. Start looking I’m sure you will find them. 

Perhaps do a series on your favourite chair.


Tuesday, November 13, 2018

David Hockney’s thoughts on the Art of Seeing

Those coming to the next Sketch Crawl, Sunday 18th November (there is still time to register at eventbrite) might like to view this BBC documentary which covers much of David Hockneys views on photography and the important Art of Seeing. The documentary does run for almost an hour and mainly covers Hockney’s revised inspirations from landscapes and lead up to Hockney’s Bigger Picture series of landscapes. The PhotoWalk/SketchCrawl is based around many of the same issues. So this You Tube is not only a very interesting in itself, it is also great context for the walk.


The harder to look the more you see.

Thursday, November 30, 2017

Fun with MacPhun

image

The Macphun blog was a fun test to test some basic photography knowledge.

Follw this link to see whether you are a 10/10 Photographer!

Tuesday, June 06, 2017

Roadtrips, the Death of Creativity & the Continuous Sketch

I had the brilliant idea back when I started planning this year long project, to build a series of sketches into a continuous panorama. Each place I visited should form part of the total picture, they thus needed to loosely join each other (eg match horizon and tonal blends. So I recognized that occasionally and intermediate image might be needed for a difficult transition.

riadtrip0001

I soon found out this wasn’t a particularly original idea, but I wasn’t deterred. I even experimented with a few sketches to get the best size (which was quarter watercolour sheets, around 28 by 18cm and in landscape mode. I even though these could be scanned and reduced onto cards. However there was a bit of a time oversight, on the road and travelling (Australia) is a big country and getting between places I wanted to visits take a lot of time) left no time to stop and work on the idea. So very few sketches got completed. If I tried to remember what the road trip saw a few days later I could perhaps describe it but not draw it convincingly. Clearly my visual memory requires a bit of time to work. So I gave my canon to my wife and said take pictures out the window every now and them as we passed through different country. Ok, Now I have a lot of blurred photos.

IMG_2075IMG_2115IMG_2117IMG_2072

The photographer is not to blame, my wife has a good eye for what to photograph. It is the speed of car travel, and trying to anticipate the gaps between tress, landposts and countless other obstacles. Still I should be able to take a trees from here the tone and texture from another and the colour balance perhaps from a thirds. Again sounded simple but I always ended up trying to slavishly copy the little amount of detail I could get in the glimpse of in focus landscape.


Then I realized something important, that has be nagging at me for a long time now. I find it very hard to start a painting from a single photo. I’m much happier is I have a sketch I have made, even if it is a very simple composition or tonal layout study. I’m not convinced I’m alone here. Perhaps the time to sketch slows you down an ramps up your visual seeing rather than the symbolic seeing, as the landscape flashes by.  Further the act of drawing reinforces that visual sight and lets you focus on the important aspects of creating something. You come tp terms with the detail that is not required and are happy to leave it, whereas the snapshot records it as if it is important.


However, I’ve lost enthusiasm for the continuous sketch project. So The moral is…


Lots of driving and no drawing kills creativity

Sunday, June 04, 2017

PhotoProject :: Seeing more with your photos

I have become convinced that there are two opposing objectives when you are collecting photographic reference material for creating art works. Firstly the documentary aspects, the objective recording of important visual details, form, shape, lighting etc. An aide-memorie. Such tasks are really performed well with a digital camera or smart phone. However there is a second subjective/expressive side of how you feel about the scene, the atmosphere or your connection to the place. Single photographs will seldom capture these things. Whereas a sketch or small plein-air painting probably will.

I suspect ignoring the second component when painting from a single photo is why they so often look bland and lifeless.

I had already come to recommend to artist wishing to collect photographic reference that they should make at least an tonal/compositional sketch in the fields and take at least 5 photos to support it. Actually it’s better to take 10. By coincidence this ties in nicely with capturing both the objective and subjective aspects. A great metaphor is to use your hands to remember what to photograph.

Documentary

1-IMG_20170602_164305_processedTaking an Objective View (Detailed left Brain Stuff)

  1. Take the obvious snap shot.
  2. What is the main subject, get as much detail as possible.
  3. Take a wider view.
  4. Evaluated the tonal balance.
  5. Textures and surfaces

Its quiet normal to pick a snapshot type view of any new vista, It might actually be what you are going to paint to take the shot, get it out of the way. It could also be the scene you sketch, that’s fine you’ve already got a photo to copy. However now you need to look for a bit more detail of the scene. In particular detail of the main subject could really help future drawing or painting back in the studio. Therefore zoom in on the important subject details, or walk up and take some closer photos. Similarly it is wise to take a wider view, zoom out or walk back, or use a wide angle lens. Even take a few over lapping images to stitch or cut an past together. This will help you understand what part of the scene makes the best framing and composition. The last two items have a lot to do with the quality of the light. The tonal aspect are a very important in realistic art as they help the eyes more that any other visual features understand the three dimensionally of what we see. This is a bigger topic than I can even begin to cover here in a single blog post but you want to avoid just have one photo with a bleached out sky (or other highlights) and solid black shadows. It might be best to take one exposure of the sky and another of the shadows (or use HDR style exposure bracketing) or even take one photo without and with a flash providing fill light of any close subject. Perhaps you might look at using black & white to better understand the tones. The eye is also interested in edges, texture and the small detail of surfaces that help our brain identify an object, However it often ignores other information once its has found itself a satisfactory explanation. so it is a wise option to get some documentation of the dominant textures usually requires very close up detailed photo(s).

Expressive

Finding a Subjective View (big picture right brain stuff)1-expressive hand

  1. Include a photo your plein air work
  2. What interests you most in the scene.
  3. Look for main abstract shapes .
  4. Main colours and mood
  5. Atmosphere

If you have not made a sketch you won’t be able to photograph it. However a photo of your work in position with the scene in the background can be a great help in putting your sketch and colours in context, this cross reference will be a big help back in the studio. It is also a wonderful way to establish provenance, works in progress posted on social media are a better way to promote your work than yet another selfie. The next two items to attempt to photography are similar to items 2 & 3 in the documentary set but know you need to focus on what interested you the most. It may not the the old house but the path disappearing behind it. To the tree but the show it cast across the path beside it. Take you time to understand what attract your view don’t just assume it was the subject you first choose in the snapshot. Next you should look for the larger abstract shapes , They are probably defined tonally and the small composition sketch many art make are perfect here, another well established trick is to squint. However a camera can be a great help here. Deliberately put your camera out of focus. The main shapes of dark and light design will jump out at you. The final items are also related to the quality of the light but you need to consider how they affect you and what mood they invoke. Despite all the colour matching and calibration technology perception of colour can be a very personal thing and strongly connected to emotions. This is a bigger issue is not just white balance and colour temperature, but extends to colour harmony and compliments (classic colour theory). Another important aspect to remember is few experienced master painter fill there creations with endless detail a lot of the images was left with a suggestive colour, tone, texture and our eyes filling in what it thought it saw, where as way to many photographer's are obsessed with tack sharp focus and copying such photos doesn’t excite our eyes and brains so take a few photos of the distant mist, the heat haze or sun glare. 

Sunday, March 26, 2017

Collecting Photographic Reference Material

Most artist have their very own way of collecting reference material for a later studio painting. Some might just take one snapshot style photo (or perhaps a few) then essentially just copy that.
image
I must be from a more plein-air background, I much prefer to do a sketch or two (or three) on location. There is more time to breath in the atmosphere, listen to the sounds and get a real sense of the place, than just pressing a shutter button and moving on. More significant you still generally have only limited time so you have to gloss over the less important details, ones you might be tempted to copy from a photo. Instead you have to concentrate on what will be your subject/centre of interest, getting the relative tonality right and pulling together the colour palette. This requires keen direct observation, but with a little practise it come easy. In my initial pencil sketches I could see I needed to include the distant people to consolidate the vastness of the beach (Seven Mile Beach near Gerroa, South Coast of NSW )_IGP5449-2
Where a photograph will just reproduce the colours (and detail in a scene) within the technical limits of a camera, an artist will usually refine the colour palette to enhance or subdue the atmospherics. Possibly tweak the relative tonality to emphasize the subject. I always feel even rough sketches capture the essence of a place and are fresher than just a photo.
_IGP5480-3

Take 5

However it doesn’t hurt to have some extra detail and this is where photography can be a great assets for any artist. My advice is always Take 5 
  1. The snapshot (first impression of the scene)
  2. Wider perspective (wide angle, panorama, or just adjacent overlapping shoots)
  3. Zoom in on your subject
  4. Take some atmosphere (eg the sky, the surf)
  5. Look behind you (ok not literally but do look around and get a context photo or two of the place).
image
You may as well get the obvious snapshot out of the way. However next spend a bit of time looking for a wider view. Camera phones are already slightly wide angle but unlike a DLSR you can’t change lenses but there are lots of panorama apps that will allow to get a wider view. Alternatively you can take several overlapping photos and use a stitching program to join them. The next option is to zoom in close (most phones can do digital zooming) and a DSLR with a good zoom lens will save you leg work. Otherwise just walk in to get a closer view. It is also wise to take a couple of atmospheric photos, if it is a cloudy sky, take a photo just of some of the clouds. If the light is intense take some photos showing deep shadows, A blue sky is a lot of blue but it will give you a good reference for tonal changes, particularly towards the horizon, Make sure you can record the direction of light (shadows in photos will help here). Don’t forget to look around, sometimes what's behind you can make a stronger picture.

Make that 10


That set of five type of references should give you a big start back in the studio, but why stop there. Here are a further set of optional photos you should consider as well. You don't have to follow my suggestions here exactly these steps they should just be an excuse to do something different, perhaps more create.

  1. Take a photo of the sketch in place
  2. Try a range of different framing options
  3. Try a range of exposure options (eg EV bracketing)
  4. Look for Abstract shapes (or lines) and focus on them
  5. Get in really close, record interesting texture (this could be very close up or plants, rocks, ripples in the sand or a stream)

  6. The photo of your sketch in position will give a great reference of understand any difference in the colours captured by your camera versus what your sketch recorded. If nothing else any white background of your sketch book will be perfect to do a white balance on the photo later (which decent software should let you can carry to your other reference photos). Next is the idea of trying different framing options (its a little like steps 2 & 3 but instead of focusing on the subject you should move the frame around shifting the subject up and down or to right and left).  You might like to change your position so you are looking up or looking down (eg standing or sitting on a beach makes a big difference to perspective). Perhaps you can find a track, fence line that leads you nicely to the subject. Walk around. Perhaps a portrait orientation (vertical) may be better than a landscape (horizontal) orientation. Your camera viewfinder or phone screen are fixed aspects but you might like an image with a slightly different aspect. For example I am finding many sunny vistas lend themselves to a super wide format and I even sketch across two pages (3:1 aspect), so why not take two or more photos and join them later. image
    A lot of folk don’t like the default HDR style of photos (chunky detail and over vivid colours) but taking a set of images at different exposures can give you details in the shadows right through to delicate highlights. A single photo even when perfectly exposed can not provide these in a very contrasty situtaion. Learning to use HDR methods/software in a constrained manner can deliver photos that are much closer to what you remembered of the light & colour. Most DSLR have bracketing options and now many phone camera apps do as well or can do HDR multi-exposures directly on the phone. You don’t have to put up with bleach out skies and blown out highlights anymore.image
    The second last task is slightly obscure but it relates to balancing the tonal areas in your final painting. You can use your camera to help find the dominant shapes of dark and light. It requires looking at the scene in a more abstract manner. Its a lot like the advice to half blur your eyes in order to better see tone. If you have a DSLR put it in manual focus mode and then blur the image until you just see abstract shapes. Strong diagonals, curved lines and edges or sharp shapes can lead the eyes of the viewer. Try framing those shapes such that the lightest light against the darkest tone become the centre of interest (such contrast is generally what involuntarily draws a viewer’s eye first). Then refocus the camera and take that view. Mobile phone cameras generally don’t have a manual focus but you can resort to any of those camera/filter apps that change what is displayed on the screen as you take your photo. Changing the camera display to black & white or using a posterizing filter with only a few steps will help make it easier to see the tonal shapes. If you don’t have a phone with such apps find a some software that can help you perform these steps (I have used Paint.net on my computer and Snapseed on my phone) This is much the same step as doing a small tonal composition/notan sketch. As with the framing step it pays to move your view around, even a little. It can also help you zero in on what contributes  to an interesting composition and what can become just a broad area of tone, and perhaps a little texture.image
    Finally a few really close ups that record pattern & texture and/or some of the details you particular want included in your painting, a few quick detail sketches of such items might be useful as well. After realising I needed some people to give me scale I took a few difference photos of people both near and far walking on the beach.
    1-people

    Saturday, March 25, 2017

    Refining the Travelling Kit

    This is my third endless summer trip and I am starting to refine the gear I am carting around. I can almost carry everything at once but normally I don’t have too, The backpack in which I carry two computers, (why two computers? why not) is fine for travelling on an airline, where one of the camera also goes in the backpack and the second camera (normally the Pentax) imagebecomes my hand carried ba). The art gear travels in my luggage for flights.

    In the field I leave the computer back in the room (or car) and just carry one of the cameras and the sketching gear, with papers (A4 or quarter watercolour sheet size) already taped to my A4 plus sized drawing board that fits inside the little red backpack.

    For more established and longer sketching I have an A3 sized sketch board in the blue folio which takes half sized Watercolour paper, it also has a bolt on the underside that can screw into a tripod for a make shift portable easel. The blue folder also holds about half a dozen watercolor sheets and a couple of extra sketch book.

    Sunday, October 23, 2016

    DIGITIZING ART :: Flat Bed Scanner .vs. Photography

    Flat Bed (HP Photosmart) Photograph Canon EOS
    rubens0003 IMG_0068
    rubens0002 IMG_0065
    image image

    Whilst I have been scanning my smaller sketches and artworks on a conventional flat bed scanner for many years now, the copystand I re-manufactured a while back, then automated the process with a tethered camera has convinced to compare scanning on the flat bed versus photographing my art. I was a little surprised I think you get a much better scan from a photograph, interms of tonal detail. The default scan is perhaps a little over-exposed an the colour detail is not as continous (as shown by the spiky lines in the illumination histogram). The photo is not perfect but the fact that it is a RAW ,cr2 files (and 12 bit colour) make it easier to correct the exposure and colours. Also the lighter tones in the pencil sketch show a better gradation.

    I can see a little further investigation is required but photographing your art may be a much better way to get the best results.

    Sunday, August 21, 2016

    On Seeing

    I perceive an apparent growing gulf happening in digitally based photography.

    Photo ... Photo.. #greylinetoronto

    A photo posted by norm hanson (@apimageo) on

    On one side is the use of photography as a substitute way for seeing, the concept that if its not photographed it may not have happened (eg like the Zen question of does the leaf falling in a forest not make a sound if no one is there to hear it). This helps me make sense of Instagram, which I must admit I still do not fully understand. Some people obviously live through their Instagram photo stream and number of likes. I would worry this is a very shallow and short life. It might explain a lot, why people spend so much time scrolling through social media images, they are living the life through others, particularly celebrities, or worse they are snooping. This is kind of photography is characterized by small screens and short viewing times with the occasional zoom into to looking at the logo on a handbag.

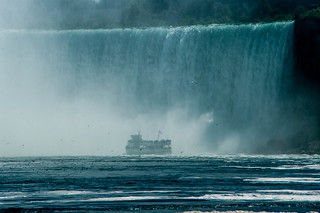
     #217_IGP0603_Maid_in_the_Mist _IGP0622 Coming to the Falls

    Glimpses of Sunlight Top of the Falls

    On the other side I know some photographers go to a lot effort to cultivate an awareness of what they see and frame that within a photograph. Often this involves leaving some details out to focus attention (depth of field blurring in portraits is the classic example, moving the view so a land post is not growing out of the subjects head). These photos usually demand a longer look. Artists have been following this same path for centuries, they have used sketching as a way to record what they see, refine composition etc. The well seen photographs may be telling a story, have compelling composition or eye catching colours or intricate patterns. They are typically larger and physical, perhaps more likely to be in an older photography book or on a gallery wall. Considered photographs are unfortunately dying out, or perhaps disappearing into the first group where they are overwhelmed and scrolled over.

    niagra falls from above panoramic

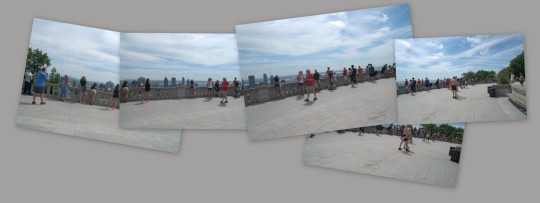
    In the middle there exists a lot of what we can see and experience that just cannot be adequately photographed. This was bought home to me in the panoramic dome on VIA’s the Canadian train. There is just too much to save into a single frame that truly records experience of being there. Yes there are 3d cameras, wide angles and multi stitched panorama but you still have to look through a limited window (I haven’t yet tried the current range of virtual reality googles, but I am skeptical). These images is obviously distorted, occasionally this is charming, but usually it jars and fails to deliver. Some sceens are hard to photgraph in a single image

    We see and should be aware of much more, both in terms of dynamic range of light and spatially, than a camera. Yet I worry bombarding ourselves with 1000’s of small images is dulling our ability to see. Improved seeing is not hard, can be taught and even (self) learned. So I hope you join in my next series of PhotoProjects which will be exercises in seeing.

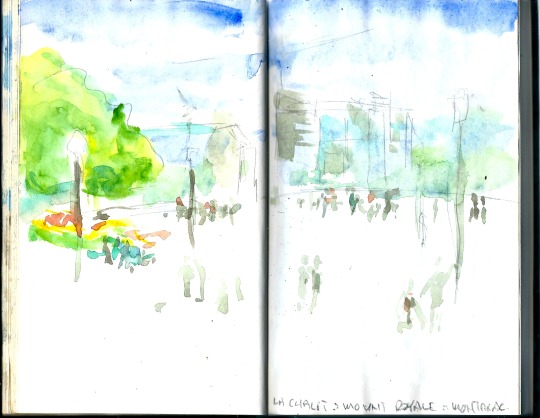
    Sketch of lookout at Mount Royal Chalet, Montreal

    Tuesday, April 26, 2016

    My First 3D Picture

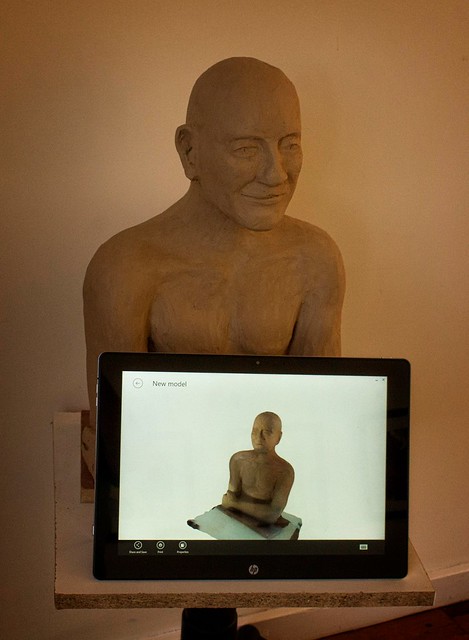
    I do like trying out new things, and since my new computer comes with an Intel “Real Sense” 3D camera I though I should try it out. Trouble is the Camera app that comes with Windows 10 is not 3D aware. A little looking around and I found itSeez3D, which can make 3D scans of people (it must start by recognize a face). Most importantly there was a Windows 10 app that recognises the Intel real sense, that I could download. There is also an IOS app (for iPads with R200 cameras)

    _#117_MG_6930-My_First_3D_Photo

    The standard windows app is free, but there is also a business version (for commercial use). However the only interesting extra feature I saw was being able to print your 3D models. Unfortunately I see being able to make small 3D plastic “selfies” as a toy application rather than something I would need at the moment. You can do the 3D render locally on the tablet, this took me less than a minute but was pretty crude or once you have an account with itSeez3D (Simple enough but it took a while and a verification email step), you can upload to the cloud (that took a few minutes) and have a much more detail (final) model produced on the cloud (I had to wait about 10 minutes). The result was really impressive you can interactively rotate and scale your 3D photo/model on the screen. For me the next step is figuring out how I can use the 3D models to create unique art. That’s going to take some time, which I have, but I do like the potential of  technology and will be looking for a way to scan non humanoid objects soon and perhaps then make some virtually amazing sculptures.

    I then went looking for a way to embed a 3D viewer in this blog posts.Try out Sketchfab below, click on the 3D arrow to manipulate the image. Unfortunately the 3D view highlights a couple of places I didn’t get adequate coverage. However for a first attempt I’m pleased.

    My Clay Sculpture by imageo on Sketchfab

    Sunday, April 17, 2016

    Back Home & What did I learn?

    Yesterday, getting home, took over 6 hours driving. It made me realise that there were many potential photo opportunities that I just flashed past. I’m sure if I’d stopped (and had time) I might have found many more. I realised photography is a pedestrian activity.

    Angel Hair Dreamcape of The Three Sisters

    The second realization (not a new one) was that whilst there are lookouts at scenic spots, the lookout rail is likely to be crowded and the view more a snapshot than a landscape, probably already reproduced in the post cards at the nearby shops. Even more distressing is the number of people with selfie sticks taking photos of themselves blocking the view.Dreamscape Crowd @ Echo PointMany of the more scenic places have narrow winding roads and it is not possible to safely pullover. Yet many of these locations also have wonderful bike or walking trails. So you need to turn off the vehicle direction, get out of you car and use the walking or bike directions on your gps. Better still get a detailed local map, We are lucky, in Australia, to have staffed tourist information centres in most towns. Their local knowledge can help you find those magic places.Luckily Australia Rock is beside the car Park (if you look)

    The moral, get out and walk (and allow time to do it)

    Monday, April 11, 2016

    Finding a Vista

    _IGP4228Being in the Blue Mountains with good weather, school holidays and perhaps just the normal day tourist flow means there are seldom any car parks at key lookouts and probably no standing room at the rail anyway. The spectacular views however don’t just occur at the tourist traps, They are everywhere.To get “private viewing place” is however a challenge because trees and perhaps other hills usually obscure the vista, yet there are many tracks around the cliffs and the occasional a rock ledge opens up with a breath taking view. _IGP4161_IGP4110
    _IGP4138However no matter which track you take there will be steps, lots of steps.

    Getting into a routine

    2016-04-10_16-55-10_ 2.0EvPhotography and Travelling with the new Silver Spectre (HP Spectre x2) has been wonderfully liberating.

    Firstly it has speed up the loading of photos off two cameras (via SD cards) and occasionally from my phone. The Spectre only comes with a mirco SD card reader (and the draw for it is jammed anyway) and as I didn’t want to fork out for new Micro SDs and adaptors I instead just bought a single.USB C to USB A connector. Today I loaded 400 image's onto the spetrce from two cards in less than 2 minutes (I still use picasa rather than lightroom). Then I import them from the SSD disk into lightroom (less than 3 minutes for todays 390 photos and 10 videos) which is now lightening fast. Only a few snips into my coffee and already everything is loaded.

    Second I have a toshiba USN external backpack style drive. It has a USB 3 connector but an older style USB A plug. So off with the card reader and in with the external drive. A bit of file explorer navigation and I can backup all todays images and videos (only another minute) and plenty of coffee left.

    Next is when I scan through the images and cull the bad, ugly and unfortunate ones (only a dozen today). This is an area I have refined yet. Because waiting for lightroom on the laptop was so tediously slow I had got used to just using Aftershot Pro, which is also lightening fast. I can also use picasa and OnOne in browser mode, which is perhaps becoming my favourite. Mainly because I can flick across to lightroom and back painlessly.

    The biggest advantage here is I can do all this where ever I like, such as out on a deck watching the sunset (providing ambient light on the screen isn’t too stong). The battery life on the spectre seems to be a couple of days even with a fair bit of post processing at night.

    Monday, March 21, 2016

    Packing for Travel

    image image
    I’m about to start a period of extended travel and I’m doing a final pack. I intend to take a trimmed down version of my fold out studio, two cameras, a tripod and a laptop. The challenge is to get the “studio” (darker blue travel bag) and supplies (in the light blue folio) and the portable tripod (black tubular bag) into my case. Not a lot of room for clothes! That space also has to house battery & phone charges, wifi modem, spare cables and a chromecast dongle etc. However it all fits and only 16kg all up with clothes and shoes, should be airline friendly. I will be carrying my laptop, USB drive (for ongoing backup) and extra camera body in a backpack and the lenses and first body in my camera bag (collectively another 6kg). So I can easily hand carry everything if necessary. However the proof of wise packing will unfold as I go along. Let’s hope I have all that I want and not too much more.

    Saturday, March 12, 2016

    PhotoProject :: Best Light for Photographing Art

    Like many of my art works, I began this work a while ago but have been slow to finish it. However yesterday’s sunny afternoon gave me the opportunity to photograph the work in a range of lighting. It is my experience getting a good rendering of art work is more dependent on lighting than any other aspect (camera cost, colour calibration workflows etc all that stuff recommended over and over again my well meaning folk on the net)

    In Full Sunlight In Shade but Outdoors Indoors with Difuse Indirect Light

    Close up of impasto line workThe first photo (on the left) was taken in full sunlight light. the second outside in the shade (middle) and the third (on the right) is taken indoors not in direct light. The two photo on the right are much better representations but it is the third taken indoors in a reasonably lit room but not in direct light, that has the best capture of the rich colours in the background. Thus I feel strongly you don’t need special and cost studio lights, colour calibrated workflows and/or the most expensive high megapixel DLSR. You really need good light, indirect and diffused light. When taking photos to establish provenance it is a good idea to photograph yourself with the work, if not working on it. These type of photo along with perhaps a closeup of the work and a very short description usually generate more interest than just posting the finished work, as well as forming perfect provenance.

    Carbon_FootPrint-Beware_False_ProfitThe above photos were taken at a slight angle to the painting so they give a distorted view of the painting. If you are taking a photo for a exhibition application, catalogue or your portfolio it is important to take your photo front on and at right angles to the work. Bring you easel upright or hang the work on a wall. if there is enough light putting your camera on tripod is not essential but it will help eliminate camera shake (if you find that is an issue).

    I’m still considering adding a few more marks, perhaps in gold leaf, never finished. Such is life for an artist!

    For small works it is better to use a copy frame.

    Monday, February 15, 2016

    Redecorating a place for my smallest camera(s)

    2016-02-13-12-56-29 My android phone started to complain about lack of space  a while back. I had been putting off deleting things when It ran out of battery (thanks to leaving the gps on). Once it was charged and restarted all the screens including the home screen had been reset to the factor defaults. Everything else was there including recent photos, so I’m not sure what happened. Anyway it was a chance to rearrange the screens and particularly my photo tools, which had become over-crowded (perhaps 7 different cameras is to much?). So I rearranged things mainly removing viewers altogether, with drop box, tumblr and flickr going to a separate page. I did mull over google photos, because I haven’t been using it for some time now but with the demise of picasa I may have to. The simple little cameras Camera 51 and Open Camera are getting more use, I like the simplistically of the open camera GUI, and the leveling aid that can be displayed on the screen is a great idea. Another goto favorite now is QuickPic, its simple, fast and shares with everything I need. I haven’t joined the free CM Cloud space (yet) so the tile asking me too is starting to feel like nagging. But once again I might have to find an alternate on-line “cloud” space, so I’ll tolerate the silent reminder a little longer.

    Six months ago I playfully suggested I was having a race between google photos and flickr in a contest to see who could manage my phone phones. It was a real tortoise and hare epic but in reality Dropbox actually won. It remains my preferred method of uploading and backing up from the phone (because its simple, reliable and no wire have to be involved) but I also like the flickr app both to view photos on my phone and upload new ones. Its no fuss and does wait long enough for me to cull the bad images (it like Drop box only works when I have WiFI access, it is also polite and seems to always let dropbox go first). Importantly both dropbox and flickr load the photos as private. If I want to share drop box is my first choice because I just need to email a link  (the recipient doesn’t have to have drop box). Thus I don’t see an urgent need to embrace google photos on my android phone just yet.