How many times have you heard an "expert" claim you can't get bokeh with a M43 (micro four thirds) sensor, zoom lens or stopped down to more than f4?
Sometimes you just need to ignore those rules.
Sometimes you just need to ignore those rules.
 |
| Exposed for Outside |
 |
| Exposed for Inside |
 |
| Bracketed EV Series |
 |
| Final HDR Result |
More than anything else it was the need to run Standlone HDR applications, hat forced me not to let one piece of software (AKA lightroom) control what I was doing and how I was doing it. I have been interested in extending the dynamic range that Digital Cameras capture for a long time and had used many early HDR tools that used jpeg files (and got reasonable results). A lot of these tools let users go over the top, with luminous lurid colour and crunchy tones in the sky, as examples. HDR became synonymous with unconstrained over processing and even despised by many self-appointed photo purists. In some case I would agree but I wasn’t scared away and with the widespread development of RAW editing tools many of the tone mapping techniques where incorporated in the tonal adjustments of the RAW photos (which has in general more information on which to establish the best tonal range). The role of HDR and tonemapping has become more subdued and now offers the possibility to easy lift a digital photo to something like you rembered the light when you took the photo. Rather than the hazy, greyish image you loaded from the card. The extreme HDR effects are dying out, well except for Instagram where “funky” colours might still get you extra followers and real estate where evening photos will all the lights on and a wet path and strong colours still helps sell properties

The latest version of aurora incorporated AI feature in its new Quantaum HDR engine, that pre-processes a number of refinements steps including object recognition. This takes a little while and again not so long you need to go and make a coffee. You will them arrive at the fairly convenrtial main edit screen with some key viewing controls along the top, with a set of edit tool on the left hand side (which can be easily hidden and/or expanded) and a set of “looks” tiled as thumbnails along the bottom. Looks in aurora are like presets in other software that nicely combine several of the tools. In this case I am quite happy to just accept the default adjustments and tone mapping. I am only left to export the HDR file.
If I am intending to do any further edits of make a large print I save the HDR in Tiff format full size, if I’m posting of flickr or social media it will be a Jpeg of reduced size (eg 2400 on the longest side).
Aurora is currently my go-to HDR favourite.
I’ve decided to try and describe my hybrid approach to using a range of photographic software tools (aka my photographic mistresses). It really began long ago when everyone had lightroom and it was in charge of everything. I was interested in HDR and had to use other software to pull the EV bracketed sets together. One of the first tools to let me use RAW files directly from within lightroom was NIK software. Google had purchased the system and for a short time offered it for free downloads, still as an add in for Lightroom. I actually found all the tools very useful but it was HDR EFex Pro that I used most. As I was slowly moving away from using lightroom I started missing my access to the NIK tools, generally finding alternatives in other software. I even researched trying to use NIK tools as
So onto the task of straight forward HDR. This begins by selecting the 5 photos of my EV bracketed set and dropping them onto the shortcut link. This bring up a dialogue to work on a copy or the original and after that the main setup dilogue screen, where options such as alignment, ghost removal and fixing chromatic aberration (those purple and green outlines at high contrast edges) can be manipulated. Also the opportunity to choose which is the reference exposure. Next chick Create HDR and this begins the series of processes to combine the exposures according to your setup. It takes a little time but not enough to justify going to make a coffee.
In a familar NIK software style you then get a basic processed photo to view but with a series of tools, icon and sliders on the right to further enhance the image, OR a series of tiles on the right hand side showing various presets to further stylize your photos. In this case I’m happy to just accept the default HDR result and click on save. I have the option to save the result as a Tiff or jpeg (other formats don’t interest me) and where I would like it stored. Job done in less time!
Its exactly the same as if I submitted the selected photos in lightroom to the HDR Efex plug-in, via a special export process but quicker and without the hassle of reloading the result back into lightroom. Same result in less time and no need to fire up and wait, and wait… and wait… for lightroom.
The HDR method has become notorious for crunchy texture and oversaturated colour. However it doesn't need to be like that.
When I took the test photos for yesterday’s post, I also took a couple of bracketed sets with both my Pentax and Olympus cameras and the RAW format version were processed in the same default manner in Aurora HDR 2019. This new version of the software analyses each photo in the bracketed set before they are combined into a HDR extended dynamic range and bit depth format. Syklum, the developers of Aurora, call this the Quantum HDR Engine which in part uses AI technology to find the scene style and key objects and then adjust tonal balance and colour to ensure detail in the highlights and also details in the shadows. This seems to produce a very natural tone mapped image. This can also do a nice job off just one RAW image providing it is reasonably exposed. My experience (less than 2 months so far) has been you can save the image at this time and be happy with both the tonal balance and colour rendering looking very natural
On the Aurora screen you then see “Filters” (collection of related sliders that can adjust key aspects of the image) om the right hand side and “Looks” (aka presets, which are specific setting of the filters). The Looks tiles along the bottom of the 
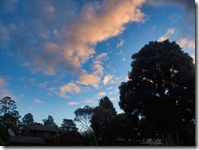
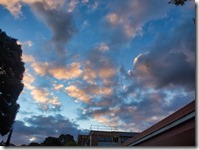
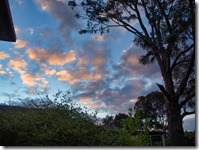
The images above compare the resulting HDR image for my Pentax K20 (one the left) and Olympus OMD EM10iii. Like the straight out of camera jpegs the Pentax HDR image is a little underexposed compared with the Olumpus but the colours are still natural but a little richer than yesterday’s Jpegs.
The photos on the track also gave me a some clearly high dynamic range scenes to compare the two HDR merging applications I currently like. I began with a set of 5 bracketed photos (-1.3EV, -0.7EV, 0.0EV, +0.7EV,+ 1.3EV) and used the RAW versions on these (shown below is the unaltered jpegs straight out of the camera)
I then merged into both packages using the align image and de-ghosting options in both systems. The On1 version being faster to get to the basic higher dynamic range image (with a generic tone map) which you can pick that up and do further tone and colour refinement as desired. As noted previously the new version of aurora actually refines the individual input brackets using an AI guided system (called by Skylum their Quantum HDR engine) , which takes longer to get to the default tone mapped image. However that default tone map is somewhat optimized to the features of the underlying image. The results where just cropped, but in the case of the AuroaHDR image also vertically transformed to avoid the converging of the tree tops.
The results are both fine, but which is better? The photo on the left comes from On1 Photo RAW and it definitely has done a magnificent job with the shadow detail however it is a little flat compared with the Aurora HDR on the right, which has stronger contrast and slightly more vivid colour. I’m sure I could easily further adjust the On1 Photo RAW output to also show stronger contrast and colour but for now I’m happy with both but Aurora being the new toy has become my favourite. Of course Aurora HDR can not stitch panoramas.
It is worth mentioning that my version of Aurora has been recently updated to version AuroraHDR 2019, whereas my version of ON1 Photo RAW is still version 2018.5
There was a half decent sunset tonight, and a perfect opportunity to test out a 5 bracket exposure and three different approaches to post processing the higher dynamic (and 32 bit colour) image in the new AuroraHDR 2019.
Firstly I really confirmed that the default tone mapping is pretty good (almost good enough by itself). However it was then easy with the adjustable Gradient filters to add a little vibrance and warmth to the top of the photo. Giving a result perhaps a bit closer to what I experienced. Then I tried a couple of presets (now called “looks” in Aurora HDR) and settled on Warm Landscape as the best match albeit perhaps a little too colourful. This is powerful stuff and a joy to use.
The new Aurora offers a many new capabilities, particularly in how it “prepares” RAW files to be merged by applying an AI (artificial intelligence) neural networks derived from how other photographers approached exposure, tone mapping and colour renderings of similar scences, to the individual input photos before they are combined. Rather than formulaic presets/filters applied to the merged and higher dynamic images after they are prepared. The difference is a bit like an unseen black box process. There are a few aspects however of the new Aurora that make themselves very obvious to the user. These are looks (the new name for presets) and LUTS (look up tables).
I thought for now I would just show how much these can affect a single input photo of some native flowers. They are all achieved with a single click once the input image is tone mapped.
I had been eagerly awaiting the release of the update to Aurora HDR (AuroraHDR 2019) particularly to see what use Skylum would be making of their AI capabilities (Quantum HDR engine). I was impressed but also a little surprised!
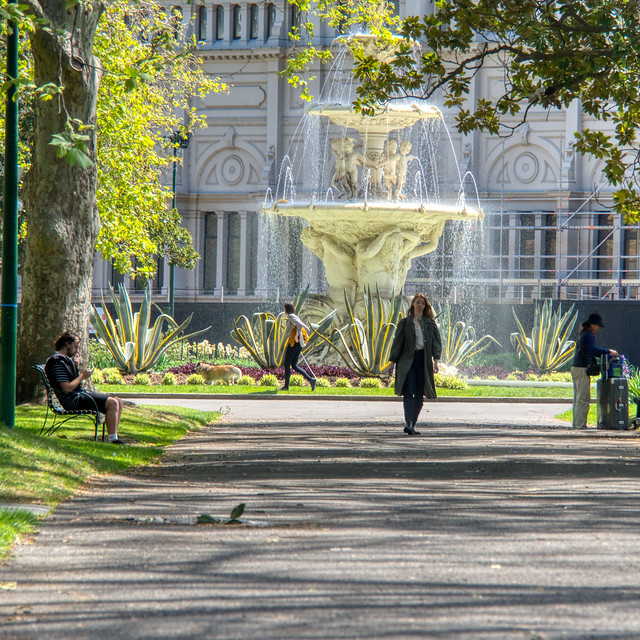
I needed to use the anti-ghosting selection because the girl on the path is walking towards me and the leaves on the trees were blowing in the winds. It worked well.
The way the AI enhancements are applied is individually to each image before they are merged (a surprise but probably the best approach). However this slows the merge process considerable as the program goes through the following steps (at least it tells you what is it is doing, where several other programs just show a static screen and make you wait.
i*after the google+/google photo failed attempts at AutoAwesome, I’ve been sceptical of any awesome claims]
The wait is worth every bit of the delay. The default tone mapped image was really great, (I refuse to use the word awesome) and the tiniest amount of adjustments to smart tone, highlight and shadows, then straightening and cropping gave me the wonderful results below. Pretty dare good for a first run through.
Sunset is a time that it can be difficult to capture a decent (and appropriate) dynamic range (tonal levels) of light. Bracketed exposures are a great way to ensure you get a decent exposure and taking this into traditional HDR merging and tone mapping will usually guarantee a decent picture. Finally how does this compare with my new software toy application PhotoLemur (aka AI enhancer). Is the extra effort worthwhile?
This first row are the original photos (The EV=0 image as a jpeg)
This second line are the results from processing three bracketed photo through my current favoured HDR application Aurora HDR, using just the default tone mapping and Realistic Balance preset as a start, then small tonal and colour tweaks.
This third line was prepared with On1 Photo RAW’s new HDR merge which is pretty fast and the default tone mapping is realistic.
This Fourth line is using the AfterShot pro 3 to merge and tome map, keeping the changes to minimal tone stretching and slight lift in vibrancies. This was once my preferred application and approach for HDR (as it was my only application to allow merging of RAW files) but I seldom use it now. It was a more involved process with reasonable amount of adjustment (“slider strain”) required if I don’t use their presets (which all have that “over baked” contrasty saturated look).
Finally I ran the middle exposure (0 EV) RAW photo through PhotoLemur, and accepted the full enhancement.
Once again the results differ but not dramatically and it is really a question of your personal preferences.
By the way, I actually would not consider PhotoLemur a “toy” application, because unlike a lot of other one click filters (or presets) it makes good adjustments decisions based on the photo being processed. All within a few seconds. Its a toy because I like to play with it, it still amazes me.
Will I just use Photo Lemur instead of doing a traditional HDR? No! (not yet)