Showing posts with label cameraphone. Show all posts

Friday, January 23, 2026

Photographing the Aurora in My Style

For longest time one item that has been on my photographic bucket list was to photograph in Aurora from Venus Bay. It’s been frustrating. I’ve managed to photograph the Aurora colours through cloud cover unconvincingly for a long time. The main problem is the difficult to predict when the Aurora will reach Victorian coast. So far I have found the Space Weather service provided by our Bureau of Meteorology is probably one of the best sources of near future aurora predictions. To be visible from the victorian coast the K-index must be 5 or more,

 https://www.sws.bom.gov.au/Space_Weather

Last Monday and Tuesday were predicted to have an excellent chance of seeing and photographing the Aurora from coastal Victoria. I went out on Monday night but was not able to see any evidence of an Aurora. Things changed on Tuesday night, I ended up at Venus Bay Beach Qne along with quite a few other families, just in time to see Aurora Australis was developing first of all as a pale green arch/swipe across the horizon and then some purplish curtain of low light going vertically up into the sky. There were occasion white vertical flare adding to the curtain and often reaching a little higher. View with unassisted eyes the intensity was dullish and the colour washed out and more grey. It is well known that the current generation of mobile cameras captures more intense colours at night (especially the purple/pink hues). You just set the phone to night mode, and it seems to capture enhanced colours compared with what you actually see. This image is what I call my “cheat” image. And was taken with my Samsung phone.

I really wanted to photograph the Aurora with my regular camera, my beloved little Olympus , which has a live composite mode and an in-camera long exposure feature that only adds new light sources to a composite image, preventing overexposure and making night shooting easier by showing the effect live on the screen, unlike traditional long exposures which normally blank screen and  just stack all light. It works by taking multiple shots and compositing them, recording only changes in illumination above the ambient exposure  This makes it ideal for star tracking and extra long exposure without overexposing the image. The headlights of cars arriving at the car park were a bonus, occasionally "painting" light the grasses in from of my tripod, which gave a more interesting foreground. The image below was taken over a three minute period.


I believe the K-index number was around 7 to 8 at the time I took these 

Wednesday, September 26, 2018

More on Photographing Art … with a Cameraphone

Anne-Laure Jacquart of “following the White Rabbit” on you tube has a couple of quirky but easy to follow video guides on the important steps using a cameraphone to photograph and post process your art (eg tidy up, straighten etc) and it is primarily oriented to getting your art looking its best when to posting on instagram or other social platforms.

It is worth following her around her flat and her fast french accented delivery, particularly how to best use natural daylight, where to find the good light and avoiding distortion by holding the camera parallel to the art. Lots of god advice explained by doing it.

In this second video she demonstrates the adjustments using snapseed, which can still be downloaded for free from both Itunes store and google play. (If you don’t have it yet now is a good time to try it out). However the steps can be applied is most image or photo editors around today,

I

If you are into watercolours and/or urban sketching, or just eed to get a creativity boost follow Anne-Laure on Instagram &/or YouTube

Tuesday, September 25, 2018

Looking at Photographing Art Works (again)

I have known for a while that my conventional flatbed printer/scanner doesn’t do a particularly good job of photographing coloured art works. (BTW Its fine for ink line drawings such as cartoons)

Last night I went to a great talk by Wayne Degenhardt at the Watercolour Society of Victoria, about Photographing Art. This inspired me to take some photos of my multimedia sketch I created at the Discover Nature through Drawing workshop last week, because I was a little disappointed with the scan, it was flat and very pale.

drawing on nature - As scanneddrawing on nature - As photographed on my phone

drawing on nature - As photographed on my HP tabletdrawing on nature - As photographed on my olympus camera

The results shocked me!

I haven’t gone to a lot of trouble to make this a scientific comparison, the cropping and rotation are inconsistent for a start. Further, the results are all jpegs, straight out of camera with only cropping but importantly all taken under the same lighting conditions. Upper left is the conventional scan (on a HP 8110 Photosmart printer) The apper left is my Android HTC 11 Cameraphone. The lower left is camera on my HP Spectre Tablet. The lower right is the jpeg from my Olympus OMD EM10iii.

So which is best?  Well, none really! If I had to choose one it would be the cameraphone but i’d have to lighten and correct the colour f the background. I can see further investigation is required here.

Wednesday, July 26, 2017

A Photo Worth Taking

A photo worth Taking
Sometimes there will be beautiful light and you don't have you camera, but you will have your phone. This was taken with my new HTC Uplay smartphone and its basic camera app in panorama mode. I’m certainly rethinking the need to carry a second camera body in my travels.

Wednesday, May 10, 2017

HDR on my Phone

The technologies of addressing High Dynamic Range have come a long way in the past decade. Once the process required a couple of specialist programs with round trips through photoshop or similar photo editors. Today there are camera apps for phones that can easily do the job on the phone. I have been using a great little app called HDR Camera+ for a few years now and onto my third android phone. Of the many apps around today it seems to do the most convincing job of creating a “natural” look but expanding the dynamic range. It does take up to three photos, a normal shot one under exposed and the one overexposed. Even when the images are blown out or almost too dark to make out detail, the clever HDR Camera+ software seems to find a reasonable balance. It also does a great job avoiding ghosting when a subject moves.
20170510_123442_HDR2017-05-10_12-35-00_ 0.0Ev2017-05-10_12-35-00_ 2.0Ev

My new HTC Uplay android phone comes with a built-in camera app that incorporated the HDR feature in the basic camera operations (it clearly takes abit longer that a straight photo but it only takes a second of two to process. There are no tonemapping options (or selection step) but the resulting image is noticeably more balance in high contrast situation. There is even an AutoHDR mode which seems to recognize high contrast situation and switch over to HDR. The image below is an example of AutoHDR.

IMAG0540

This camera app software is different from the many HDR style filters (which strive to create the HDR look, normally poorly, and without really boosting the dynamic range). Once you have the higher dynamic range other art filters (like prisma below) can play wonderful games with colour.


IMG_20170510_123916_HDR processed in prisma

Tuesday, April 18, 2017

Directly Painting onto my Phone

I have been itching to try this out for a while (David Hockney has been doing it for years) and my new phone seemed the perfect excuse to try out some software. I had downloaded the free or trial versions of a number of app Wacom’s Bamboo Paper, Autodesk Sketchbook, Corel painter mobile, Adobe Sketch and an app I had been using previously called Marker.

I have to admit it was a joyful trial, more a test of my patience. Autosdesk & adobe’s app would work without signing up for an account (not here in the land of low band width. So did Corel it wanted to upgrade because my trial had run out? Strange since I just started to use it, but it did let me work. Wacom’s Bamboo Paper is really set up to exploit their pens but I could use the basic set of brushes. They also want you to purchase additional items. No thanks, for me its try before you buy. I just want to try out plein air sketching directly onto the phone!

1492410893613 created with Marker app    Created with Bamboo Paper

So I did get to try three options, first using Marker which simulates using marker pens. Way to bright and very limited colours but it free and easy to use. The Wacom Bamboo paper is a nice little sketch book/journal into which you add you new pages and sketch on them. The tools available in the free version are limited but quiet serviceable, I can see myself experimenting more with these. I was expecting corel painter to be easy to pick up (since I have the full corel painter software 2017 now) however the touch screen mode is different enough to frustrate me, particularly in choosing colours. I gave up my first attempt took a picture to trace over and ended up testing out the colour cloning ability (with a very purple result). I think it is an issue of picking colours on a highly reflective surface or maybe I’ve been out in the sun too long.

the old bearded heath created with Corel PainterThe Old bearded Heath as a clone painting

Thursday, April 13, 2017

How Wide can I go?

Whilst on my endless summer trips I’ve gone a bit overboard taking very wide panoramas. It very easy with a digital camera to rattle off the 30% overlapping images to make a stitched panorama and I have used Autostitch to do this mostly although Microsoft’s ICE is another great stitching program and there are lots of other programs and apps. Because the wide view suits so many of the vistas I’m visiting I’m also opening out my sketchbooks to paint across two adjacent Landscape pages. This is all wonderful and enjoyable in the field but it has a downside, it takes time, in fact the bigger the panorama I want the longer the stitching and other post processing of the photos takes. On busy travel and field days I simply run out of time and/or I’m likely to fall asleep waiting for the stitching to complete in the evening.

Sketch at Gypsy Point

As my LG phone got terminally ill, and misbehaved several times, I lashed out an got a new HTC U Play (why HTC, well it was not the cheapest but because my first HTC was super reliable and easy to use and is still going strong, as GPS in my camera bag, it was able to take over from the ailing LG). The UPlay was equally easy to use, the one downside is the beautiful case and screen as a bit slippery so a slip-on cover (red so I don’t leave it behind) was the first accessory. Then it was out to try out the camera, I just love it! Here is my first attempt at panorama mode.

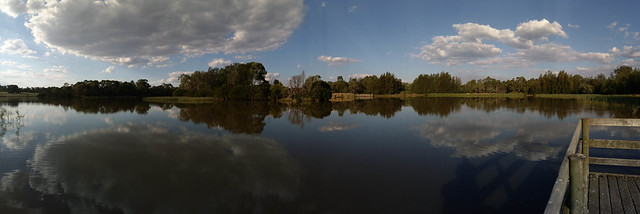
Jell Park Lake Panorama

Now that did take a few seconds to stitch in the phone but it is a wonder panorama, I might have been able replicating this with a DSLR and autostitch, which would easily take over 5 minutes or longer!

Screen Captute of a recent 3 Across Instagram Post

My passion for the wide view has very much moved into my instagram accounts especially @apimageo, which is still very much stuck in the 3 across grid view (you have to look at my profile to see it). I also recently notice that @packtography (he’s worth a follow) includes the camera, exposure and post processing summary with most posts. I reckon this is a great idea, so I will try to keep up including such info. Sharing your settings to me is important as an insight to let other understand your work, BTW my flickr posts have always included the extra EXIF data automatically if you are interested.

Tuesday, August 23, 2016

Don’t Stand So Close

The Lens BoxI have been having a little fun with a very cheap accessories I bought at Typo (yes the stationary and scrapbooking accessories place). Its a simple clip on design and the lens just sits over the small camera lens. It works fine on both my Android phone and my HP Spectre (a tablet laptop cross over) although there is some vignetting at the edges.


#234 Experiments with a cheap clip on macro\wide angle lens for my phone.

As a wide angle of a distant screen it is fine, but I’m not really a fan of the fish eye effect on a landscape. However letting it get right upclose (the macro aspect) definitely gives a different, aka interesting, perspective of some familiar items around my studio

Pentax & Tamrom Lens, my favourite comboCanon with zoom lens

The Red Wireless MouseThe Wandering Webcam

Thursday, June 09, 2016

PhotoProject :: Recursive Self-Reference

It is close to a decade since I last attempted the one image three cameras trick, this time I wasn’t looking to create a screen wallpapers just a creative way to build some self-reference into an image about the changes in camera technology. Yesterday’s daily photo was a camera taking a set of selfportraits of itself as seen in the screen of my new tablet. A kind of spiraling droste effect of recursion, as much about composition as the cameras (the picture duplication devices) or use of layers in the post processing (the technique).

#160_WIN_20160608_21_28_16_Elegant_Recursion


I decided this photo needed to be reproduced through the eyes of other cameras, a self-referencing recursion,  a photographic quine, where each generation reflect the previous within its own bounds, a self coping replicant project. All you need is a camera that can display the photo it just took, and another camera to take its photo … … …

WIN_20160609_17_33_40_Pro-Recursion 1 _IGP5816-Recursion 2

And so on, till I reached today’s daily photo.

#161_MG_7598-Recursion 3

For a change there is more detail on the cameras used back in  my flickrstream

Tuesday, April 05, 2016

Tale of two cameras

I am often asked which is the best camera, and I usually answer “the one you already have”. Some times I might change it to “the camera you like to use”. Basically all modern digital cameras from camera phones up, well more specifically those with about 4 megapixels and higher (ie less than 4 years old) are great. Will a new camera make a difference? Yes maybe, but it probably has a lot more to do with the person behind the camera.

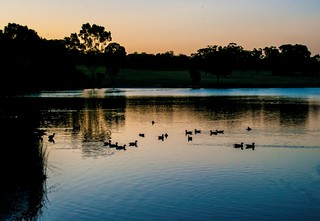
 2016-04-04_18-20-40_HDR #95_IGP3351-Ducks_at_dusk

The photo above left was taken on my android phone using a camera app called HDR Camera+, which processes the HDR image in the phone, and then it was loaded via the flickr app as soon as I got  good wifi. All pretty automatic. The image on the right came from my big DLSR, it is part of a bracketed set (that didn’t work so well because the ducks where moving, and I abandonned using HDR). I had to load the RAW file into lightroom and do some tonal adjustments and a slight trim then into OnOne for some dynamic contrast adjustments and a big softy vignette (all my favourite “style” adjustments). I have presets that do these steps, however I didn’t use them it didn’t take long but it took time but I prefer to adjusted things manually. It also had to manually uploaded to flickr (flickr’s nice Uploadr is no longer available to me because I have a Free account).


The two photos are different, and I would put down the difference mainly to the quality of the lens (on my DLSR) and a little bit to my post processing skill. However I see these two photos as markers of where photography is heading. The smaller cameras where a lot more of the smarts about how to process the image are built into the camera, or phone. In other words a smart camera with software doing a lot of the work. Compare this with the modern DLSR it is big and clunky, they can mostly can take amazing detail photos, but the controls are largely in the hands of the photographer and his/her vision is usually also required to get the most out of post processing. While I love it in the second more traditional place (the right hand side above) I can see the future being towards smarter and probably smaller cameras (the left hand side above) and I think you can expect to see more many improvements to come there. DLSR are not dinosaurs about to become extinct, a lot of folk including me still love them but they have definitely plateaued in term of technical development, but they can capture wonderful images.

Friday, August 14, 2015

Another messanger of Spring


Suddenly a bit of sun and many suburban streets are bursting forth in spring blossoms.

(Melbourne in late Winter, can be full of surprises)


Sunday, July 12, 2015

Back to the Future II

Having some fun with Pixlr on my phone
flickr have modified their snipet of html code when sharing an image to include a little java script that puts a hearder on the image to make it clear it came from flickr, the person's account it is taken from (me) and also shows a little watermark/overlay of the licence condition for sharing on the image.

Sunday, June 21, 2015

PhotoFriday :: Flowers


And now for something completely vertical.


Taken on my LG Phone, using HDR Camera+.
Vignette & Borders using Perfect Effects


For PhotoFriday‘s topic Flowers

Saturday, May 09, 2015

SmartPhones :: My Android Workspace

My LG lock screenI’ve only had my LG phone a short time but I already like it a lot. The nicest feature for making sure my camera is always at hand, are a couple of LG specific features, the first is called knock on, and it simply is a light double tap gesture on the phone screen to wake the phone up. Then on the lock screen you can set 4 app icons ready to go at the bottom of the screen, the camera app is on the bottom right. So to start the camera is just a third tap on this camera app, with a swipe up gesture. If you know morse codes its like tapping out IT (dot dot wait dash). Viola the camera app is up and ready to go. Compared with finding the power switch, turning on the phone unlocking it if necessary then the finding the camera app and eventually starting it. This is fast and natural.

I’ve seen plenty of reviews that claim the camera in this LG phone is ordinary and maybe it is but the IPS screen is really amazing, strong colours and contrast (while you’re inside!) which LG describe as beautiful colour reproduction and viewing clarity. Outside the screen suffers lot from glare and you have to manually increase the screen brightness (which can be a challenge when you can’t make out the screen). I can’t figure out why they haven’t made screen brightness automatically adjustable according to ambient light. (Other than the fully bright screen setting does eat battery life!). I soon learned you can adjust the brightness (even blinded by the light) by a swipe down gesture at the top of the screen (which brings down to notification draw and then taping again bit lower, on the screen brightness slider, and swiping all the way to the right).  K in morse code (dash dot dash).

Oh back to the real issue here, how have I setup my digital photography work space. Its actually still a work in progress but here are the basics. I have set up a whole app panel to hold camera and photo related apps. My current setup is shown below.

My LG photography app panel

I have a few old favourites which came over from my HTC wildfire, the first serious photo editor I used routinely was Photoshop Express, ok it relatively basic but it does the basics well enough and recent version allows connection to a creative cloud account, if you have one. This was largely overshadows but Autodesk’s Pixlr, which quickly became my preferred on phone photo editor. It is on of those free apps that has in app purchase options (I normally don’t like them) but they are tolerable and for other autodesk modules/tools. HDR Camera+ app is the one paid app from the wildfire and was really my favourite camera there, its had limited editing functionality (specifically tone mapping options). Finally Dropbox is a wonderfully reliable facility, I just have  it working behind the scenes and synching up my photos whenever my phone connected to WiFi (ie doesn't waste my data limit on my phone) I have sister apps on all my desktop computers so recent phone photos can be accessed there (no wires or able or separate steps required.

With the new phone and upgrade to android version, I’ve reload the official flickr app. Where the old app was clunky the new version is really much nicer and does allow a seamless upload to flickr (but I have turned off the automatic upload). Flickr is quiet enough for me I’m not interested in instagram.

The real gem I discovered was Snapseed (which was incompatible with the Wildfire) and I just managed to download it the day version 2 was released. It really is a very elegant app and a great photo editor for a touchphone. I was familiar with snapseed as the photo editor for google+ photos but the phone app is in many ways nicer to use. However now for the downside. I did originally have google+ app on the wildfire but it was a resource hog so I removed it and I don’t use google+ itself as a social network place much anyway. The LG approach has been to integrate many of the google tools as standalone apps (such as GMail, Photos, Hangouts) and this initially struck me as a great approach. Whilst the LG (google) Photos app lets you access the albums on the net, but it started acting like google auto backup vacuuming up and uploading any images on your phone (so I turned that off). A real downside of this integration has been the overwhelming of the default LG gallery app with photos (not just albums) from the every increasing google+ photo mess. Haven’t figured out how to turn this off. Lightroom mobile is only on trial and I must admit I am not excited by it. 

So now my phone’s photo collection is in close connection with google+ photo, flickr and I am still trying out Carousel (the original download on the wildfire was not reliable) as a connection to the rest of the world. It is basically a gallery app for dropbox, I’m even starting to favour it over the LG gallery app, particular for sharing with other services like twitter and SMS. I also like the everpix like Flashbacks.

I have previously posted about my alternate camera apps.

getting up close and personal with a rockFinally I also have autodesk’s Sketchbook. its not really a photo tool although you can edit photos (eg circle important parts, draw arrows etc.) I bought a cheap stylus and I find I use this app a lot as a graphics notebook, quick diagram maker, and good party trick (I sketch quick cartoonish portraits of folk)

My SmartPhone workspace is humble compared with the computer power available elsewhere but it is remarkably capable of getting decent photos and images out onto the wider net, into my albums on computers and into reports. When I started this blog over a decade ago If you’d have hinted at this power in my pocket I would have been sceptical.

Wednesday, April 29, 2015

Cameraphone :: One Phone 3 Cameras

Pudding Camera  HDR Camera+  A Better Camera

I have a new phone an LG Android and the review’s seem to can it as very ordinary but to me it is s reasonably decent camera to have always in my pocket. Specifically to get simple snaps and collect reference material for my sketching.

One thing that many people don’t realise you are not locked into the supplied camera app that came with your phone. There are dozen of good camera enhancements out there.

Pudding Camera gets some favourable reviews and has a simple and easy to use controls, the special feature is you can choose the style of camera you wish to use (the above left photo) is Basic Camera with a vintage look.. I’m still experiment with this one but being able to see the final effect before you take a photo is great.

HDR Camera+ was a favourite back on my HTC wildfire, it takes three exposures and then creates a HDR image, all processed on the phone and it has a range of tone mapping in the form of little filter style icons. I still like it (centre image above)

A Better Camera, is another camera app from Almalence who create HDR camera+, for a small cost you can get am impressive array of extra controls for your camera, akin to the controls available on most Bigger DSLR Cameras. They are on a pull down icon menu but easy to learn and navigate. For me its bihggest benefit is that it does produce clearer and more vivid images (see the image on the right above), with the DRO (Dynamic Range Optimization) option set. This is a propriety technique similar to tone mapping that seeks to make the camera see like the human eye!

Monday, April 27, 2015

PhotoEditingTools :: White Balance, When & Where

Colour correction, usually just called white balance these days, has been an issue since the earliest days of colour film. Some aspects even stretching back further into the martials used in the construction of black and films. Looking around current net explanations the need for colour compensation might be related to a technical limitation of colour film or modern digital sensor, actually the truth is they are pretty good at capturing the true light and they are getting better. The issue is the human eye (and yes a lot of this pre-processing is done at the back of the eye and on the way to the brain) is very good at accepting that a wide range of illumination is actually a “white” light source and reflection of it in the surroundings. This acceptance of what is supposed to be white is general subconscious and takes a very short time. Yet light sources (particularly artificial ones) can vary in strength and their colour profile, which can be measure on the Kelvin Scale (shown on the right), which actually an absolute measure, but it has been adopted in photography as a measure of colour temperature. These measure all very technical and somewhat theoretical but essentially different light sources emit light that corresponds to different hues (colours). A candle or tungsten globe seen in daylight will appear quiet yellow/orangish but in a room just illuminate by that light source our eyes will happily convey the image as if illuminated by a white light. The camera however will “correctly” capture the image a with distinct orangey bias. Objects that our eye saw a white will actually be orange and other colours will have excessive yellow and/or red tints. Thus the photo may look wrong.

Cambridge Colour  website has a great tutorial on the theory of colour compensation (aka white balance) as well as good practical advice, for those that want to investigate this deeper.

The best place to adjust white balance is in your camera, and this is an area you will need to consult your camera manual but most digital cameras, even the less expensive point & shoot ones will have a number of white balance options typically indicated by icons like those on the right. They normally cover a decent range of common lighting sources. What’s more AWB Automatic White Balance techniques have become very dependable in most modern cameras, so it is the obvious default setting. Older Camera phones might be the biggest exception here, particularly in low and/or artificial light. So it is worth looking at you camera settings on your phone. understanding the right setting and changing them as required could make a big difference to your low light photos taken with your phone

When It comes to RAW photos the white balance may not have to be set in your camera (ie just leave it on the default AWB) because there is usually enough information stored in the RAW file to allow the colour adjustment to be undertaken on the RAW image, Most RAW photo editors then allow the recalibration of the image to either a given Kelvin temperature, standard light sources or even a better estimate of the “as shoot” balance.

Having advised that AWB (Auto White Balance) is probably the best default I need to point out that there can still be situation that can confused the camera (ie an scene of dominantly warm or cool colours). Alternatively if you are always reaching for the warming slider trying setting your white balance to cloudy or shade.

Wednesday, April 15, 2015

Enough of the sharing already

I’m in the process of swapping from and old HTC android phone (still on version 2.2) to a newish LG android phone (running 4.4) The transition has been very straightforward, You just go to the My Apps section of google play, from my computer, change the device (the number is the same as I just swapped the SIM over) and tick the apps you want (there are a few duds in the my apps list and a few to much sharing, & why black & white?I haven’t used much). So whenever I’m on WiFi I get the apps downloaded (a couple at a time).

Unfortunately I hadn’t anticipated that a number of the apps would be updated (for compatibility with android 4.4) and that entailed turning on the default settings, which on most of my camera related tools involved “free” upload and on-line storage. Suddenly every time I took a picture I would get a copy sent to google+ autobackup, Carousel/Dropbox, flickr, adobe and a few others. Most of which I didn’t know about. Worse google has restarted its auto awesome blooper campaign, sending me enhanced version of photo I didn’t really want rather than the ones I would have preferred and the occasional humorous miscalculation. Where’s the off switch on autoawesome again?

Ok it was easy to turn all the auto-uploads off (except the dropbox, which only uploads when I have a WiFi connection). Fortunately all the uploads where set to “private” (ie not automatically shared). Still it is a timely warning to check those “this app requires access to” settings, particularly around the Photo/Video/Media files  and Camera item(s) and what internal settings are defaults in those apps.

Saturday, April 04, 2015

Trying out a new phone

The gums
The Gums

Just an experiment with an LG L7, nice clean colours ....but "super difficult to see the screen in strong light!!!" Autumn Light here in Melbourne can be beautiful but it still has a lot of contrast and often leaves digital cameras very confused.

taken with Pudding Camera App & uploaded to flickr via Pilxr. 

All the apps I had used on my older HTC phones are easily downloaded and most benefit from the extra screen space

Wednesday, June 25, 2014

Me!bourne By Night by Phone

2014-06-25_19-08-07_HDR_editI tried out a little experiment as I was in the city to go the princes theatre to see “The King & I” which was a great production. Anyway on the way the wet city streets begged to be photographed but I only had my phone. So I took a couple of  photos with HDR Camera+. Next as I waited for the train home I played the Pixlr app creative filters to make the image on the right and then I created a blog post, using a Blogger android app, expecting to be able to utilize the WiFi at the station. However after a lot of non action and spinner on the screen I eventually got a message that the server wasn’t available. However when I got home the photos where already on my Dropbox recent uploads, so dropbox worked just fine.

2014-06-25_19-08-07_HDR  2014-06-25_19-12-31_HDR


HDR Camera+ 2,  Dropbox 2,  Pixlr 1,  def Android/Google Blogger 0

Thursday, January 23, 2014

simpler HDR on my phone


2014-01-23

Continuing on with the HDR theme, which seems to be this week sub-plot. I was out walk (unusually without my DSLR) and notice an interesting cloud formation. Of Course I had my phone, A normal exposure would be ok but I guess an extended dynamic range HDR  might be better. So I used my HDR Camera app, which has been changed a little lately. It still takes and processes the three bracketed images on the phone, and has the big advantage that you don’t have to keep the phone exactly steady and it now has the more common interface where you pick the look & tone mapping from small thumbnails  I like the natural tone mapping but sometimes I might do light tweaks to the exposure and colour vividness. It still does this on the phone, so you can cross reference back to what you are actually seeing.

2014-01-23_20-25-044  2014-01-23_20-21-50_HDR_1

I’m sure there are a lot of HDR apps out there now, Yet for those, such as an artist, who might like to capture difficult subjects straight onto the phone as close to what they are seeing as possible, and check, doing everything on the phone is a big bonus. More traditional HDR approach are normally carried out some time later under different lighting and colour context so it can become a little more challenging to get the “feel” of the colours