A pair of Sooty Oystercatchers take in the last rays of the sun

 | This series was taken using Bracketing with 0.5 steps in EV |  |
 |  |  |
The first way to overcome the dynamic range limitation of your camera is to take a series or bracketted exposure setting (ie with different EV values) Like the set above and hope that at least one of them will turn out Ok! Trouble is the image with the best sky has the land mass in detail-less shadow and the one showing detail of the beach has the sky bleached out.
The technique know as HDRi (which I have mentioned before) lets you combine each of these separate exposures and make up a new image that contains the detail from the extended tonal range. In this case I have used Dynamic Photo and tone mapping to match the range of the human eye. And now I have a photo that looks like the scene I was trying to take.
One of the new features in Picasa 3.5, is geotagging directly via google maps. You where previously able to geotag via google earth, and you  still can. To test this I choose this photo of a monument in the main street of Leura, in the Blue Mountains, as it was something I could easily see in the google map hybrid image. Geotagging in Picasa no longer requires looking for a separate function among the tools and opions. Just select the photo (or photos in album mode) you want to locate. Then press the places button, it down on the lower right of
 ![]() the picasa window. A google map is displayed in the places widow that pops up. Simply navigate to where the photo was taken. This can be using the map zoom and panning controls, or type in an address, or location name to the search box at the bottom of this places window. Using the hybrid or satelite display option you can get street level detail and I could easily find the place I took my picture of the monument. Now you just need to click on the green “map pin” marker button and drag it to the location where you took the photo. Click on that position and click on the OK button on the pop window, with a thumbnail of your photos. That’s it. So, within the accuracy of how google maps are mapped onto the geoid , which is a whole different story, I am fairly certain
the picasa window. A google map is displayed in the places widow that pops up. Simply navigate to where the photo was taken. This can be using the map zoom and panning controls, or type in an address, or location name to the search box at the bottom of this places window. Using the hybrid or satelite display option you can get street level detail and I could easily find the place I took my picture of the monument. Now you just need to click on the green “map pin” marker button and drag it to the location where you took the photo. Click on that position and click on the OK button on the pop window, with a thumbnail of your photos. That’s it. So, within the accuracy of how google maps are mapped onto the geoid , which is a whole different story, I am fairly certain ![]() these cooridnates are fairly reliable. They also get nicely embededed in my photos EXIF data.
these cooridnates are fairly reliable. They also get nicely embededed in my photos EXIF data.
If you geotag several photos in your album, you can get a view of where they were taken by also having the places panel open as you view the album view open. I must admit I was a little disappointed there where not more ways to retrieve photos using geotags, maybe that will come. OK, there is a green map pin at the top of the Picasa window that retrieved all geotagged photos, but your can still only see them an album at a time.
Next I wanted to compare geotagging the same photo with flickr. I was pleasantly surpised that the hybrid abd satellite images know in yahoo maps is now more accurate that last time I looked. But the best scale representation I could get (you can see the kilometerr scale on the bottem left of my screen capture) is no where near as detailed as the google map equivalent, but I could strret the main street and guess about half way along. So maybe I will be within about 30 meters. Once you have save the location, your main photo display page will show a taken in location down under additional information of the right hand side.
 I wanted to check the location accuracy but do you know what? You can’t see the actual coordinates for things you geotag in flickr, you can just see them on a map. So I still don’t really have a good comparison of accuracy. It is at the retrieving end that he difference in flickr win out. You can get a map of all your geotagged photos, explore the world or just for nearby photo by others, use the flickr api, or even via third party gadget & widgets (like mine, down on the right hand side of this blog).
By the way if your upload a photo to flickr, that is already geotagged in picasa, it is automatically give the map button.

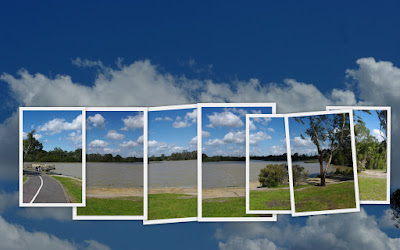
"Cubism was total-vision: it was about two eyes and the way we see things. Photography had the flaw of being one-eyed... My joke was that all ordinary photographs are taken by a one-eyed frozen man!" ...David Hockney

Before I begin remember Backup, ensuring you have a second copy of image incase the original is deleted, is different to Archiving, achieving dependable long term storage of an image.
| Megapixel | 128MB | 256MB | 512MB | 1GB | 2GB | 4GB |
| 2 | 134 | 268 | 552 | 1119 | 2245 | 4494 |
| 3 | 120 | 240 | 490 | 996 | 2000 | 4000 |
| 4 | 60 | 119 | 245 | 497 | 999 | 1998 |
| 5 | 48 | 95 | 195 | 395 | 800 | 1595 |
| 6 | 44 | 88 | 180 | 366 | 735 | 1471 |
| 7 | 39 | 78 | 161 | 327 | 657 | 1314 |
| 8 | 35 | 69 | 143 | 290 | 582 | 1164 |
| 10 | 26 | 53 | 109 | 221 | 444 | 887 |
| 12 | 20 | 40 | 83 | 169 | 339 | 678 |