Showing posts with label Dynamic Range. Show all posts

Monday, August 08, 2022

Reluctantly replacing the sky

I'm definitely not a sky replacement guy, but there has been so much discussion and hype about it I figured I should at least try it. This is a photo I was looking to capture the "sparkle" on the lake with a low winter sun backlighting the scene. This is a challenging photo from the rigors of exposure given the Dynamic Range to be captured, Getting detail in the foreground shadows means the sky (which was the vivid Australian sky blue becomes a blown out grey/blue. Importantly I hadn't taken a bracketed set., to no real chance to recover the sky

The original photo
Original Photo

My recent purchase (Update?) to Luminar Neo. With it big promotion of the ease of Sky Replacement meant I really should try it out, despite my reluctance to do such things. So here are three results, all achieve with one click to select a sky from Luminar Neo's library and a couple of tweaks for Sky Orientation (the positioning of the sun) and also the Scene Relighting.

Adding a blue sky (clouds)  & relighting

Making it Overcast

Moving to the Golden Hour?

Does it worry me that they all look uncannily real?
Yes a little.

Wednesday, October 31, 2018

The Big Vert-a-rama

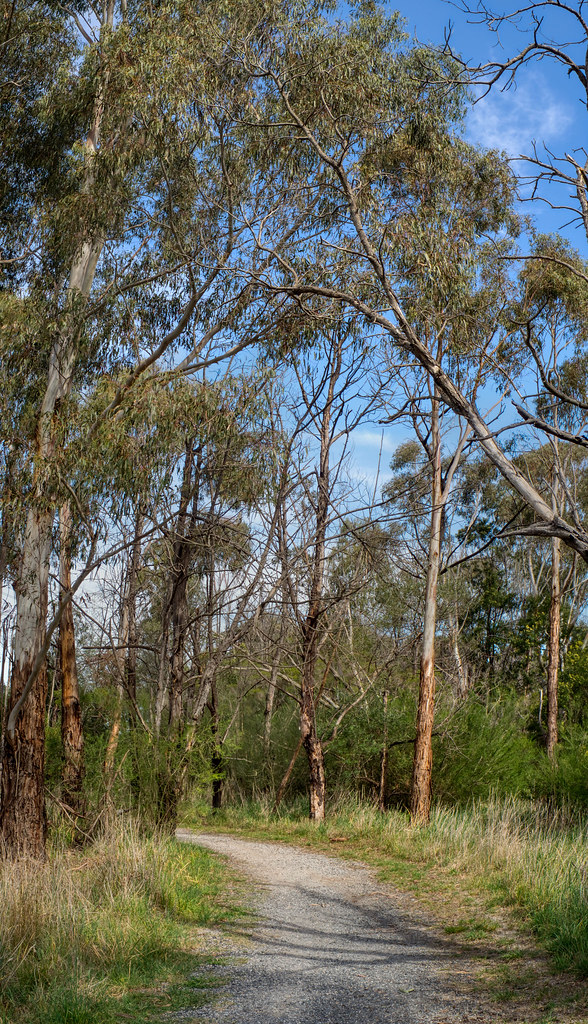
Stands of Gum trees can be hard to photograph because they are so tall. Also I was looking for examples of this isssue of showing verticality for my up coming sketch crawl (in the context of David Hockney’s observations on photography and seeing for his bigger picture series).

pencil sketch of grass seedsIn front of me on the track I was meandering along (actually doing detailed sketches, like these on the right). I looked up and in the strong Australian afternoon light was typical challenging composition, the understory in shadow, very tall straight trunks, some almost white in full sun others dark in shadow but the canopy just lacy against the deep blue sky. I know a single exposure is a recipe for blown out sky and/or blown out shadows. So I grab my little Olympus switched over to multi-bracketed exposure. I’ve been really pushing hard against Aurora HDR 2019 and hitting it with 5 exposures (-1.3EV, -0.7EV,  O.OEV, +0.7EV, +1.3EV), to see if their was notable differences in the image quality (not so noticeable in detail but possibly there is in better colour rendition) Then I did three “compositions” the path and understory the top of the understory and tree trunks and finally up above into the canopy.  Rather than holding the camera to a given exposure/ISO regime I left it in automatic so the average exposure could suit the section of image being photographed. So I had 15 exposures (saved in both Jpeg & RAW formats ie 30 files). I used the RAW files in Aurora, to start with higher dynamic range.

PA300176PA300177PA300175PA300178PA300179

PA300171PA300172PA300170PA300173PA300174

PA300166PA300167PA300165PA300168PA300169

First I ran each set of bracketed exposures through Aurora HDR 2019 and save the default tone mapped image (ie no tonal tweaking or use of “looks” (presets). So far so good. I saved them as as both .tiff (to keep the extra bit depth of colour) and Jpeg (sRGB) to show here.

PA300165aurPA300170aurPA300175aur

Finally I assembled the three tiff files using On1 Photo RAW 2018.5. I did a little rotation and cropping and exported the full image (now 4079by7105 pixel) but no other edits now as a final jpeg (back to sRGB). There is great detail in the understory and also a nice blue (not overblown sky). This combination has worked well, below is a link to the image on flickr which is the full resolution (click on it to view in flickr)

The Big Vertarama

Wednesday, May 10, 2017

HDR on my Phone

The technologies of addressing High Dynamic Range have come a long way in the past decade. Once the process required a couple of specialist programs with round trips through photoshop or similar photo editors. Today there are camera apps for phones that can easily do the job on the phone. I have been using a great little app called HDR Camera+ for a few years now and onto my third android phone. Of the many apps around today it seems to do the most convincing job of creating a “natural” look but expanding the dynamic range. It does take up to three photos, a normal shot one under exposed and the one overexposed. Even when the images are blown out or almost too dark to make out detail, the clever HDR Camera+ software seems to find a reasonable balance. It also does a great job avoiding ghosting when a subject moves.
20170510_123442_HDR2017-05-10_12-35-00_ 0.0Ev2017-05-10_12-35-00_ 2.0Ev

My new HTC Uplay android phone comes with a built-in camera app that incorporated the HDR feature in the basic camera operations (it clearly takes abit longer that a straight photo but it only takes a second of two to process. There are no tonemapping options (or selection step) but the resulting image is noticeably more balance in high contrast situation. There is even an AutoHDR mode which seems to recognize high contrast situation and switch over to HDR. The image below is an example of AutoHDR.

IMAG0540

This camera app software is different from the many HDR style filters (which strive to create the HDR look, normally poorly, and without really boosting the dynamic range). Once you have the higher dynamic range other art filters (like prisma below) can play wonderful games with colour.


IMG_20170510_123916_HDR processed in prisma

Friday, April 14, 2017

Extending Dynamic Range

Contrary to want a lot of people believe Digital Cameras, even the best ones, are not capable of capture the full extent of light from the darkest blacks to the purest white. They struggle to get close to the capabilities of traditional film and they are certainly no where near as capable as the human eye. This range of illumination is usually referred to as Dynamic Range. This limited range coupled with an automatic light meter that is trying to get an average exposure (ie matching a mid tone grey overall) is the reason a lot of images turn out boring, washed out and flat looking even though you remember much stronger light (and often colour)._IGP6498 Untouched RAW Image as Rendered by Lightroom

Here are a couple of techniques that can help you get a wider apparent Dynamic Range in your final photo.IMAG0167 - AutoHDR using HTC UPlay CameraThe first is the use a camera app on your phone that will take an “AutoHDR” (this usually means it will take 3 exposure and combine then using software with the app, a few will do pseudo HDR a bit like the next approach.) This is the simplest approach and results can be surprisingly good.

_IGP6497A second approach is to take a RAW image (this is in .PEF format) and use software (I’m using lightroom Develop basic panel only.) I’m following what I once called SDR+ (standard dynamic range plus) and I even wrote a couple of presets to do it. The basic idea is I bring up detail in the shadows (usually moving the shadow slider to the right, sometimes I also change the blacks using the approach often called “finding the black point”, while on the black slide hold down the <alt> and the scree turn black,image the adjust the slider till a few whit areas (these are the areas that will be rendered pure black) show up. You can do a similar operation with the white slider. The objective is to get the illumination histogram to be as evenly spread across the range as possible. This doesn’t take all that long  and I prefer to do it manually to even my own preset, but it requires specialist software, some skills in the oftware and a camera that can take RAW files. Many RAW purist will explain this is why you should always take RAW images.

_IGP6496_HDRThe third approach is classic HDR (High Dynamic Range) and here I am using three bracketed +/-1 EV exposures. Then the Nik HDR Efex Pro 2 software and the balanced preset to create a new 16-bit colour .Tiff file. There are many variation of the HDR technique and software, but it normally involves two steps. First collecting and preserving the full range of illumination values from the three or more exposures. Then a second step of “tone mapping” these into the available dynamic range of your image (and this is also related to how you might reproduce the image, eg print or screen). The downside is these steps and any image prep take extra time and a lot of folk get carried away with the slider options in the “tone mapping” step, thereby producing the sickly vivid and disturbingly surreal images that have given HDR  a bad name. I personally think this method has give me a final photo much closer to the late afternoon light I was photographing in. I have to admit I do take a lot of HDR images, particularly in contrasty light or where I know I need to preserve the Highest Dynamic Range possible.

So if you are disappointed with flat washed out images you might like to investigate at least one of these approaches.

Thursday, March 02, 2017

HDR on the forest floor

HDR on the Forest floor

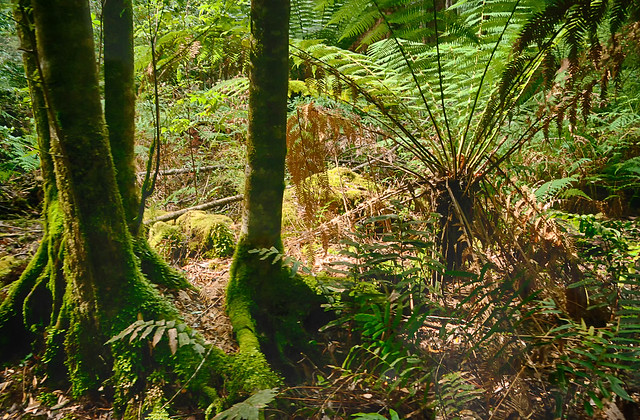
I visited the Tahune Air Walk and forest on a largely bright (summer) sunny day, but rainforests are typically dark (shaded) places on the forest floor. Shouldn’t a sunny day be a better time to photograph?

The answer is NO! The dynamic range of light (the range in strength of illumination, from darkest to brightest) on a sunny day is significantly higher on the sunny day, The bright splashes of foliage where shafts of full sun light is reflected many times brighter than the nearby glom of full shadow, yet there is detail there also. Whilst our eyes can handle this situation a camera and the dynamic range it can capture will probably be a lot less than required.  Typically you will your photo will have correctly exposed (or maybe slightly overexposed foliage behind dark silhouettes of tree truck of overhanging vegetation. On an over cast day this difference is much narrower, and you are much more likely to get a decent picture.

imageSo it seemed logical that this is a perfect opportunity for getting better images with a set of bracketed images (using EV steps, see screen capture on the right) and HDR post processing these images. Here I am using lightroom and the NIK software add in which has worked fine. The resulting HDR image does manage to get the shadow detail and preserve (not over expose) the colour of the foliage. I is much closer to what I remember seeing (and feeling). There is a lot that can be done at the post processing stage and this is usually referred to a tone mapping, how the extra illumination and colour detail is mapped back into the colour image and this is where HDR can get its bad name because you you can push the colour, local contrast and other aspects into very surreal and painterly abstractness. I am becoming a fan of NIK HDR Efex and their realistic presets (either balanced of deep) because they stay closed to my expectations.

I have returned to using lightroom to mamage photos on my HP Spectre and definite use two organization tools, Colour (eg. I flag bracketedimage sets with yellow) and then I stack the original images together. Thus reducing the clutter or many images that are the same.

I also have gone one step further in this image and used OnOne 10’s enhance and magic eraser to reduced the impact of a dead fern frond in the upper right and also detail filter to reduce overall digital noise, but keep as much detail as possible.

Wednesday, September 02, 2015

PhotoEditTool :: Another good pair of add-ins

image Following up on some more add-ins for Aftershot, I reloaded the 64-bit version of Bez, a neat tool for managing tonality and this new version is smooth and fast. Bez (which comes from its use of Bezier Curves) was originial develop for Bible to bring in Lightroom like tonal controls. I like the 5 tone narrow curves that mimic the basic brightness controls in recent versions of lightroom. You get separate sliders for Shadows(Blacks), Low Midtones(Dark Grays), Grey (aka Mid Gray), High Midtones (Light Grays) & Highlights (Whites). It also incorporated an opacity slider, useful to reduced the effect of the filter itself. It definitely enhances Aftershot tonal controls.

imageThe other add-in of interest when considering tonality is Zone. It is a new, well I haven’t noticed it before, and it simply lets you see the Zones (from dark to light) as used by Ansel Adams in his Zone System. When you active the Preview Zone Systems by tick the radio button, the photo you are working on becomes black & white and the hightlight a zone slider is activated. Sliding the the zone changes from 0 (the darkest) up to 10 (the lightest). Each zone is highlighted in a dull yellow as you step through the zones.

The magic happens if you see that one zone overpowers the image (in this case the shadows are very dark and lack detail and represent a large portion of the image) so you can then adjust the appropriate bez sliders. I prefer the 5 tone sliders at the base of the Bez panel. Remember each of the 5 tone sliders crosses two zones in the zone system.

It is also very important to turn zone off, once you are happy with the tonal balance, So that the final photo is correctly rendered (in colour).

_IGP1977

There is no HDR technique here, although I am capturing a AdobeRGB colour image (thus high bit colour). All I have done is looked at the 10 zones of Ansel Adams system and made sure I have balanced the tones in each zone. It this case it has bought detail into the shadows and midtones, at the same time this lifts the apparent intensity of the green foliage.

Monday, June 15, 2015

MDR rather than true HDR

I’m using the abbreviation MDR to mean Maximum Dynamic Range, to differentiate these approaches from “true” HDR.

Something I haven’t tried out in a while is Amalence’s HDRAW standalone utility. This utilizes Tone Mapping technique, allowing it to preserve the details while fitting the highest dynamic range image, taken from a single RAW photo, into the limited dynamic range of a single JPEG or any other 8-bit format.

Example of The Hdraw Main Screen

It displays the options in popular filter examples that you just need to click on the most pleasing option (ie not shinny painting please)

Another way  I have seen described to get a HDR set from a single image is to take a well exposed image and create an overexposed version and save that and then an underexposed version. Normally by moving the exposure slider by the equivalent of one f-stop. This might let you use tone mapping tools but it does not get you extra tonal range, you can find in bracketed exposures. If you want to follow this approach the new AfterShot HDR has this as its second option to create a HDR file (I don't recommend this approach)

The final approach, which I feel is the most obvious, is to use software like lightroom to stretch the tonal rendering to its maximum (well maximum acceptable amount). In this example I am using lightroom’s development module I just use the basic tonal controls controls at the top of the development tool panel. I fist try the whote balance, although in this case I feeel the as shot does reflect the warmth of the first dawn light colours well. Next I have a adjusted the exposure up a little (moving the whole histogram a littel to the right because it is so heavily biased to the left, the dark side). Next I adjust the shadows and blacks to keep the forground dark (and hide the shadow detail, for pictorial reasons). Finally I lift the highlights and the whites (there aren’t many as shown by the histogram). I lift the clarity (local contrast) and vibrance (the intensity of the deeper co0lours just a little.  I do have a preset I developed ages ago called SDR+ which follows these steps but I actually prefer to do the steps manually because I can finesse the sliders in each step.

image

A number of software programs offers histogram stretching tools and they can produce HDR like results but they are less easily controlled than the tonal tools in packages like lightoom and AfterShot.

Saturday, July 12, 2014

One RAW to SDRplus & FauxHDR

P

OnOne's HDR Look Filteropularity brings copycats and there are now a lot of HDR style presets, filters, “Dragan Effect” methods and straight out HDR Fakes. These normally split the image into a series of layers that generate re-blends to emphasis contrast, detail and possible saturate some of the colours. Like the true multi-image HDR they can de used to excess and produce scary lurid photos but they can also produce strong results when used with care. I quite like the results that can be produced with the OnOne Perfect Effects HDR look filter, particularly when used in conjunction with Dynamic Contrast and/or Tone Enhancer filters on underlying layers.

The SDR+ Preset is simple  My SDR+ preset applied in Lightroom

There are also several methods to bring the tone mapping approaches into processing a single RAW image. The Digitial Photography School gives a nice tutorial on creating a fauxHDR look using a set of simple tone stretching methods in lightroom presets. I have a very similar preset I’ve called SDR+ but I don’t include exposure, white balance or noise reduction., and in DPS’s example. I prefer to fix white balance first (as tone stretch can introduce significant colour casts). I only adjust exposure and noise after the preset is applied if necessary, and I’m a fraction heavier on the clarity slider.

hdraw thumbnails screen hdraw my simple reinhard preset

One simple application to uses this approach is hdRaw, which can take a single RAW image and stretch the tones in a number of common tone mapping like ways, Rather than calling this true HDR I have seen it called SDR+ (Standard Dynamaic Range Plus) but it can achieve much the same effect as a multi-image HDR image tone mapped in the same way. You can even create your own presets, so I have made a basic Reinhard to suit my atheistic.

There are quiet a few techniques around that suggest you create a pseudo under exposed and over exposed image from your single raw file and then use these to generate a conventional HDR but to be honest this is a lot of work and you still start with the same dynamic range of intensity anyway. I think you are better experimenting with some of the approaches above when you only have a single RAW photo.

At the same time I was writing this post by +Iain Harley, from The Patch community on google+ gave a heads up in this link on The Changing Face of HDR Photography which does nicely summarize that HDR is developing and its really all about reproducing the beauty you see and feel when your take the photograph.

Wednesday, July 09, 2014

AutoTonal Fixes & Jpeg

M
ost packages these days offer an autofix solution for “correcting” the tonal range in an image, which normally means stretching the range by increasing the contrast and manoeuvring the exposure/brightness. They mostly work, underexposed images will be lightened and overexposure images will be darkened, and some extra detail will appear. However these processes/filters can come spectacularly unstuck when the exposure is heavily clipped (clipping is an adobe-centric term to described when the exposure intensity falls below the minimum recordable, ie black or above the maximum recordable ie white). This clipping will be visible as vertical lines on the right or left hand edges of the intensity histogram. The image I’m using for this series is clipped a little on the black side, but not that significantly.
IMGP3368 original IMGP3368_auto_levels IMGP3368 pefectly clear
aftershot jpeg as shot histo aftershot jpeg auto_levels histo aftershot jpeg perfectly clear histo

Original Jpeg (as Shot)

After Auto Levels

Perfectly Clear

If you look at the exposure intensity histograms under each image you see what has been done by each step. The original jpeg image does not capture the full range of exposures, they are grouped to the left og the histogram. The auto level fix has stretched the available pixels to fill the histogram. Because there is less detail in the information to begin with, when this is stretched across the full range there will be some new intensities that get missed, the new locations for originally adjacent exposure in a nice gradient of light will now be two or more illumination values apart, leaving a little gap, which can produce stripping in the nice gradient, and sometimes this becomes very obvious and distracting. The perfect clear filter has done a similar stretch but has less mini peaks.
All on these images still have a very dark shadow in the foreground and probably a bit more post processing could be justified.
AfterShot Pro’s Perfectly Clear filter, is a bit of a secret sauce, but I find I prefer using it to any other AutoFix solution because it gives me a better idea of a what an image is capable of. The ones I want to rank as worthy of further work in the future. On occasion I need a jpeg version to post on the web straight away, and perfectly clear probably does the best job in most situations, with just a single click. (Perfectly Clear also works with RAW images).
Auto Enhance options in Google+ SettingsGoogle+ photos has a featured called Auto Enhance which is turned on and set to normal by default. It works well most of the time, but if you think your images is just to contrasty, or looks posterized you can turn it off or change it individually on the photo page under edit, or change the default setting under the google+ settings. If you are only uploading jpeg photos, from your phone the normal setting will probably do a good job 90% plus of the time.
So be careful with Autofix as a solution to extend your dynamic range. There are better solutions to come in this series but it is well worth having a play with these settings/filters in your package of choice.


Cambridge in colour has a good introduction to Understanding Image Histograms