Showing posts with label stitch. Show all posts

Wednesday, October 31, 2018

The Big Vert-a-rama

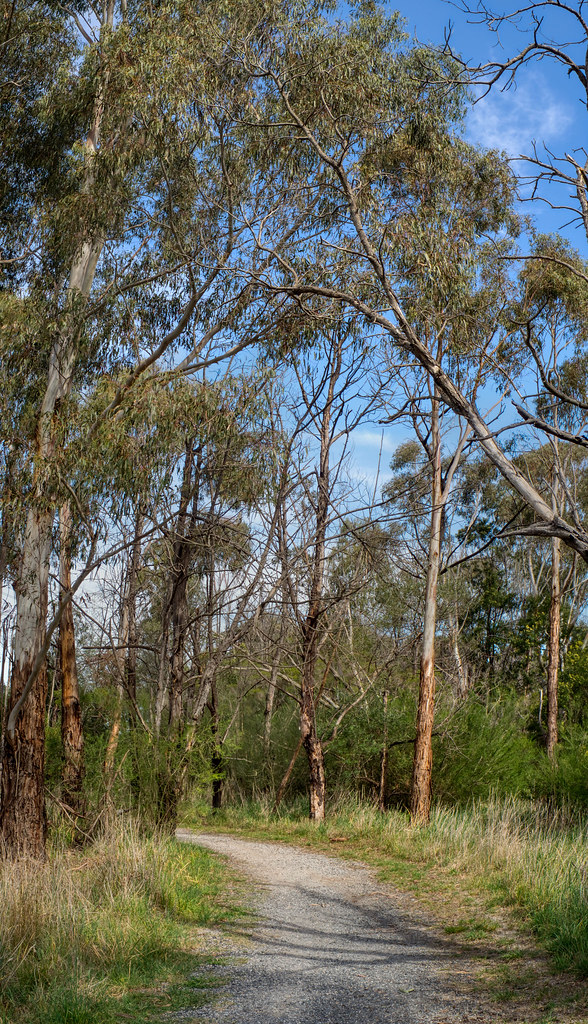
Stands of Gum trees can be hard to photograph because they are so tall. Also I was looking for examples of this isssue of showing verticality for my up coming sketch crawl (in the context of David Hockney’s observations on photography and seeing for his bigger picture series).

pencil sketch of grass seedsIn front of me on the track I was meandering along (actually doing detailed sketches, like these on the right). I looked up and in the strong Australian afternoon light was typical challenging composition, the understory in shadow, very tall straight trunks, some almost white in full sun others dark in shadow but the canopy just lacy against the deep blue sky. I know a single exposure is a recipe for blown out sky and/or blown out shadows. So I grab my little Olympus switched over to multi-bracketed exposure. I’ve been really pushing hard against Aurora HDR 2019 and hitting it with 5 exposures (-1.3EV, -0.7EV,  O.OEV, +0.7EV, +1.3EV), to see if their was notable differences in the image quality (not so noticeable in detail but possibly there is in better colour rendition) Then I did three “compositions” the path and understory the top of the understory and tree trunks and finally up above into the canopy.  Rather than holding the camera to a given exposure/ISO regime I left it in automatic so the average exposure could suit the section of image being photographed. So I had 15 exposures (saved in both Jpeg & RAW formats ie 30 files). I used the RAW files in Aurora, to start with higher dynamic range.

PA300176PA300177PA300175PA300178PA300179

PA300171PA300172PA300170PA300173PA300174

PA300166PA300167PA300165PA300168PA300169

First I ran each set of bracketed exposures through Aurora HDR 2019 and save the default tone mapped image (ie no tonal tweaking or use of “looks” (presets). So far so good. I saved them as as both .tiff (to keep the extra bit depth of colour) and Jpeg (sRGB) to show here.

PA300165aurPA300170aurPA300175aur

Finally I assembled the three tiff files using On1 Photo RAW 2018.5. I did a little rotation and cropping and exported the full image (now 4079by7105 pixel) but no other edits now as a final jpeg (back to sRGB). There is great detail in the understory and also a nice blue (not overblown sky). This combination has worked well, below is a link to the image on flickr which is the full resolution (click on it to view in flickr)

The Big Vertarama

Saturday, May 26, 2018

The Tale of Three Panoramas

Originally I was planning to put the Olympus Camera Panorama “feature” through its paces. Well to cut a short story shorter, the panorama feature in my new M10ii doesn’t stitch the images in camera. It just gives you guide lines to follow. So I abandoned try he feature further and decided to test the stitching of images with different lenses and different camera orientations.

Rather than falling back on my favourite panorama stitcher AUTOSTITCH I decided to do all the post processing in On1 Photo RAW, mainly because it seems to handle the Olympus .orf RAW files best.

TESTING LENSESTESTING LENSES

I’ll begin with the simple panorama, just two images shot semi wide with 14mm ( Jpegs shown above straight from camera). Notice the images are exposed differently. I then used the .orf files and began by stitching them, then I took the result into the On1 develop, adjusted the horizon slightly and did a little tonal tweaking. Finally I took the adjusted but barely post processed panorama into the Dynamic Contrast setting in Effect module via the Natural “filter”. The results are pretty reasonable.

TESTING LENSES

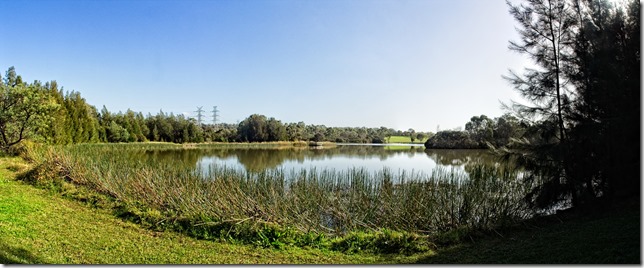
Next I turned the camera vertically, added my circular polarizing filter and took 7 overlapping photos of roughly the same scene. I post processed this in On1 Raw following the same steps. Another decent panorama, much bigger and possibly a stronger image (because I include the strong darks of the trees on the right.
TESTING LENSES

For the last panorama I took 15 photos with an 75mm telephoto and undertook the same steps as the previous two panorama. This took a lot longer and created a massive file 26480x3970 (1,154.MB). It so wide I doubt I ever want to get it printed BUT it is massively detailed. I’ve done it now and may never do it again yet I now know how to do it.

TESTING LENSES

Wednesday, June 11, 2014

Dark Skies over the Lake


I was pleasantly surprise when this AutoAwesome Pano showed up in my Google+ photos. It is actually created from 16 individual photos in approximately 3 overlapping bands (taken hand held so the overlap is not precise) and cover approximately 180° view from the horizon to directly over head. It is a very big wide panorama.

I have found so far it is relatively rarely that google+ assembles my multipanel panoramas, instead it often makes then into stop motion movies. I see not being able to create a multi-image stitched panorama when you have collected a set of suitable photos is a bit of a limitation, waiting for autoawesome to do it for you is an inevitable let down.

Wednesday, April 13, 2011

An extra big autostitched image

te mata pana 1a

This is probably my biggest multi-image stitched panorama I have attempted. It is based on 32 separate telephoto images (taken at 85mm, equivalent to roughly 130mm for a 35mm film) taken hand held. The flattened perspective of the telephoto shots does put a little more pressure on the stitching to matchup features so I have reduced the amount of overlap between images a little (approx. 15%). The lighting was wonderful this morning and the detail crisp and clear. The stitching was run with Autostitch using all default settings and run to 17,600 pixels horizontally (the image I have posted here is a tenth of that, but should give you a feel for the grandeur of the place) and took over an hour to prepare! The lettering and border where added in Paint.net. Normally I would crop these big images to straighten the edges but I felt the ragged flow of the photo matching adds to the drama of this image. Whilst taking this series and other photos (see previous post) I meet Alistair, a peaker (which means he regularly runs up the IMGP5474peak!) and he said if I waited the swirling mist would clear and I would see the distant pines silhouetted (shown here). Excellent advice.

No. Lord of the Rings was not filmed here.

Thursday, March 31, 2011

sky & lake

2011-03-31These multi-image stitched panoramic views of Lake Taupo are more about the clouds and sky than the lake and landscape. I’m informed these unusual clouds are locally know as “Mare’s Tales” (thanks Wendy). Clouds alone are something that I have found can be a challenge to match up for Autostitch, especially for hand held sequences.  So I was careful to keep a little bit of the horizon in each image also I have taken the photos in the vertical “portrait” mode to maximize the vertical range and having two rows of images within each composite panoramic image.
Lake Sky Pano Bigpano
lookout pano big

Friday, August 22, 2008

Photosynth'ing

Microsoft's Live Labs have released a new free photo service called photosynth. It is a photo splicing service with a difference, its uses lots of images with lots of overlap to create a convincing 3D view that you can zoom in and out "smoothly" around pan around the scene. Such facilities are not new to the web many real estate site now use walkthroughs, but this is pretty impressive and you can create your own, without much effort. there are two technologies involved the first is the ability to reconstruct the scene or object from a bunch of flat photographs, and the second independent technology, called seadragon, that allows seamless scrolling through 100 of MB over the Internet.

upload to synth There are two parts to creating your own synths. You must first register at the service, (for which you need a windows live ID) then download a small uploaded application, that not only help you prepare the images and upload them but monitors the splicing process.


There are a few crucial limitations. All syths become public (ie can be viewed by anyone via the internet) but you do have the option of setting the licensing (full copyright or a creative commons) during the upload process. Results can only be viewed on PCs running XP or Vista, which must run the direct-X photosynth add-in for Internet explorer. The 20GB of space seems generous, but you will use this up fast.

upload to synth 2

One downside is the bandwidth required, I have downloaded it, set it up and uploaded my first project using free wifi at an airline lounge that dropped out a few times so I had to be very very patient!

Sunday, January 20, 2008

Stitching in an unusual place

image

If you are a regular reader of this blog you will know I love the extra wide perspective you get when you stitch several images together. Normally I have been using autostitch, but I have just discovered a very serviceable stitching tool inside window Live photo gallery (one of the tools that you can get in windows live)

The Downside, depending on you view it could be an upside, is the fact that it works completely automatically, no settings to maketweak, no sliders to slide or knobs to turn. You just select the photos you want to join and then click on the little make item on the menu and pick the first option create panoramic photo... That's it

It generally seems to to a good job. It even does multi panelled grids of overlapping images

IMGP0514 Stitch

I haven't cropped or rotated (Live Photo Gallery does not seem to have a straightening tool!) so you can see exactly the image produced.

Monday, November 20, 2006

Kilcunda Panorama with swooping sea gulls


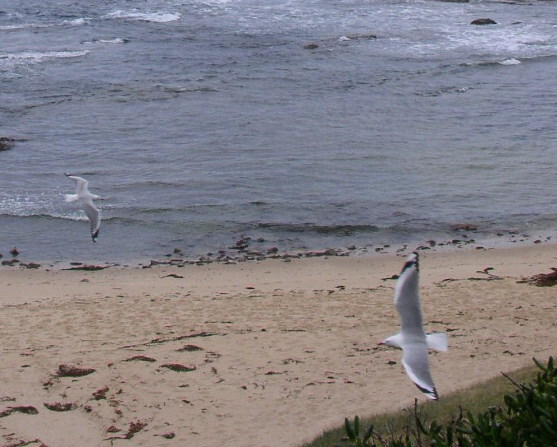
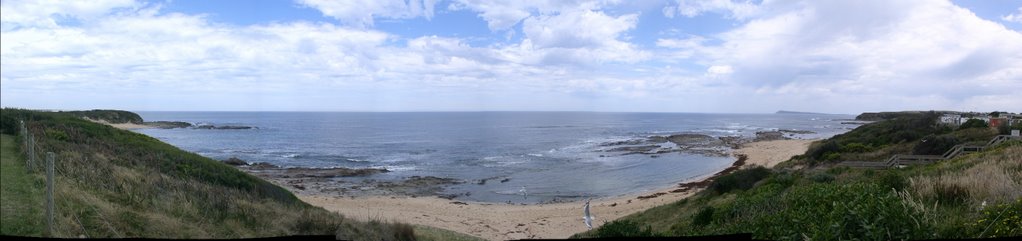
I like big sweeping landscapes, and have enjoy making multi-image panoramas, which generally do the subject matter justice. Getting a scene like a beach can be difficult because the waves change position during each shot. I do remember the sea gulls gliding in the wind when I was taking this and thought I had avoided photographing them (they usually make a nuisance and fly over exactly that spot where they will spoil the join.) I must have missed these two but glad I did. They really add depth to the image.
(you may need to click on this image to look at the larger size to fully appreciate this)
See where this picture was taken. [?]