Wednesday, December 30, 2015

The Importance of a Catalogue to your Digital Photo Archive

A shoe box or album full of photos is easy to flick through and you can quick see both its condition and content. Digital files however have limited visibility, especially a collection of digital photos. The Photo file will be in binary and unless you have specific software to decode it it will just be symbols and numbers at best. One exception is the jpeg format which is so widely used that most software, browsers, computer and smart phone apps with recognise and decently render it. Other formats and in particular the camera RAW formats will always require social software (and given that these formats are proprietary and there is a risk of them becoming obsolete) may not be guaranteed to be available on different hardware and/or in the future. Further It is unlikely that scanning the file names from the camera (like IMG_0007.CR2) will be very meaningful. You need a reader that understand the format of that data and can render it as an image. A decent catalogue (or Index) of you photos need both to be able to easily view you photos but it also benefit from some organization that makes the images quicker to find

So how do you figure out what is there. There are two common solution,

  1. The first is Thumbnails, normally postage stamp size low resolution version that give you a peek at what is in the photo.
  2. The second is to use metadata (data about the context of the photo itself).

There are lots of decent (and free or inexpensive thumbnail programs) like Picasa XnView, Photo Mechanics, the default folders view in windows even lets you select a small, medium or Larger icon view, which are thumbnails. Some can handle RAW formats but other may not (or rely on updating a codex for that format). Other software like Aftershoot and OnOne 10 have a browse mode so you don’t have to “import” photos first, you just get presented with a grid of thumbnails. These are fast and a joy to use compared with opening up directories of images in say Lightroom. Having a good thumbnail facility that is fast and easy to use is the first additional need for a good archive.

Metadata, (data about the photo and it’s contents) is a little more complex but it should not be. There are two standards EXIF and IPTC metadata formats. The EXIF data is really mainly about the camera and image and has been well addressed by camera and phone manufacturers (although they may not record all the possible metadata). This EXIF metadata is included with the standard jpeg data format so the metadata travels with the image embedded in it. The IPTC Interchange Model is a way to record information about who created the photo and how it is licenced for distribution and publication (it was set up for exchange of information, and images between newspapers  and is not a big deal in a personal photo archive). This information can be, but seledom is, embedded in jpeg files. Most software that works with photo will let you display both forms of this metadata. If you are having trouble reading the metadata Phil Harvey has written a wonderful open source program called ExifTool, which can interact with metadata in many formats (eg, embedded in the jpeg or stored in an .xmp sidecar file)

Whilst you can see a scratch of water stain on an old photo. It is tricker to judge damage too (corruption of a digital file) because in its raw binary digital format it if not easily comprehended. Even worse even a little damage may render the digital image unusable. There are technique to ensure digital files are not corrupted, most notable the checksums and Hash function (they imageare not hash tags). Of these MD5 is the most used for photos and is usually the technique of choice applied for detecting duplicates. Whilst I can see some software uses checksums (see picasa.ini of right) they do not appear to be MD5 numbers. Adobe use two different IDs which look a little like MD5 hash values, the first is a unique image ID created when The image is scanned by lightroom (or other adobe utilities) and the seconds is an instance ID and is updated whenever the files is accesses and parametrically adjusted (ie the .XMP file and/or catalogue are altered). I can not fnd any definitive documentation on them So I’m just going to assume they are yet another propriety secret and thus I doubt I will research them any further.

Fortunately there are lots of well tried and tested MD5 utility and programs, many free to download. What I discovered is the best way to create these hash table is not one for each file but with one file for each sub-directory. I already had a program called total commander (and alternative to windows explorer) which does this. Further you just need to click on that file and then Total commander will scan the files mentioned and report back if the hash value matches. Yes I did a test truncating a photo and the checked reported a hash value difference. There are a number of utilities so I assume you will have no problems finding a similar one.

I have been using this approach for the past 6 months it very simple and I just create the Hash Table for each directory when I do my monthly backup checks. I have been reprocessing some older directories as I move to a hard disk based archive. Running the hash function did Identified 2 photos that had read problems, luckily I had another copy of those which was fine. I am now slowly adding hash table to all my archived photo folders.

I’m now even more certain you need to also keep a checksum or hash value, as well as an easily accessed thumbnails and standard metadata utilities in addition to your archived files. Copies of the applications used to created these views and information are an important part of your catalogue and should be stored with your archived photos.

Monday, December 28, 2015

Changing the way I backup my archive

This is something that keeps bugging me about ALL photo management systems. There is plenty of discussion about backups but scant regard for archives. A backup is pretty easy to understand and do, it is a second copy. The concept for computer files (or any digital information) being that if something goes wrong, I can just go the backup and recover what was lost or destroyed. This is easy enough to understand for one file, a day or month’s photos but gets a bit trickier as information mounts over a year or more. Do you keep backing up everything or start a new series of backups. For those with decent DSLR cameras with high megapixel counts that means buying new and bigger external USB drive or more racks on a RAID System or Drobo. There are good strategies to safely tame this plethora of images but I need to get back to the difference of true Archives.

An archive, is also likely to be a copy but it has two key differences to a backup. The first and most important is it must provide easy access to find the photo (or digital files). This first requirements means there must be a catalogue or index of how best to find the photo. This requires that the storage be organized in such a way that the important characteristics can be recorded where necessary but also that the storage location is recorded as well. The second difference has to do with the physical format of the storage media, where it is stored and how likely that media is likely to be readable in the future. Is the catalogue always available or is it also buried in the data.

Today I will talk a little about this second issues and keep the idea of an index of catalogue for a number of future posts.IMG_9245 copy copy

I have for several years maintained 3 archives. I have one live on an external harddisk with 2GB capacity, and two CD/DVD collections stored at two different locations (one well off site). Managing and searching in them is starting to become a daunting task (ie locating the right disk and then looking through them takes time, despite being logically labelled and well stored, in suitable storage boxes). Further I’m getting close to that 2GB of photos now. So I have opted to put at least one of the stored archives also on hard disk (or more precisely a couple of hard disks). I do have strong desire not to keep buying bigger and newer gear, so I purchased a small USB hard drive dock (mine is the Shintaro) and it can read both 2.5”and 3.5” SATA HHD drives and also has an e-sata cable. So all I had to do is take the hard drives out of older computers (which I always do before I scrap them) and now I have extra external storage. They are of course slower than a new drive and some of my older drives are smaller 512MB. However Importantly I am not letting my personal and business data get out into the wild (it is well overwritten by photos) and I am also getting a more easily stored medium (a 2.5” 1 TB drive, holding a decade of photos takes up less room than 4 or 5 DVDs roughly a month of my shooting). I did however required two old drives to backup my current archive, but I have several so I might end up using this set this year and cycling over to another pair next year.

Trying to contemplate the best way to do incremental backups (monthly) to a remote disk, has left me sticking with the DVDs as the best option for the time being.

Saturday, December 26, 2015

Searching for a suitable Archive Media

The biggest problem with setting up a long term digital archives related to what physical storage media you plan to use. The Digital world is littered with various storage media that have a very short operation lives and/or have fallen from common usage. I have used Punch paper tape, Punch Card, Reel to Reel Magnetic tape, Various Tape Cartridges, 8”Floppy Disk (yes they were once that big but they could hold around 1.3mb), 5¼” Floppy Disk (only 360kb), 3 ½” Rigid disk (720kb but later 1.4mb), Zip Disks (a glorious 100mb), CDs (compact disks with a capacity of around 700MB) on to DVD (which generally hold 4.7gb) and Blu-ray (which can hold up to 25gb). Unfortunately the unspoken secret here is as the capacity and specifically the information density has increased the shelf life tends to decrease. The punch paper tape for the late 60s is good to go (if only I had a reader) if it hasn’t been torn, so are the punch cards from the early 70s, but everything else has probably reached its best by date and there is a reasonable chance you will experience corruption or errors reading older media already. Even CD and DVDs, once thought invincible start to have troubles after only a few years, even less if they are not handled carefully.

What about solid state memory (like SD memory cards, USB keys or the newer SSD drives), unfortunately they have limited life spans as well (more to do with the number of reads and writes) in normal usage they may outlast the next form of storage HDD. The conventional hard drives (whether built into your computer or as an external USB style) also have some telling untold secrets (see backblaze study), which suggests seagate drives are more likely to fail than western digital, but I have had the opposite experience I have 4 dead western digital my book USB drives but 3 healthy seagate drives, one of which considerably older). Furthyer I have only ever had 1 ( failed under warranty and was replaced) of my 7 toshiba hardisks (some in laptops other are portabale backup style). The caveat here is your spinning disk hard drive will probably last a day or two longer than the guarantee.

So what about cloud storage that’s forever isn’t it? Well if you look in the terms of Service (TOS) offered most cloud service providers there is generally no mention of loss or damage of stored data (I guess they assume you must already have a copy as well, ie from their point of view the data is backed up). Only Amazon seems to have addressed this, and I hope companies like google could be relied upon. However they are companies that are unlikely to last forever. So cloud backup is where we are at now, not cloud archiving yet. So where does that leave us. We will need to plan to regularly move any digital archive onto new media as technology change and popular taste determines.

Clearly an Archive of Digital Photos must not be hardware/media specific.

I trust all this scares you into making a backup of your digital photos right now. Stop reading and go and do it!

Thursday, December 24, 2015

Two months of distress and dissapointment


Some may be wondering why my blogging and other social net contributions have fallen away so sharply. The Answer is simple upgrade distress. Whilst I had experimenting with upgrading to windows 10 months ago (and given up) I felt brave enough back in early november to give it another go on my main office machines. I also felt it was time to upgrade to OneOne 10. Also force upon me was several updates to google photos (on my android phone). Well it did sort of work, the windows updates left many programs having to be reinstalled or registered and I’m still trying to sort out the various drivers I need to update (some have been updated but still misbehave, eg Wacom tablets) And don’t get me started about sharing printers (that at least I have resolved).


BUT WHY? I am a person that has used computers continuously since 1969 (yes that’s 46 years!) so you might expect I would find updating some software easy. I didn’t! I do appreciate windows 10 may be lighter and tighter but without good documentation (on-line user forums and FAQs are not a substitute for real information about drivers and settings) I have floundered. I wonder how many people have just given up.

OnOne’s Technical support have been helpful despite there no longer being phone or direct email support. I won’t mention microsoft or google and various hardware companies, Its time to lift your game everyone.

My real disappointment is with two applications Microsoft’s Live Writer and googles photos.

Windows Live Writer (which I use mainly for this and other blogs) seemed to work but I gave up trying to use it under Windows 10 (despite all the user advice on how to reload it under windows 10). It just never would reconnect to my blog. Looks like microsoft was just abandoning all the live essential stuff, damn
I’ve downloaded the open source version called Open Live Writer, and it seemed to work (it does have a few restrictions). The joy didn't last long, more unifortmative errors messages
The other big disappointment is google photos, its android app has disgraced itself to the point of relegation after reloading and updating itself so many times and filling up my phones available space with I know not what. The share memories option sounds good for sharing family and private events but it reality it is yet another attempt to vacuum in all your smartphone photos.

PhotoFriday :: A Little Sweeter

Whilst much contemporary installation art is straight our boring, occasionally some art can delight, like this Christmas Feast sculpted entirely in sugar, On display in the foyer of Melbourne's Windsor Hotel, until January 5th. Well done Hotham Street Ladies


For PhotoFriday‘s topic Small Scale

Saturday, November 28, 2015

Updating OnOne & having fun

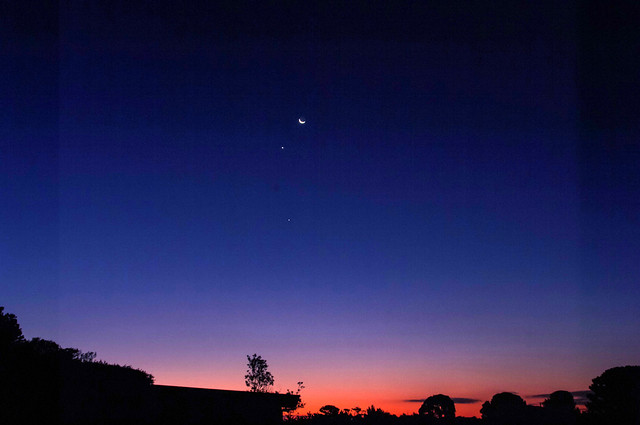
Towards Sunset

 Bottom Deck Panorama

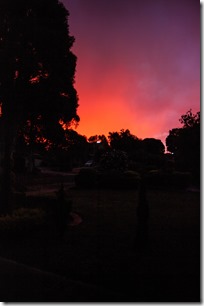
After Sunset

top deck sunset big pano 1I have been experimenting with the new OnOne10, its fast!.My perspective is it is most of the great tools rearranged and set up so they can be used standalone not only as an add-in (to lightroom). There By-line “photo editing made simple” is very appropriate. I’ve also had much fun using browse & layers rather than lightroom and then passing files to other applications which are simple to set up. Unfortunately I haven’t figured out how to send multiple photos into Autostitch. However the simplicity of the file export means they can easily be sent somewhere autostitch can pick them up.

Friday, November 27, 2015

Sunday, November 22, 2015

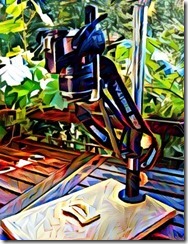
CreativeSpaces :: repurposing an old Enlarger as a Copy Stand

The repurpose enlarger as copy standMy studio clean up has bought a focus on sorting out the mess, and throwing out a lot of it. However it also got me interested in how to organize my diverse works, store them and most importantly start keep a catalogue of my works. In the process after a little web searching I came across the CALL (Creating a Living Legacy) project,  Which does lay down the important steps in what they term Career Documentation, involving creating a viable archive including photographing your work. Its a good read and guide.

Whilst small flat works (watercolour sketches etc, photographic prints, many of them old family photos) could be scanned on one of my two multi-function printers I have. I also have an old and  “cheap” slide & negative scanner that is so old It not longer has a driver and can only work with an old XP laptop (I have keep for compatibility with some old devices like this). Larger art works (and I have some BIG ones) had to be photographed. Which is easy enough. However I also do a lot of more sculptural small things as well. I figured an old fashion copy stand was what I needed. The pieces come togetherEven if someone still made copy stands I doubt I could justify the expense to photograph a few items.

Clearing out some of my father’s untouched storage I came across our first enlarger (in a poor state). It was missing the globe housing and lens. I soon realized it could be easily converted to a perfect copy stand.  I just had to unbolt the enlarger bellows unit, to give me a perfect mounting position, roughly over the centre of the base). I also found an old bracket for an old and broken off-camera flash bracket and figured it would be perfect to connect the camera. A little experimentation and I found I needed Assembled stand (without Camera)a small piece if rubber (cut from an old kids play mat) as a way to really tightened the connection. With its slot mounted vertically I had considerably flexibility when I attached the camera by the base screw tripod connector (no elaborate quick release mechanism here).

Using the stand is simple. Place the piece on the base, rack the camera up or down till the piece largely fill the viewfinder and focus. A macro lens if you have one is great also. I haven’t built any special lights for the stand (yet) and have used it both outdoors in the shade and indoors in my studio away from direct sunlight without needing extra lighting. The Mouth : Small Experimental Clay PieceRather than trigger the camera manually I do have a remote shutter release but have found the 2 second self-timer just as good. Set up like this I have found making copies is even faster than scanning. Position the object (after a bit of practise there is no need even to check the viewfinder if the items being photographed are roughly the same size). Next half press the shutter (to focus), when the whirring stops (if it starts at all) fully press the shutter and stand back. Beep beep click, its done. Position the next object. Its just as fast when taking photos of old prints.

With an extended table and the the camera cranked as high as I safely can get it, and un-zoomed to 28 (the widest I dare to avoid undue distortion) I can easily photograph to 40 by 25cm (approx. 18”” by 10””), not quite A3. With the stand turned around so the camera overhangs the back of the base and the stand protruding off the edge of a table (securely weighed down on the based) I can photograph items on the floor up to 90 by 59cm which is roughly A1. With this configuration it is hard to focus through the viewfinder but that’s when I find connecting the camera to my computer comes into its own (my Canon T3i tethered to lightroom is perfect).You have a very remote control and can zoom in to get the focus perfect.

I’m proud of my repurposing, Further I can now strongly recommend a copy stand over a scanner for any artist as a way to record their art.

Saturday, November 21, 2015

The New Google+ but no Photos or Hangouts

imageThe new Google+ has arrived, its faster (much faster) and bolder (a red header line with a more responsive style design) but really more of the same. EXCEPT there is no direct menu link into google photos and hangouts,These are are presumably becoming very separate applications, so that ok. Also missing from the menu are circles and pages, which I don’t understand. The Truth is I removed Google+ off my phone a while ago and I have been visiting google+ less and less much from the computer. I don’t see anything to encourage me back. However if you want to give the new google+ a go check out the “How to Use [the New] google+: Tutorial” blog post by Traffic Generation Cafe

Thanks to +Ananda Sim for the heads up on the How too…

Wednesday, November 11, 2015

Digital Archives :: An Unfortunate Truth

Some of the media formats I have used.The biggest issue in setting up a long term digital archive is related to what physical storage media you plan to use. The digital world is littered with various storage media that have very short operation lives and/or have fallen from common usage. I have used Punch paper tape, Punch Card, Reel to Reel Magnetic tape, Various Tape Cartridges, 8”Floppy Disk (yes they were once that big but they could hold around 1.3mb), 5¼” Floppy Disk (only 360kb), 3 ½” Rigid disk (720kb but later 1.4mb), Zip Disks (a glorious 100mb), CDs (compact disks with a capacity of around 700MB) on to DVD (which generally hold 4.7gb) and Blu-ray (which can hold up to 25gb). Unfortunately the unspoken secret here is as the capacity and specifically the information density has increased the shelf life tends to decrease. The punch paper tape for the late 60s is good to go (if only I had a reader) if it hasn’t been torn, so are the punch cards from the early 70s, but everything else has probably reached its best by date and there is a reasonable chance you will experience corruption or errors reading older media already. Even CD and DVDs, once thought invincible start to have troubles after only a few years, even less if they are not handled carefully. What about solid state memory (like SD memory cards, USB keys or the newer SSD drives), unfortunately they have limited life spans as well (more to do with the number of reads and writes) in normal usage they may outlast the next form of storage HDD. The conventional hard drives (whether built into your computer or as an external USB style) also have some telling untold secrets (see backblaze study, which suggests seagate drives are more likely to fail than western digital, but I have had the opposite experience I have 4 dead western digital my book USB drives but 3 healthy expansion seagate drives, one of which considerably older). The caveat here is they will probably last a day or two longer than the guarantee. So what about cloud storage that’s forever isn’t it? Well if you look in the terms of Service (TOS) or most cloud service providers there is generally no mention of loss or damage of stored data (I guess they assume you must already have a copy as well, ie from their point of view the data is backed up by you). Only Amazon seems to have addressed this, and I hope companies like google could be relied upon. However they are companies that are unlikely to last forever. So cloud backup is where we are at now, not cloud archiving yet. So where does that leave us. We will need to plan to regularly move any digital archive onto new media as technology change and popular taste determines. Clearly an Archive of Digital Photos must not be hardware/media specific.

I trust all this scares you into making a backup of your digital photos right now. Stop reading and go and do it!

Saturday, October 31, 2015

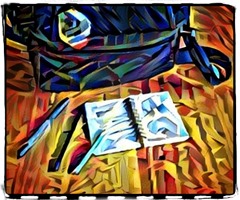
CreativeSpaces :: Sketching Gear in my Camera Bag

Yes I always do carry a small sketch book in my camera bag. Why?

There is always a sketchbook in the back of my camera bag.They are not full of finished art works, mainly there are squiggles that are really little more than doodles. There are also notes on the lighting, time and conditions. Maybe I have sketched the horizon and marked where the sun/moon rise or set. Perhaps I have scouted around for an interesting foreground silhouette. Occasionally there will be records of some key colour aspects of what was happening. Most are just me trying out some composition decisions, often this is just getting a feel for shapes and tones (not exactly notan but similar).

I prefer to have the mini A7 visual diaries. Every now and then you might find the local art supplier has a selection of sample pads made up at A7 size, at a very attractive price. There will be watercolour and various drawing surfaces and perhaps fewer pages than the normal pads but they will be attractively priced. They are idea for the camera bag. I also include and old/used (ie short pencil), perhaps a pen and I have been experimenting with woodless pencils, they can be sharpened or broken off and used as a crayon, They are also very black.

Sometime ago, I had seen a video by Matt Kloskowski talking about the 50/50-rule. Which basically suggested spending 50% of the time to capture what you want but then spend as much time again doing something, original, creative or experimental. This was a nice coincidence because I had years previously made some notes or more key words on different things to try out, scrawled on the back page of an early little sketchbook. Here is my list of alternative ways begin to see a photo.
  • sketching is about seeingWhat is the first thing you see? Do you return to looking at it or something else?
  • What should be left out?
  • Which details are help tell the story?
  • Is the Light? Hard, Soft, Low Key High Key, Direction
  • Is there a way to balance the mass/tone. Avoid symmetry
  • What is the important Colour? Emotion? Atmosphere?
The best reason of all to have a sketch book in your camera bag is it forces you to look and find an image (not just focus on perfecting a crop in your viewfinder). An Artist has to see their subject and figure out where to put it on a blank page. You don’t have to spend long just a few squiggles will give you an idea of what to capture. This really seeing is likely to modify how you position the camera and take a photo, much better than just lifting the camera to your face and finding an image in the view finder.


Thursday, October 29, 2015

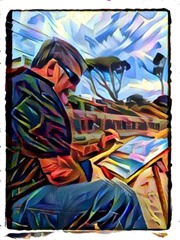
Creative Spaces :: The Plein-air Sketching Kit

the joys of plein-air painting I enjoy painting and sketching outside. Very little of this work gets directly into exhibition pieces but that’s not really my purpose. I find I do remember more and connect with a place more strongly when I have spent a little time sketching.

Over time my “sketching bag” has evolved to include more paints (watercolours and water soluble media) and brushes. If I use pencils they will probably be really soft (eg 4B or 6B) but I have begun to use ink pens more often. I’ve become a real fan of Derwent’s Inktense blocks.  Whilst charcoal is good for the studio, it can’t stand the travel and rough handling so I have found conte is way better.

I currently have two identical smaller re-purposed shoulder carry bags (handout from a tour group) and have them fitted out with similar basics. One is just a little more slimmed down than the other. Things get used up and I make occasional changes of what I consider is essential, particularly the surfaces I am painting/drawing on.The contents of the "Fatter" Sketching Bag & Accompanments Sometime I just have a basic sketch book, other times I might want good quality watercolour paper (ie > 300gsm) I pretty well always have one packed and ready to go. At the moment I have only the one folio to carry better quality media (ie individual watercolour or pastel papers) it also holds a drawing board that can be attached to a camera tripod, (see my tripod easel post), This normally travels with the larger kit which is logical as it has more watercolour paints.

Yes all that stuff does fit in the dark blue bag! Easily!

Wednesday, October 28, 2015

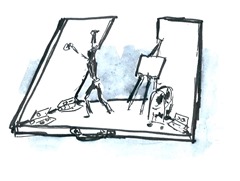
CreativeSpaces :: What is a “fold out” studio?

fold out studioIt’s really nothing fancy, “”fold out” studio is just my name for a portable workspace (and specifically the equipment and media for it). I have had a fair bit of practise in creating such a “portable” studio. One of my favourite places to create is in a place down the coast, a couple of hours drive. To use it I must include all I want in the back of the car (space is generally limited) and I need to be able to hand carry the bits, thus weight has also been a consideration.

I think it is reasonable to assume anywhere that can make a functional studio space is likely to already have a table (or desk), chair (or stool), access to water & power. From the car boot experience I like to have everything fit in a canvas style duffle Contents of my "fold out" Studio Duffle Bagbag or a couple of smaller carry bags. Fitting it all in a duffle bag also means when necessary it can easily become standard luggage for flying (ok not much room left for clothes).  It also needs to fit in the bottom shelf of my studio cupboard.

What I expect to be able to do it is is sketch, paint and also take or process (lots of) photos. I also want to be able to use my basic tool kit of photo management and post processing software (ie I need a computer and preferably access to the internet). I also prefer music (usually jazz) when I’m creating (I have an old IPod nano but I find my phone does just as well and I usually have a selection of music on the Laptop as well). Earbuds/headphones so I don't annoy others

So what goes in the Duffle Bag?
  • Sketching gear, Optionally [Plein-air Sketching Kit, or Portable Sketching Desk]
  • Painting media pencils, watercolour [Pastels,Acrylic]
  • Brush Roll(s)
  • Surfaces, Sketch books, good watercolour paper, Small “test” canvases
  • Light Drawing Board (fits into base width of Duffle Bag)
  • Folding Easel
  • Empty Trays and Containers
  • Old Towels (as Padding, Cleanup &/or Drop Cloth)
  • Power Board (not shown)
Other Items Hand Carried.
  • Android Phone (LG 7L)
  • DSLR Camera (usually my Pentax K20D)
  • Laptop (Toshiba)
  • USB Backpack Harddrive (for backup, extra music)
  • WiFi Modem
  • Battery chargers

Tuesday, October 27, 2015

CreativeSpace ::Time for a Change

An optimistic view of my studio Whilst I have the luxury of a Home Office and a separate Studio. They are significantly different places with different meaning. The office is the place to work and I can leave the work behind when I leave the room. Creativity doesn’t work that way, it just happens and is difficult to turn on and off. The environment has a lot more sway in the creative process than most folk appreciate. Unfortunately my studio has succumbed (or more precisely keeps succumbing) to clutter. A stained glass filter from Dreamscope might make it look inspiring but all the junk it hides makes it hard to just sit down and create. So how to fix it?

When I really though about it I don’t limit my creative spirit to the studio anyway. I have different places where I do find inspiration and focus to create. Some are handy, a few steps away, some take time and effort  to travel to. So before cleaning up my studio yet again I spent some time contemplating these places and what I need in those locations. Being in the right place at the right time is difficult but being there with the right tools is more important. So I’ve spent some time thinking about what might be that right tool. Is it just a sketch book, a camera (smartphone maybe but would a DSLR  be better?). Mind map of my creative spacesWhat about colour, watercolour, pastel or camera again? Do I need computer tools?

This let me group my work and media into the places it may be useful, not the place I tend to dump it (ie not the table or floor of my studio). Not only was this interesting it refreshed my thinking about what I need and always having it ready. This journey will make a nice set of blog posts so stay tuned.
My objective for the next few years is to seek out artistic residences that I can both learn from and perhaps return a little extra new knowledge back into their community. Having myself prepared to create in other spaces is an important first step.

Monday, October 26, 2015

PhotoProject :: One Image Three Ways

Sometimes it is worth taking one image and processing it in a variety of ways. Yesterday sunset was very memorable. Here I firstly have a Raw image processed in Lightroom (just of tone & colour balance). Next is a bracketted set made into a tonemapped HDR using Aftershot Pro, Finally I have used a Dreamscope filter.
RAW Image postprocessed in LightroomHDR created in Aftershot HDRAngel Hair Filter from Dreamscope

Thursday, October 22, 2015

Discovering the simple elegance in chromecast-ing

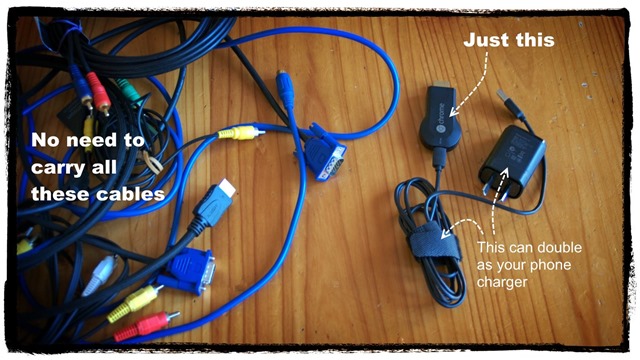
I must admit I had been ignoring Apple TV, streaming, chrome casting and such. Unlike the supposed typical Australian net user I don’t use such technology to download pirate videos of the lastest TV show from the USA. So I am late coming to the wonderful little chromecast dongle. Rather than playing with streaming video, I came across the wonders of the chrome cast as a way to avoid cables and incompatibilities when giving a presentation (or training session) directly from my computer. What it can do is allow you to throw your screen onto any modern TV and most data projectors without a cable. Thus avoiding resetting screen resolution, cables not long enough or other such hassles. The TV, Big screen or projector just needs a HDMI input and most recent equipment will come with this. You just plug in the chromecast dongle into the HDMI socket (it generally needs to be connected to separate power supply, a charger is supplied with the dongle but any powered USB port is fine). No need for a bag of extra speciality cables

There is a downside, you need to have WiFi, both to set up the the chrome cast at a new location and carry the stream from your screen during the presentation. Most venues these days do have internet & WiFi but if they don’t and If you have a smartphone that can create a local hotspot that will be fine for running a powerpoint or a live demo of software. Perfect for a travelling trainer. However it could be a very expensive way to stream cast a full movie from somewhere else on the internet, depending on your phones data package.

You can broadcast from your phone or tablet via special apps, and you probably already have some of these. For example the You Tube app on android will direct the YouTube clip to your chromecast, no need to download it first. Google Slides, can make a slide show presentation located on google drive directly controlled from your from your phone (and yes it can read powerpoint files). The real power lies in the ability to send the contents of any chrome browser tab, to the chromecast, and thus big screen it is connected to. The current version also has the ability to send an application output or your entire screen (these later options are in beta release and can be a little laggy at times). So as long as you have a chrome browser you can send anything you can get on your PC screen onto a larger presentation stage. All without any fuss.

I also like the backdrop (aka screen wallpaper) settings on the unit which lets you use your own pictures from Google Photos, Flickr (or facebook if you must) or just stick with the google selected photo as a slideshow screen saver.

Monday, October 12, 2015

PhotoEditingTools :: HDR well After the fact

 The unprocessed Bracketedv Set of Photos

IMGP7994_HDR VersionSome time ago I used to take 5 photos in my bracketed sets. I was experimenting with different EV steps and this set remained unprocessed. Further these are all jpeg not RAW. Its not a gripping image but has a little potential as an abstract composition. I came aross the set when I was checking through my photos and thought I should give Aftershot Pro”s HDR merge a try out with 5 images rather than just 3. There was no need to worry it worked perfectly. The only item of note was, it is very important to run the feature based align when you are merging 5 hand held images, but Aftershot did a great job.

Not yet a great photo but a pleasing improvement none the less, much closer to what I feel I would have seen and attracted me to take the photo. These days I normally only take three photos but 1.5 EV apart and in RAW on my Pentax and 3 photos 2 EV apart on my Canon. There is lots of well meaning advice of the right settings for HDR, most of it apparently given with authority but totally prescriptive and usually without explanation. If you have decent software I suggest you experiment for yourself and find those settings that best suit you and your camera, and be gentle with the sliders during tone mapping (aka avoid the lurid colours).

Sunday, October 11, 2015

PhotoFriday :: My Favourite Location (this year)

_IGP9542-Jells Park
My all time favourite photographic location is still probably South Walkerville, but over the past year I have been taking a lot of photos just down the road in Jells Park. The scenery may not be  world shattering but I am enjoying capturing the migrating birds, the subtle changes of light and reflections.


For PhotoFriday‘s topic My Favourite Location