Showing posts with label On1PhotoRAW. Show all posts

Friday, August 18, 2023

The hyper-real, as a replacement for our photographs?


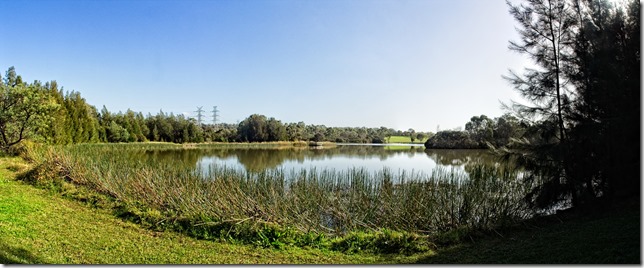
I was out scouting for my last photowalk, on a bright winters day with virtually no breeze. The Jells Park lake was forming a beautiful mirror with strong reflections. I am also testing out the new Skylum Neo extension for creating a multi-image stitched panorama, its nice and much faster than the stitching routine I'm currently using in ON1 Photo RAW.

Things are changing fast in generative AIart all the time and I was also testing out the latest version of Stable Diffusion (model SDXL 1.0) on Nightcafe studio and thought a sunny winter's scene like the above would make a good test. I used the text prompt -

"bright winter blue sky, some clouds over a still lake with strong reflection, yellow ochre grasses in foreground, Professional photography, natural lighting, shot on micro four third digital camera sharp focus"


With the above photo being given the defaults of a 50% Prompt Weight and 50% Noise Weight as the starting diffusion image for the generative process.

Certainly the capabilities of these generative AI systems has become really great, the detail is definitely starp and the reflections undoubted strong. However is it just a bit disturbingly too much on the hyper-real side?

"Hyper-real: More real than reality..." Brookes Jensen, Lenswork PodcastLW1362 - The End of the Trail, Sort Of

Sunday, March 10, 2019

Revisiting & Extending my Photographic Punctuation Marks

Its been a while since I wrote about the idea of including pictorial punctuation marks in my camera’s photostream. It much handier (pun intended) than taking notes or trusting memory. As I’m taking more and more group image sets this is a very easy way to find and group like images just in the thumbnail view (eg PhotoMechanic as I load the photos where I can colour code them accordingly or in OnOne Photo RAW where I like to group Stitched Panoramas, HDR and Focus Stacked sets in their own sub–directories). This avoids a lot of wasted time churning thorough a mountain of similar images, and keeps things a little better organised.

Think of these first the hand signals as visual brackets


Panoramic Sequence, and direction of shooting. I still don’t use this all the time, because a panoramic series is usually pretty self explanatory. When I have used this I will add this marker photo before the panoramic sequence is shot. I further identify the stitched panorama series with a Green Colour Class


 HDR Bracketed Sequence, I use this to indicate I am taking 3 or 5 a photo sequence. This is another punctuation marker that I normally use to precede a sequence. I usually don’t bother put this in front of every HDR set in a continuous series (such as combined HDR and Stitch Panorama because it is relatively easy to find the groupings). I then use the Yellow Colour Class to easily identify the HDR sequences.


Focus Staking. or other multi-bracket techniques. This is a new marker because it can be very difficult to discern the beginning and/or end of focus bracketed sequences when more that two or three shots are involved. I have therefore adopted the approach of adding this at the end of each sequence. I use the Blue Colour Class to identify this type of bracketing.


I like to think of the next hand sigalns as simple punctuation marks  ; (=battery) . (=end)  ? (=cut)  ! (=good)

Battery Change, still my way of recording when I changes my battery, looking back through your photos and finding the previous battery change photo, then just subtracting the new photo number from the previous gives you the battery life in terms of number of shot per battery charge. On the Pentax DSLRs this can be weeks to months worth of shooting but on the mirrorless Olympus this is generally days to a week. Doing this let me work out I get around 750 photos from a single battery charge from my new Olympus OMD EM10iii, which is about double the claimed 330 shots.


Full Stop, End is a marker to end one series or starts another. I used this often for a variety of breaks or just simple visual markers to aid looking through a large collection.


Cut, not something I use much, but I have used this simple bit of sign language to remind myself that the previous photos should be deleted. I never just flag photos to be deleted I immediately delete them as soon as they are loaded onto my computer, I also delete this marker.


Good, another new punctuation mark just to remind me that close to this marker is a photo I liked at the time, maybe good light, composition or just that perfect moment.

Whilst I normally take both Jpeg & RAW, I usually delete the larger RAW version of any punctuation photos, as I never intend to post process them.

Wednesday, October 31, 2018

Merging for HDR :: On1 Photo RAW 2018.5 .vs. AuroraHDR 2019

The photos on the track also gave me a some clearly high dynamic range scenes to compare the two HDR merging applications I currently like.  I began with a set of 5 bracketed photos (-1.3EV, -0.7EV, 0.0EV, +0.7EV,+ 1.3EV) and used the RAW versions on these (shown below is the unaltered jpegs straight out of the camera)

PA300155PA300156PA300154PA300157PA300158

I then merged into both packages using the align image and de-ghosting options in both systems. The On1 version being faster to get to the basic higher dynamic range image (with a generic tone map) which you can pick that up and do further tone and colour refinement as desired. As noted previously the new version of aurora actually refines the individual input brackets using an AI guided system (called by Skylum their Quantum HDR engine) , which takes longer to get to the default tone mapped image. However that default tone map is somewhat optimized to the features of the underlying image. The results where just cropped, but in the case of the AuroaHDR image also vertically transformed to avoid the converging of the tree tops.

Merged with ON1 PHOTO RAW 2018.5Merged with Aurora HDR 2019

The results are both fine, but which is better? The photo on the left comes from On1 Photo RAW and it definitely has done a magnificent job with the shadow detail however it is a little flat compared with the Aurora HDR on the right, which has stronger contrast and slightly more vivid colour. I’m sure I could easily further adjust the On1 Photo RAW output to also show stronger contrast and colour but for now I’m happy with both but Aurora being the new toy has become my favourite. Of course Aurora HDR can not stitch panoramas.

It is worth mentioning that my version of Aurora has been recently updated to version AuroraHDR 2019, whereas my version of ON1 Photo RAW is still version 2018.5

The Big Vert-a-rama

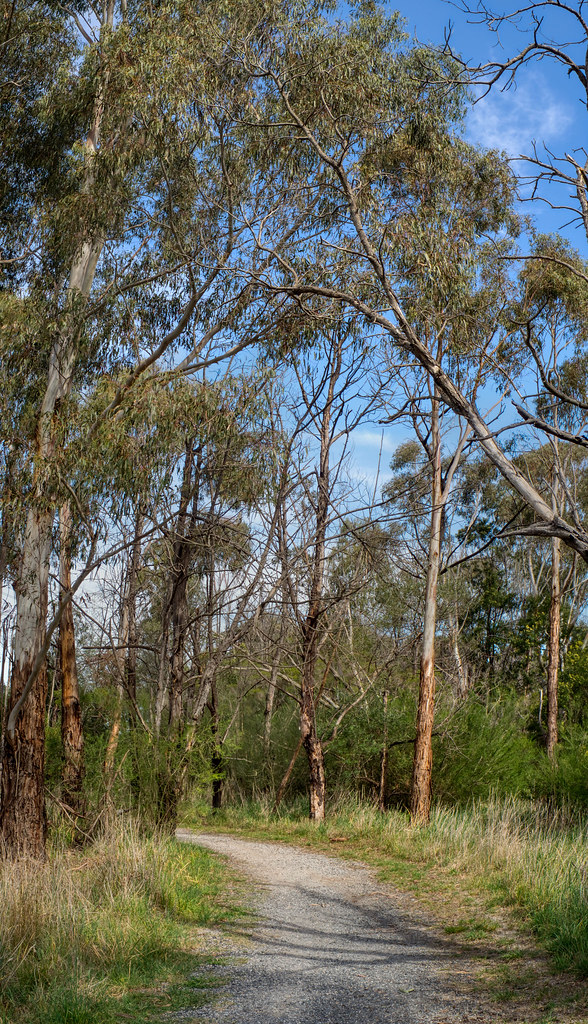
Stands of Gum trees can be hard to photograph because they are so tall. Also I was looking for examples of this isssue of showing verticality for my up coming sketch crawl (in the context of David Hockney’s observations on photography and seeing for his bigger picture series).

pencil sketch of grass seedsIn front of me on the track I was meandering along (actually doing detailed sketches, like these on the right). I looked up and in the strong Australian afternoon light was typical challenging composition, the understory in shadow, very tall straight trunks, some almost white in full sun others dark in shadow but the canopy just lacy against the deep blue sky. I know a single exposure is a recipe for blown out sky and/or blown out shadows. So I grab my little Olympus switched over to multi-bracketed exposure. I’ve been really pushing hard against Aurora HDR 2019 and hitting it with 5 exposures (-1.3EV, -0.7EV,  O.OEV, +0.7EV, +1.3EV), to see if their was notable differences in the image quality (not so noticeable in detail but possibly there is in better colour rendition) Then I did three “compositions” the path and understory the top of the understory and tree trunks and finally up above into the canopy.  Rather than holding the camera to a given exposure/ISO regime I left it in automatic so the average exposure could suit the section of image being photographed. So I had 15 exposures (saved in both Jpeg & RAW formats ie 30 files). I used the RAW files in Aurora, to start with higher dynamic range.

PA300176PA300177PA300175PA300178PA300179

PA300171PA300172PA300170PA300173PA300174

PA300166PA300167PA300165PA300168PA300169

First I ran each set of bracketed exposures through Aurora HDR 2019 and save the default tone mapped image (ie no tonal tweaking or use of “looks” (presets). So far so good. I saved them as as both .tiff (to keep the extra bit depth of colour) and Jpeg (sRGB) to show here.

PA300165aurPA300170aurPA300175aur

Finally I assembled the three tiff files using On1 Photo RAW 2018.5. I did a little rotation and cropping and exported the full image (now 4079by7105 pixel) but no other edits now as a final jpeg (back to sRGB). There is great detail in the understory and also a nice blue (not overblown sky). This combination has worked well, below is a link to the image on flickr which is the full resolution (click on it to view in flickr)

The Big Vertarama

Saturday, May 26, 2018

The Tale of Three Panoramas

Originally I was planning to put the Olympus Camera Panorama “feature” through its paces. Well to cut a short story shorter, the panorama feature in my new M10ii doesn’t stitch the images in camera. It just gives you guide lines to follow. So I abandoned try he feature further and decided to test the stitching of images with different lenses and different camera orientations.

Rather than falling back on my favourite panorama stitcher AUTOSTITCH I decided to do all the post processing in On1 Photo RAW, mainly because it seems to handle the Olympus .orf RAW files best.

TESTING LENSESTESTING LENSES

I’ll begin with the simple panorama, just two images shot semi wide with 14mm ( Jpegs shown above straight from camera). Notice the images are exposed differently. I then used the .orf files and began by stitching them, then I took the result into the On1 develop, adjusted the horizon slightly and did a little tonal tweaking. Finally I took the adjusted but barely post processed panorama into the Dynamic Contrast setting in Effect module via the Natural “filter”. The results are pretty reasonable.

TESTING LENSES

Next I turned the camera vertically, added my circular polarizing filter and took 7 overlapping photos of roughly the same scene. I post processed this in On1 Raw following the same steps. Another decent panorama, much bigger and possibly a stronger image (because I include the strong darks of the trees on the right.

TESTING LENSES

For the last panorama I took 15 photos with an 75mm telephoto and undertook the same steps as the previous two panorama. This took a lot longer and created a massive file 26480x3970 (1,154.MB). It so wide I doubt I ever want to get it printed BUT it is massively detailed. I’ve done it now and may never do it again yet I now know how to do it.

TESTING LENSES