Thursday, September 27, 2018

B is for Burst mode

I haven’t really had the opportunity to test out my higher rate burst mode (continuous shooting) on the Olympus OMD EM10iii. Mainly I had not been in the desirable position of the sun behind me and a cross wind so any birds where taking off while they fly past as I panned. The magic happened late yesterday. Well the camera performed well.

OLYMPUS DIGITAL CAMERA         OLYMPUS DIGITAL CAMERA         OLYMPUS DIGITAL CAMERA

OLYMPUS DIGITAL CAMERA         OLYMPUS DIGITAL CAMERA         OLYMPUS DIGITAL CAMERA

OLYMPUS DIGITAL CAMERA         OLYMPUS DIGITAL CAMERA         OLYMPUS DIGITAL CAMERA

I was shooting in RAW+jpeg and I got the above sequence in a little under two seconds. Not exactly 8fps as claimed but it does give a great range of the full graceful wing movement of a bird in flight. I’ve cropped in a little on the RAW versions, not perfect but I am impressed.

Wednesday, September 26, 2018

More on Photographing Art … with a Cameraphone

Anne-Laure Jacquart of “following the White Rabbit” on you tube has a couple of quirky but easy to follow video guides on the important steps using a cameraphone to photograph and post process your art (eg tidy up, straighten etc) and it is primarily oriented to getting your art looking its best when to posting on instagram or other social platforms.

It is worth following her around her flat and her fast french accented delivery, particularly how to best use natural daylight, where to find the good light and avoiding distortion by holding the camera parallel to the art. Lots of god advice explained by doing it.

In this second video she demonstrates the adjustments using snapseed, which can still be downloaded for free from both Itunes store and google play. (If you don’t have it yet now is a good time to try it out). However the steps can be applied is most image or photo editors around today,

I

If you are into watercolours and/or urban sketching, or just eed to get a creativity boost follow Anne-Laure on Instagram &/or YouTube

Tuesday, September 25, 2018

Could AI help Photographing Art

imageWell after all it is my new “toy”, sorry I should have said tool. Will AI (Artificial Intelligence) be of help when photographing art?

I have found that photolemur generally does better on the olympus RAW (.orf) files, and as I generally take RAW + jpeg I did have a RAW version of my multimedia sketch (I’d used in the previous comparison).

And It did! The creases are a consequence on my folding the original A3 to get the sketch to fit on my A4 scanner. Otherwise we are getting much much closer to the original,  improvement id exposure and colour rendering but not perfect reproduction yet.

Camera RAW Enhanced by PhotoLemur


Looking at Photographing Art Works (again)

I have known for a while that my conventional flatbed printer/scanner doesn’t do a particularly good job of photographing coloured art works. (BTW Its fine for ink line drawings such as cartoons)

Last night I went to a great talk by Wayne Degenhardt at the Watercolour Society of Victoria, about Photographing Art. This inspired me to take some photos of my multimedia sketch I created at the Discover Nature through Drawing workshop last week, because I was a little disappointed with the scan, it was flat and very pale.

drawing on nature - As scanneddrawing on nature - As photographed on my phone

drawing on nature - As photographed on my HP tabletdrawing on nature - As photographed on my olympus camera

The results shocked me!

I haven’t gone to a lot of trouble to make this a scientific comparison, the cropping and rotation are inconsistent for a start. Further, the results are all jpegs, straight out of camera with only cropping but importantly all taken under the same lighting conditions. Upper left is the conventional scan (on a HP 8110 Photosmart printer) The apper left is my Android HTC 11 Cameraphone. The lower left is camera on my HP Spectre Tablet. The lower right is the jpeg from my Olympus OMD EM10iii.

So which is best?  Well, none really! If I had to choose one it would be the cameraphone but i’d have to lighten and correct the colour f the background. I can see further investigation is required here.

Monday, September 24, 2018

How close is too close?

I had a great opportunity yesterday while walking on the wall of the Cardinia Reservoir to  test out the reach of  my new olympus OMD EM10iii camera, using just two lenses (14-150mm and 75 to 300mm) and a multi-image stitched panorama.

Appparent fisheye style Wide Angle using 6 vertical photos at 14mm

42mm  (slight telephoto)150mm (super zoom with 2x setting)

Sunday, September 23, 2018

More Flavours of HDR vs AI enhanced

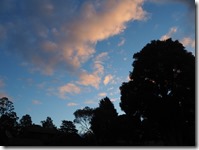
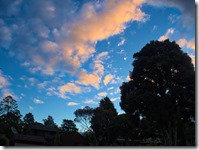
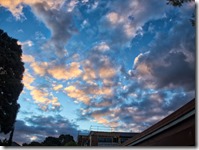
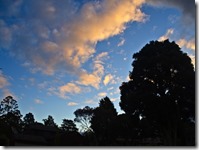
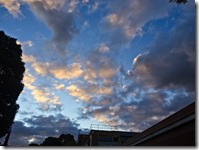
Sunset is a time that it can be difficult to capture a decent (and appropriate) dynamic range (tonal levels) of light. Bracketed exposures are a great way to ensure you get a decent exposure and taking this into traditional HDR merging and tone mapping will usually guarantee a decent picture. Finally how does this compare with my new software toy application PhotoLemur (aka AI enhancer). Is the extra effort worthwhile?

This first row are the original photos (The EV=0 image as a jpeg)
OLYMPUS DIGITAL CAMERAOLYMPUS DIGITAL CAMERAOLYMPUS DIGITAL CAMERA

This second line are the results from processing three bracketed photo through my current favoured HDR application Aurora HDR, using just the default tone mapping and Realistic Balance preset as a start, then small tonal and colour tweaks.
P9230002aP9230008aP9230011a

This third line was prepared with On1 Photo RAW’s new HDR merge which is pretty fast and the default tone mapping is realistic.
via On1 RAW HDRvia On1 RAW HDRvia On1 RAW HDR

This Fourth line is using the AfterShot pro 3 to merge and tome map, keeping the changes to minimal tone stretching and slight lift in vibrancies. This was once my preferred application and approach for HDR (as it was my only application to allow merging of RAW files) but I seldom use it now. It was a more involved process with reasonable amount of adjustment (“slider strain”) required if I don’t use their presets (which all have that “over baked” contrasty saturated look).
via AfterShot Pro HDRvia AfterShot Pro HDRvia AfterShot Pro HDR

Finally I ran the middle exposure (0 EV) RAW photo through PhotoLemur, and accepted the full enhancement.
P9230002P9230008P9230011

Once again the results differ but not dramatically and it is really a question of your personal preferences.

By the way, I actually would not consider PhotoLemur a “toy” application, because unlike a lot of other one click filters (or presets) it makes good adjustments decisions based on the photo being processed. All within a few seconds. Its a toy because I like to play with it, it still amazes me.

Will I just use Photo Lemur instead of doing a traditional HDR? No! (not yet)

Saturday, September 22, 2018

AI enhanced .vs. classic HDR

I’ve already commented that I am finding the jpeg straight out of my new Olympus camera fine for those quick uploads (eg instagram or email) where time is important. I also have Auroa HDR 2018 & now Photolemur 3.1 on my handy little HP spectre and both of these came give really great images from processing RAW files (.orf files) straight up with little intervention. So here I will to compare the three approaches.

Original

Photo

ISO 200 f11 1/320sec 42mm

3 Bracket

Photo HDR


PhotoLemur

AI Adjusted

P9220019 P9220019hdr P9220019
There are differences, however they are subtle. I do see the two images derived from the RAW files to show better detail and crisper colour rendering. It probably then gets down to personal preferences which you like best. The classic HDR required three bracketed images (here at 1 EV steps) and then some time to merge, align the photos, tone map the HDR version, and a couple of personal manual tweaks (in this case polarization to get a bluer sky and lifting the exposure a little at the bottom of the image) perhaps 2 minutes of editing, compared with the 10-15 seconds that PhotoLemur takes to do its magic (automatically). Both are fast enough to appear pretty instant but I probably still prefer to spend the extra time on the classic HDR approach (which includes taking the three bracketed photos)

Monday, September 10, 2018

PhotoProject :: Building a “Hand Drawn Photo” in 3 layers

I felt it was time to do something creative for this blog (and instagram). I had selected this photo of the young Osprey on the nest on the Mooloolaba spit to make a painting or perhaps a pastel drawing. However I felt it also need to be reinterpreted as a “hand draw photo” using a combination of rendering approaches.

Originl photo of the Osprey NestAI rendering of the photo using Abstract Nature trained filterClone painting made with an impressionist cloning brush

First I loaded the original photo into Google Deep Dream Generator and used the Abstract Nature trained AI filter. This created a darker rendering but I loved the strong blue colouring of the sky. Next I took this new version into Corel Painter as the work to base a clone painting using the artist impressionist clone brush and a linen surface texture and also emphasised warm colours or the plumage and nest.

"Hand Drawn Photo" of the Young Osprey on its Nest
For the Final Work (above) I used On1 Photo RAW and load the original photo as the base layer and the Clone painting as the second layer. Then I used soft light blending mode and used a semi-opacity masking, a lot like a homemade luminosity mask to bring out some of the original photo (eg almost 100% masking over the eye and beak, but variable 75% or lower on selected parts of the nest and feathers). I also lifted the vibrancy of the blue and yellow/oranges a fraction to give me a strong complimentary colour feel. Finally I cropped in a little to add a bit more drama to the composition.

Friday, September 07, 2018

National (Australia) Threatened Species Day

This was a bit of serendipity, I happened across the egret in a billabong beside the Jells Park Lake.

Egert in the billabong

Eastern Great Egret {Ardea Modesta Ardeidae]

Not a positive ID but the egret family generally are considered a threatened species, so a perfect photos for #threatenedspeciesday


OLYMPUS DIGITAL CAMERAOLYMPUS DIGITAL CAMERAOLYMPUS DIGITAL CAMERA

Sunday, September 02, 2018

Is PhotoLemur really an Automatic Fixer?

Photolemur, from Skylum, introduces itself as the world’s first fully automated photo enhancer powered by Artificial Intelligence. A big claim, and does it live up to the claim.
Maybe it Does!
image
It probably isn’t the total magic autofix app, that photographic postprocessing killer. However it is very neat and does a really wonderful job with exposure, tonal balancing and colour. It’s probably close to weaning me off the need for HDR to get photos that look like I remember the light was when I took the photo. P8290027Having said that there is one feature that is sure to appeal to those that avoid post processing photos. There is only one button (the export) and one slider (the paint brush dot), which activates  a nice screen width slider which allows you to control the amount of “boost” from the the original to fully enhanced. I would love to understand how the AI works in detail and I don’t yet, but I am impressed this is a significant step in the right direction. Specifically it is touch sceen friendly so perfect for my little HP spectre.
If you act fast you can get both a free trial (with the watermark) and/or buy it for a great preorder price today at PhotoLemur.