Thursday, October 05, 2017

Single Image HDR

Ibis against dark clouds


The new Aurora HDR 2018 for Windows can perform all its normal tone mapping on a single photo.The original for this was a bit over exposed (as you might expect for a largely white bird high in the sky). The default "HDR" was in fact very realistic, yes the clouds where that dark and threatening rain. So I only changes a few of the basic tonal slider and smoothed down the noise in the sky. Since this was only the fourth image I had processed in Aurora HDR 2018 so I'm impressed already, just a bit more to work out on defringing.

Monday, October 02, 2017

INKtober and now for something completely different

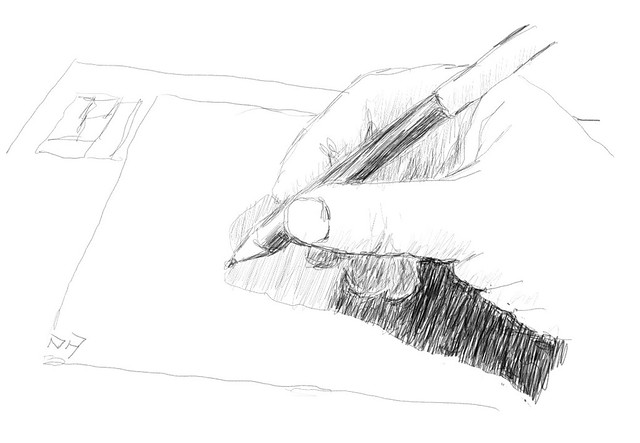
Day 1 pencil sketch of wacom tablet

October seems to be the month for Sketching, flickr are running INKtober (so expect my photofeed there to suddenly become drawings), the YouTube SketchBookSkool are running monthly sketching themes on Instagram (some background on @oz_endless_summer) and pastel artist Marla Baggetta is also recommending a month long sketchbook challenge.

Given that I was unable to keep up a year long daily sketch routine last year I figured I should at least give a one month of drawing & posting a reasonable chance. So expect less photos and more drawings, wish me luck and get drawing yourself.

Day2 the strawberry with watercolour washpreliminary pencil & ink

Sunday, October 01, 2017

Does Exposing to the Right make a difference?

Exposing to the right, isn’t magic and it not applicable everywhere.  Its a relative simple method (“trick” is not the right word) to help capture more light and reduce the underlying signal to noise ratio issues in lower tonal ranges. Whilst it can be applied in jpeg format, with lesser success, it really needs photos to be taken in RAW format, which records more detail and  give the capacity to adjust tones with suitable post processing software for the “finished” photo. It also helps to have a digital camera that can display a histogram (of the light illumination levels) on the back of the camera.

Just a word of warning there is a lot of rubbish written about exposing to the right that will come up early in google searches. If you read this post and try it out for yourself you will realise that it isn’t a hoax or a myth (they are just BS, Fake news)

The other requirement before you can exploit exposing to the right, is having an image with some “head room” in the histogram to increase the exposure without hitting the dreaded white clipping. Once your sensor fills with photons to its maximum, no extra detail can be captures. in 8-bit RGB terms you have reach 255 level in each colour channel. The histogram will be hard up against the right hand edge (see lower right of the examples below). If your camera has the settings you can turn on the feature to show this clipping. They are frequently displayed by blinking zones of colour usually referred to as the “blinkies”.

Originial Exposure Exposing to the right +1 EV Blinkies, opps too far +2EV

I took this series of photo on the way home, trying to beat a storm, the new growth on the oak trees looks photo worthy so I stopped for a quick shot. The sky was darkening and the trees largely in shadow so I got a typical result (photo above left) with what appeared to be an reasonably exposed sky and most of the foreground in deep shadow. Looking at the histogram the exposure is probably ok in terms of average illumination. There is very little  bright light recorded on the right hand side of the histogram. The photo on the left is just not what the scene looked like, it appears darker than what I saw. This is the type of situation where exposing to the right can help achieve a better image.

In my series I am using the exposure compensation to try letting in more light, but if your are shooting on a DSLR you can use any combination of ISO, F-stop or Shutter speed. Just changing f-stop by one stop doubles the light, change to +1.0 EV achieves the same. I have taken +1 Ev (the middle photo above) and +2 EV (The photo on the right above). Immediately I can see that the +2 EV option is too much I am clipping the sky and no matter how much darkening I try to perform it will remain pure white. The histogram for the center photo looks better the histogram is just touching the upper edge but now a lot of the illumination has moved to the upper right, This is what exposing to the right is trying to do. The trouble is, the photo looks overexposed, particularly in the sky.image

The important next step in the exposing to the right method is to post process (the center photo) to “pull back the tones”, particularly the whites & highlights, the sky in this case. I’m using lightroom and just the basic tonal sliders. I’ve moved the exposure slider back –1 (one stop),  highlights most of all, white & shadows less and blacks hardly at all. I have moved all slider to the left, darkening the tones. Essentially I’m reversing the lightening step I deliberately took in the camera, when using the +EV compensation. Avoid pressing Auto (tone) here because it will take you photo back to essentially the same as your first exposure. Just experiment with the sliders and remember “less is more”, be gentle don’ try and over do it.

The result (shown below) better captures both the sky and the shadow detail, with the important side benefit of reducing noise in the dark tones and making the colours and mid tones a little clearer (without having to use the clarity of vibrance sliders). It is definitely closer to what I saw.

Afternoon walk in Jells Park (before the storm)

It is also worth looking at a bit of the detail

Detail from original photo

An insert from the original photo shows some noise in the shadows and flatness in the mid tone details.

detail from tonally adjusted final photo

Similar insert of the tonally adjusted Photo that was originally exposed to the right, showing less noise in the darks and also better detail in mid tones and slightly richer colours.

With RAW it is also possible to also lift the tonal range, (ie lighten the darks/shadows) of the original but this will only increase the obvious noise.

Exposing to the right can be a rewarding approach if your shoot in RAW, and have access to good software for post processing. Try it out next time you see a photo with the “head room” in your histogram to up the exposure (and collect more light).

Tuesday, September 26, 2017

Matching GPS Log Files to Photos

When first trying out the GPS match up in photo mechanic from GPS wayfiles and my photos I was out of internet accessible areas and could not look at the result on a map. When I finally did get a chance to check things where out all over the place. A real mess. Since I had had massive issues trying to synch my phone and camera I figure that was the issue. And it was … just not a matter of synching the current time.

The real issue was the fact the google my tracks app which I use on my phones, actually stored the time stamp in UTC (univeral coordinated time) which most people know as Greenwich Mean Time or GMT. This is for the simple reason that satellite position is reference to this time standard. At the moment its 11 hours behind our local time here on the eastern side of Australia. Once I realise this (its not documented anywhere I could find) everything else about loading the GPS wayfile (in gpx format) and merging the coordinates to my photos in photo mechanic was easy.

image

I’m doing the gps merge straight after the ingest step. I have to export the gps wayfile from My Tracks app in .gpx format (and despite what the app says it does not reliably export to my google drive anymore), so this is now a two step dance, export to the card in the phone, connect the phone to my computer and up load the .gpx file into the same directory as the photos. I then run File/Import GPS coordinates… from the main drop down menu. Which starts the dialogue show above. There are just four things to do/check.

1) Press the little add button in the GPS log file dialogue up on the top left, and use the normal file browse to select the .gpx file. Then press the plot GPS logs (you can have several files being processed together) and this will display a map of your path on the right hand panel.

2) the next important place to set up and/or check is the GMT Offset of photos panel on the right below the Map panel. First time you use it either enter the difference in your local time to GMT (11 hours in my case). You can also try using the Auto, but it seems to match your first photo with the first way point, and often I start the gps tracking well before I photograph. So there can be a mismatch (as I discovered the hard way)

3) The small panel on the right will show the first photo and coordinates. If the photo is miss located because of time difference you can make those changes easily by clicking on the small + and – button over under the map. Each time you press the button it moves onto the next way point (the ++ give you bigger steps). You just need to move the blue pin along the way path till it reaches the correct spot. you will also notice that the time offset is being changed in accordance with the shift. You can also step through the photos using the -> arrow keys below the photo in the panel on the lower right. Despite my best efforts to synchronise everything one camera is 4 minutes 30 slow the other 1 minute 25 seconds fast. These time difference make a difference even at m walking speeds. The time differences are “sticky” and show up next time you import more coordinates. So after a few ingest the small shifts are usually not required.

4) The last step is to click the Import GPS coordinates button in the lower right hand panel.

The whole process usually only takes less than a minute.

In the past I found picasa a reasonable way to review photo location for .jpeg files. Even Microsoft photo will display a map for an individual photo once it has lat and log coordinates. However I have had very mixed results trying to use Lightroom (it will read the coordinates from the way files and do a merge with photos but very often refuses to display map backgrounds so it a bit impossible to check and got it wrong more often than not. I had used a special apps such as geotag and geo tracker to do the merge but that was also tedious and error prone, so I had got used to only occasionally bothering to geotag a sample batch. Just manually locating a few photo in Flickr, when appropriate.

The new approach with photo mechanic is so quick and easy I am doing it routinely again. I’m even going back and redoing a few of those batches of the photos in the past for which I still do have gps wayfiles. Geotagging is back on my agenda

Monday, September 18, 2017

Photowalk & Replacing an old reliable companion

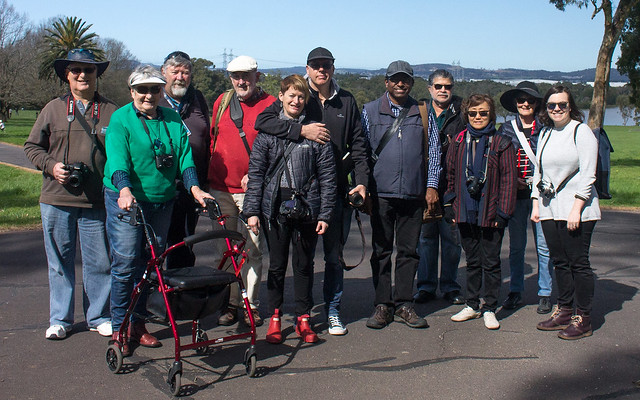
Jells Park PhotoWalk :: A sense of Place

As I packed up from taking this group photo of those that went on my first Jells Park Photo walk. A light breeze and a stray camera strap caught my old travel tripod and it just fell apart. Luckily the camera was in my hand. Its not the first time the very light tripod has collapsed or blown over, The poor thing is 13 years old now and has one foot replaced by a champagne cork, a broken leg lock and a winder ratchet that something drops a few inches or slowly slips down. Its saving grace that it has never actually caused damage to any of my cameras and it really light and compact. It can be put in my case when travelling  or in the back of my car. When really needed it was usually at hand. It was a reliable friend. Yet fall apart in a light breeze isn’t exactly being reliable.

New & Old Tripods

I hadn’t planned such a sudden change but I noticed essentially the same model out the front on special in JB HiFi and a very reasonable price. It is still Aluminimu, not carbon fibre, lighter, smaller and extends higher. I’m sure my old friend, the silver model, can retire quietly without any incident.

Thursday, September 14, 2017

Wednesday, September 13, 2017

Cleaning up the Gear Shelf

I have a shelf in my studio that I keep my camera gear (that I am not using). The gear I’m using is usually in one of three camera bags. It has become full of stuff (mainly empty boxes). So I decided to get rid of the really broken stuff, some of the broken stuff could be repaired and/or has sentimental value (like my first spotmatic) so it can stay. I’ve put a lot of older lenses back in their boxes and thrown out boxes that don’t match up to gear. I’ve keep a couple of camera sleaves/covers but damaged and cameras bags are going. I will keep the boxes of my working gear as that might help resale. I have created a lot of space! This reduced my cameras to just 7. Four Pentax (the original spotmatic hasn’t worked for years), leaving a 35mm film and two digitals K100D & K20D) Two canon, a compact 35m film camera and a Canon EOS digital Rebel. Finally a much loved Olympus digital compact (till works fine but the card reader is now very unreliable).

Pentax Cameras

Given that this range of camera gear has covered my photography well since 1970, I’m pretty happy that I’m getting good use of what I have. Ok I don’t take 35mm film anymore, but I could if I really wanted to. The important part is I have not been chasing the shinny new things really focussing on what works for me. I do have an affinity (or maybe muscle memory for the Pentax cameras, But really I just loved their colour capture back in the 35mm silde days and like their colour capture now.

Canon Cameras  Olympus Compact Camera

I haven’t got into micro four thirds or Mirrorless cameras, which doesn’t mean I won’t, I and just still happy with what I have. I will resist the urge to fill the clear space I created. Well until there is a compelling case to do so. Yet I wonder what my collection of cameras might be like 46 years from now?

FYI: If you have any camera that takes batteries and you are storing or not using it it for a while (eg 3months plus) take the batteries out (this is what kill my original pentax Spotmatic). Used batteries tend to leak strong and corrosive acid and salts.

Monday, September 11, 2017

On a Bright Day

_IGP3927lum

Experimenting with a long lens for macro photos (in my garden). Unlike portraits flowers can still look beautiful in the harsh Australian sun

Sunday, September 10, 2017

Why aren’t you Celebrating this?

Alvin wans to know why

Alvin : Wow why aren’t you celebrating 200k views?

Me: I know I know if I only had a $1 for each view.

Alvin {Thinks}: Be real even 1c would be OK.

Alvin :  So why don’t you have Ads?

Me:  No simple answer there. First I don’t like pop ups and Ads. Second I did try to monetize the blog with the Google's AdSense but I was disapproved (for a strange reason? My blog was considered unsuitable!). At the time a troll/lowlife was skimming off my blog posts and posting them unaltered on a site that looked like a legit camera review web site and it had Google AdSense ads  but it the content all totally fake (thanks to copyscape for helping in this research) . However Google was clearly paying him for my content. Didn't seem fair at the time. After a lot of investigation and DCMA notices, with the troll changing the countries hosting his rip-off website many times the hassle eventually stopped. I also wrote to google many times during this period via links in blogger and forums but never once got an answer back about why I was considered unsuitable. So I just lost interest.

Alvin: Ok makes sense but why are you still blogging?

Me: Good Question. I must like it.

Alvin: You mean a fun way to waste your time then? What happened to your enjoying the social media silence?

Me: No comment

Saturday, September 09, 2017

Big Celebration

_IGP3458

A brand new day :: Kimberley Coast

Its an important day my beloved HP Spectre has come home with a new screen (sadly the previous screen got cracked in my previous travels). I must admit I had become very used to tablet mode and speediness of the little computer with not a lot on it. Welcome home my little friend.

Thursday, September 07, 2017

The Second Shooter

_IGP3820

I had though a lot about which camera (or camera body) to take as my backup on my Kimberley Cruise, the latest of my Endless Summer trips. The logical choice was my old Pentax K100 body, if was just for backup and it takes the other lenses I was carrying. In the past an important aspects is it takes 4 standard AA batteries (which can be bought almost anywhere, even on cruise boats!), if power to recharge batteries wasn’t available. I carry spare recharged batteries and they last several days so that is seldom and issue. Instead I choose to take my trusty old Canon Rebel (EOS 1100D), which was basically my work camera used in mines and for making training videos (it has decent quality video except for the sound). Its pretty light and plastic and whilst I have had two lenses fail it has taken the rough and tumble well. With a small zip bag of accessories I planned to put in my art kit backpack. Storing it, with lenses detached, in my computer backpack on airline flights. Well that was the theory.

This last minute inclusion became my main camera in a lot of situations. The reason was a cheap wrist strap and sling system I bought just before the trip. I love the wrist strap! I have always hated the camera maker supplied neck straps! What proved invaluable clambering over rocks, landing on mudflats and beaches in the Kimberley was the over shoulder sling. Just a word of warning to use this style of sling you must be happy for the camera to hang upside down at your side. This leaves your hands free to do the climbing and support stuff with the camera with the lens aligned beside you body just above your hip is safely out of the action (you should adjust to find the safest most comfortable spot using the clips on the strap accordingly).  Rather than sticking out in front of your chest, which in many situations is in harms way. I tended to leave my bulkier Pentax in its camera bag, which was awkward and sometimes inconvenient in rock hoping situations. It was thus left behind in many landings and zodiac trips. The camera and I where safe hanging on my side but I could also quickly grab the camera in one hand, lift it to my eye focus and take a photo. With the result that a lot of my better photos where taken with this second shooter.

Wednesday, September 06, 2017

Windows Beta of Luminar has reached 1.0.0

I have been testing the Luminar for Windows Alpha & Bets version for a while and they have clicked over from pre-release versions to version 1.0 so I’m expecting that they will be officially release very soon. The last updates are for specific tools, adding a radial mask and texture (tweaks to clarity & structure sliders). Without doubt the best filter is the Enhance AI filter with the Luminar before & after viwersingle boost slider (its magic, you have to try it out to appreciate its power) A lot of very ordinary photos will be quickly made impressive with this single click filter and single slider. If you are on a Apple Mac you can get the free trial now, and Windows user will have to register for the beta in the short term. Visit Macphun for the details.

However there are lots of other filters in Luminar made up of numerous common adjustment sliders. Rather than have to set the slider individually or use presets (like lightroom) you have pictures of how the adjustments will look on your photo (like OnOne & instagram). Here I thought I saw a great photo with the dusk sky out to sea reflected in a sheet of shiny stainless steel (A public sculpture on the Coolum board walk, referring back to the seaside fun parks).Well because of the extreme dynamic range the photo ended up insipient and flat (such is life). However loading it into luminar and skipping through the filters I found “Dull no more”, it looked a bit dark but closer to what I was trying to photograph. One click and I as 95% there. I just added a fraction more clarity and I was done.

Final Image

Luminar is currently a single image editor, it works with all the RAW & Tiff files I threw at it, but it doesn’t have a photo browser within it (ie it will not manage your photos). As a single file editor it really shines and gets the job done super fast.

Sunday, September 03, 2017

Jells Park Photo Walks :: A Sense of the Place

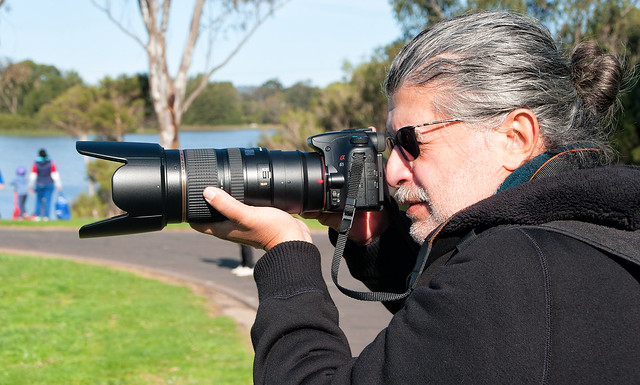
I just realised I haven’t posted anything about a series of free photowalks I will be hosting in Jells Park (over the next 10 months). The series of walks follow the notion of Photography with an Artist Eyes, so they are a little different. The first photowalk is only two week away and has the theme A Sense of the Place. The number of participants is limited to 20 and this first photowalk is almost full now. If you want to join the fun please register via Eventbrite at the link above.

Saturday, September 02, 2017

The Social Media Diet, that isn’t going so well

Alvin: "Where is Your Commitment"Alvin (aka my Social Media Diet Coach) is very disappointed with me. My social media posting hasn’t really reduced and I was travelling. He is particularly exasperated as I was off line for 10 days and still managed lots of posts. He claims I have become a social media glutton, that I might need to detox. He is threatening to change the passwords, or worse install apps that limit the time I can waste.

Secretly I enjoyed the silence, He is right but I won’t tell him that.


Me : "And I enjoyed it"

I dare not mention that rather than deleting software this month I’ve taken on two more packages. Photo Mechanic, which I won in a give away contest on Instagram (and I already like) and a public beta of Luminar for Windows (I also like it). Maybe I am truly a glutton? So ssssh!

Friday, September 01, 2017

Thursday, August 31, 2017

Refining the sketching pencil roll

1-IMG_5805

My collection of pencils and pens in my small pencil roll has move for all graphite pencils of various hardness to a few conventional graphite pencils HB to 6B range a couple of woodless pencils, a charcoal pencil a couple of clutch (mechanical) pencils, a sharpener and a water brush, as well as a small watercolour round. Whilst there is room to keep this in the outer pocket of my camera bag, I normally keep it in my smll art kit backpack

I also like to start new sketch books by drawing anything, usually something ordinary (and probably bad)  just to “break in” the book and avoid any feeling that it might become to precious to use. If its different to one you have used before turn to the back page and make a reference “colour chart” with you current media. Different papers make a big difference at the sketching level. This is a new A4 book spiral bound to see if I can avoid the falling apart in the wind problem with the conventionally “glue” bound sketch books.                                                                                

My Camera Bag Diet

1-IMG_5610
I’m not obsessive about my gear, but I do like it to be safely stowed, I have been very happy with my thinktank bag I bought last year for my trip to Canada. Even though its a Mirrorless Mover 30i it has plenty of room for my bulky Pentax K20 with my big tamron zoom and a 300mm zoom sigma lens, also on the large size. However I have been slowly trimming the ancillary stuff to give plenty of room for my sketcking gear. I have the mandatory clean small towels (aka face washers). I also have two lens cleaners, an old fashion blower brush and a lens pen. There is also a polarizing filter and a case for SD cards. I am rotating the SD cards, so there is a temporary backup of photos there as well as on the two external backup drive (back at my accommodation). I also have an old HTC phone that has no sim card but it has a good gps receiver so I just need to turn it on, start My Tracks and put it back in the camera bag to get a continuous wayfile. I also have my trusty but redesigned string monopod.

Art gear wise I still carry an A5 sketchbook, and a couple of pencils and/or pens, often a water brush style pen. And of course my small Cotman sketcher box. I am now even move convinced a sketckbook is a great camera accessory (for seeing).

Tuesday, August 29, 2017

Photo Mechanic Unplugged

There are certain disadvantages to learning new software away from the net, especially when the help system is on-line. Quickly realizing that I downloaded the Flat version of the help system as a pdf. It not exactly the same but I was able to find and answer to most queries. The next and probably the biggest draw back was I was out most of the days either travelling around on the boat’s tender, visiting remote island, or scrambling over rocks to visit cave painting site, walking along remote beaches or out spotting birds, crocodiles, whales, sharks, turtles and not to Example Photomechanic full screenmention getting some photos of sunrise and sunsets. In other words I was doing a lot and when back on the cruise vessel I was pretty much eating or sleeping which left precious little time to review and cull photos.

Still I had three cameras to upload (aka ingest in photo mechanic jargon). My favourite pentax, my old faithfully canon rebel, which I tended to use for wet beach landing and rock scrambling outing, just in case it got dropped, wet etc (which it didn’t) and finally the camera in my mobile phone. I must admit I could not get Photomechanic to ingest directly from my phone (a HTC UPlay) either with a cable or via wifi. There are generally only a few photos so copy copying them via a USB cable was fine. Actually I had two smartphones, even though there was no phone signal most of the trip. The oldest was used just simply as a GPS to collect wayfiles, I’d set it in the morning and put it in my camera bag (or backpack), The new phone I used used both with My Tracks to save a wayfiles and also with the default camera and location set to include geocode in the EXIF header, mainly for checking purposes. GPS logging is a pretty heavy battery drain om the phones so they often ran out of puff. So I went over to different morning and afternoon shifts on each phone for GPS tracking. I usually managed to upload every thing at least every second or third day and made a point of also running a backup to one of two external drives each time anything new was loaded, all simple to set up in Photomechanic.
Example Photomechanic Contact Sheet of ingested photos
Photo mechanic did make culling a lot quicker, but I couldn’t find an auto-advance setting (such as lightrooms) as I rated photos, I kept using my favourite 1, 2 Or 3 stars. However I could not use the press X for flag images to reject. These star rating are written to a .xmp sidecar files, so all the rating where useful in lightroom and AfterShotPro. Photomosaic tagging system works a bit different so I actually just used the keyboard delete key instead of a shartcut (it does also mean also doing a confirm delete each time). I will also admit that I had trouble doing selective transfer of files into lightroom if it was running. I tried both drag and drop and setting up lightroom as the external editor. However both attempts to work on the images in lightroom starts the import from disk function but without and files selected and as I had already culled I could just click on select all (and go have a coffee).

Whilst Photo mechanic process is fast, the step of just copying the photo files to the computer is actually not as fast as a straight system copy file, or Picasa or Aftershot Pro imports. They all loaded all the photos faster than the limited comparity Photomechanic testing I did. However what photo mechanic lets you do was start working on the first files loaded straight away, so you could begin your rating and culling quickly and didn’t have to wait for all the photos to be copied or loaded before beginning. This is a big deal if you have a lot of images to load (I was averaging 800 a day but had a 2,000 day in there). You can easily halve the time to load and rate your photos.

Other than the ingesting process and culling I didn’t really get to exercise photo mechanic a lot. I also have beta version of Luminar for windows on my PC but was not successful in opening an image directly from photo mechanic into Luminar, again I did have access to the on-line help for Luminar. The transfer to edit in AfterShot Pro worked beautifully but there is so much overlap in what the browser mode in AfterShop and Photomechanic do I probably wouldn’t be using them together.

Example PhotoMechanic GPS dialogueI was also very keen to get the GPS tagging running but ran into a series if unexpected issues. The synchronization of timing sounds simple but because the phones had no mobile signal they kept defaulting to different time zones (not “ship” time) and the camera let me change times (both have dual cloaks) but they too often just reset themselves to the base, my home, time. So figuring out time shift was a confusing and annoyingly repeated problem. A second contributing issue was the tools I had at my disposal to show the photos on a map (ie Photo mechanic, Picasa, lightroom and google earth all require and on-line connection) This meant even when I did merge the wayfiles and photos I could not check the location on a map. Recognizing this could lead to a lot of frustration I just gave up.

In the process of getting off the boat in Darwin the screen of my beloved little HP Spectre got cracked (no idea how) and the touch screen and pen functions have stopped working. So this has put an end to my investigation for the moment.

Sunday, August 27, 2017

Darwin Sunset ii
Dusk looking over to the Naval Base Darwin
I've been off the nest for over 10days now and Haven't missed it one bit. The noise of constantly being "connected" is very distracting but the peace and tranquilty to just enjoy theplace you are is wonderfull.

Saturday, August 05, 2017

Making Softer more Intelligent Filters

I have a long (aka deep) interest in the application of AI (artificially intelligent) techniques going back to the 1970s, it even survived the so called “AI Winter” of the late 90’s and 2000’s. It no surprise that I have been interested in the fairly recent Deep Dream applications to recognise style and transfer it to photographs. I have even, although slowly, warmed to “filters” that perform the magic of image enhancement (a lot of the early auto-fix buttons where and still are only half baked)

Trying to keep abreast of developments (and there a lot and they are fast), I noticed a very interesting presentation by Michaël Gharbi, a MIT researcher and also a keen photographer, at this years SIGGRAPH conference.

With this or similar apps I think you can expect smartphone technology to rival current expensive SLRs within the next couple of phone generations. However I think an intelligent camera just got a lot closer and  Michael has also been working on that also.

Thursday, August 03, 2017

Seeing inside the frame

I’ve happened upon on a couple of simple tools to really help you see the important aspects of tonal balance and composition. This approach is specifically for the analysis your existing photos, but the insight gained from using them to prepare some composition sketches is very enlightening and of majour benefit for your future photography. There may be some one click filters that undertake similar methods, but it is the act of doing these steps yourself that will not only improve your observational skills but with make looking for tonal balance an automatic habit.

The first step is too find a software tool, a simple photo editor, that will allow you to do the basic editing like lightening, darkening, [cropping]. It should also let you make a black and white version and possibly posterized versions. It is important that it can display the photo full screen (or as close to full screen as possible). In this case I am using Paint.net, which is a great little user supported editor. Once you understand what’s going on the process, I suggest you migrate to a non-destructive editor. I  played around in Luminar & Polarr , they are also easy to use and do the job required beautifully. Picasa, if you still have a copy, is also perfect and with the added advantage of scrolling through your collection and also rating the photos you like. Lightroom or AfterShot pro could even be used here, if you are already familiar with them (don’t get them just to do these steps, eperiment with something free to start).

image

Load up a photo you the are interested in analysing, I’m using the Day 5 photo from last week a Foggy Afternoon in Olinda. The next step is to make it black and white. I prefer to just remove all saturation, but any convert to black and white approach is fine. The next step is to have close your eyes and look for the shapes in just 5 tones. You can lighten or darken the image to get the balance better. Only use the contrast if you must. Controls that let you adjust the highlights or shadows independently are preferable to just altering overall contrast. Now display that image full screen. Only save this version if you want to and be careful to give it a different name if you are not using a non-destructive editor.

The second tool is a neat little sketching program, called mischief, which allows you to draw over the photo, as if on a light table. There are several expensive graphics programs that allow you do something similar to this via layers but they are complex to use and set up. Mischief by comparison is really intuitive to use,  infinitely scalable and is no more complex than putting a piece of tracing paper over your photo and grabbing a pencil.   So I strongly recommend you try these steps with it. Looking on the mischief web site you will see a free and a paid version, you only need the free version to follow my method.Notan test Mischief starts full screen and there are a few controls you need to become familiar with so I have already made an Anatomy of Mischief post back a bit in the blog. Next change the window background opacity (you can use the Ctrl+W keyboard shortcut or the toolbar). I find it helpful to make a little Notan legend of 4 greyscales tones somewhere on the edge. You can later use the eye dropper to pick these shades later as you work on your “tracing”. Using the marker brush (its the bottom brush in the free version brush palette) and make it fairly thick and 100% on the opacity slider. Now start colouring over all parts of you photo that have the same tone. This is a lot easier than you might think. If you paint over something and you can not really see where you painted you have got it right. If you can clearly see where you have made brush marks, its time to back off, erase those marks, or use the undo tool (CrtlZ)  Think of yourself as doodling in the shades. It doesn’t have to be perfect it is about training your hand eye coordination to almost do it in autopilot. Turning off and on the background transparency now and again lets you check your progress. You should avoid getting too detail but you need to cover the main tonal regions (and arrive at something like the sketch on the right.

Now is the time for the most interesting steps. First look for the main positive and/or negative shapes (pick a colour to outline them and outline simple geometric shapes).image In this case the subjects (the positive shapes, my dotted light blue outlines) are the dark shadowy trees and the negative space is the central column of light. The four dark positive shapes are a little asymmetrically balanced either side of that. This is a great start.

Next look for the high contrast edges (and lines). A viewers eyes will involuntarily flow along these high contrast paths paths, because that's what our vision does and our brains use this information to make sense of the image. The direction of the eye will usually be from less contrast towards more contrast along these edges/lines. Also the eye & brain love to play the lost and found found game (lost and found lines and edges is one of a painters secret tools). It is best if these paths can converge on a “sweat spot” or lead onto another path. It is very important that they don’t lead the viewer off the edge of the photo, particular at the corners of the image. If that happens you risk the viewer moving on, scrolling down or turning the page.

Study your tonal doodles and compositional squiggles with squinted eyes. Then close your eye for about 30 seconds and half open them again but follow a different path or focus on an alternate center of interest. Close and half open your eyes a few times until you are following the same paths to the same sweat spots.

Are these what you wanted to show when you took your photo?

You really don’t have to save any of this activity. Its more important that you do it, Doing it as if sketching develops your skill to accurately observe tone and understand composition at an innate level as opposed to following sets of rules. You will be starting to see with an artists eye.

If you have been using a non destructive editor, bring up the colour saturation again (close to the normal mid slider setting) leaving your tonal adjustments. You will probably be amazed, the photo is likely to look less washed out and the colours look more natural (closer to what you remembered when you took the photo).

Wednesday, August 02, 2017

Time for a Software & Social Media Diet

Alvin Lfe coachMoving most of my time and tasks, much of which is now Art & Photography oriented, to reorganised workspaces and computers was more tedious than I had expected. I had managed to accumulate a lot software applications and tools which looked interesting at the time but I haven’t used since. I have to admit I also have a few social media accounts that are collecting dust and/or pretty much ignored.

Rather than wait till new year and a big resolution setting time I figured now is the perfect mpment to go on a diet, stop feeding the empty social spaces and slim down the bloat inside my computers. I’ve enlisted Alvin as my life coach.

I sure hope he knows what he is doing?