Showing posts with label dark. Show all posts

Sunday, October 19, 2014

ThePatch :: Remembering Rembrandt

Whenever I hear of a low key portrait as a style, I think of Rembrandt Lighting, which is a very popular technique taught in studio lighting workshops involving two lights (sometimes one is a reflector). one light is a strong spot or key light and the other is diffuse just to fill in the shadow. The light arrangement is such that one half of the face is well lit and on the other side a small triangle of light illuminates the upper cheek below the eye. A purist interpretation is that the triangle be approximately the width of the eye, and length of the nose tall. It’s actually a modern invention nothing to do with Rembrandt approach, the effect just tends to look like his portraits (see the section Origin of photographic term in the wikipedia link above).

Rembrandt's studio todayI have been to Rembrandt's studio and he only has a row of windows on one-side, (there are heavy shutters to blank off the bottom windows and a bleached canvas blind hanging above an end window) So I suspect Rembrandt himself would probably fail the studio lighting work shop. What he definitely would not have failed is portraiture and particularly low key look  (ie where most of the tonal range is in the darker tonnes) Some of his deep A bit too theatricalrichness may have come with the age of his painting (most are now over 350 years old) but if you have every seen the original of his portarit paintings (such as his 1659 self-portrait) I’m sure you will recognise the fresh feel and emotional connection.

I quickly dropped the theatrics of trying to be visably arty, and just focussed on a natural lighting from a single window. I had to add a dark backdrop and use a white sheet of paper as a diffuse reflector on the righthand side.  With my camera on a tripod and set with a timer on the shutter, it was then only a matter of adjusting aperture (first) and then ISO/speed to get the right low key exposure. A little further adjustment to warm the shadows (raw umber-fy) and adjust the black clipping point in lightroom to avoid too much gloom. Unfortunately I can be seen more worried about the shutter timer working than trying to look artistic. But it is a decent selfportrait.


Friday, May 03, 2013

Thursday, November 23, 2006

Dark subjects

From past experience I know that taking a good photo of dark subjects can be difficult, with modern automatic digital cameras. The technical explanation is to do with the cameras automatic light meter, it is trying to average the exposure over the image to match an average grey. However some subjects, such as rocks, dark skins and even low level light are just a much darker overall tone. The result is, the camera will choose a setting that tends to over exposed the photo, because the camera is actually trying to lighten this darker tone by taking a longer exposure This gives the resulting photo a flat look (and gerenally a lot of detail will be lost)


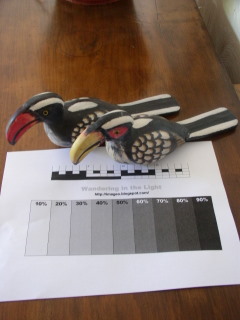
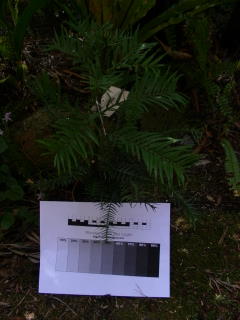
Most modern digital cameras have a system whereby you can easily adjust exposure, often this is called EV (exposure value). This combined with a simple reference sheet you can download and printout (click on the link and it should take you to google docs and let you print it or download a web document). Place the reference sheet beside your image and take a series of photos


My camera has a bracketing setting BKT, which lets you take a number of shoots with progressively adjusted EV settings by just holding the button down. Many digital cameras have controls to toggle adjustment (it may not be referred to as EV) that allow you to do the same task

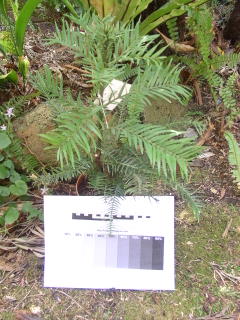
+1.0EV {BEST}+0.5EVAutomatic Selected Exposure-0.5EV-1.0EV

+1.0 EV

+0.5 EV

0.0 EV

-0.5EV

-1.0EV


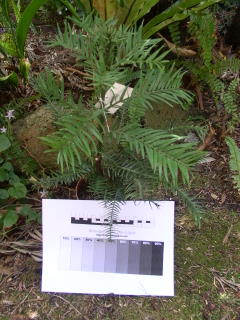
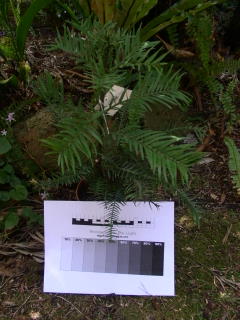
+1.0EV+0.5EV {BEST}Automatic Selected Exposure-0.5EV-1.0EV


Either look at the images in your LCD screen or better still download them and have a look on a larger screen. The photo that best exposed the reference card could well not be the exposure your camera light meter has selected


Studio portrait photographers have a similar ""secret". They often have a test card that is 18% greytone. When it is “just” perceptibly different to white on a test shot the exposure is considered right. They may still fiddle elaboratly with a hand held light meter, but maybe this is just to take more time so they can charge you more. On my reference card this would correspond to the 10% grey looking white and the 20% the first distinct light grey. In both my example sequences above I will benefit from putting a positive EV correction.

Finally remember the reference card is light and will influence the light meter if it takes up a lot of the image space, so you may like to consider making a smaller single (either 18% or 20%) greytone card of final calibrations for important photos