But why?
Thursday, October 12, 2017
More Windows 10 Update Angst
But why?
Wednesday, October 11, 2017
Sketching before taking the photo
I had made up of couple of small plastic trays for a selection of my pastel to use in the field on my trip through the Kimberleys. I only used them a couple of times, and not so successfully. The little plastics trays where fine, a great size for portability. As well as the pastels I made up a “soft” sketching kit with charcoal, compressed graphite, woodless pencil and conte. These are traditional sketching media but somewhat fragile, so not exactly field friendly.
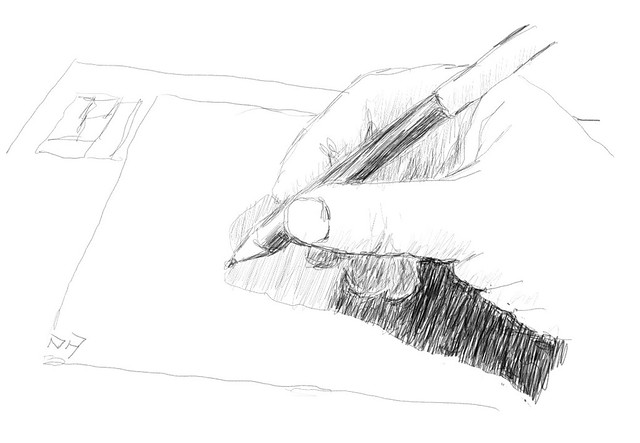
However because the kit is nice and small, I’ve been trying it out as a way to prepare composition/notan sketches for my pathway project. My intention is to make quick composition sketches and possibly a few alternatives that incorporate the tonal balance BEFORE I take any photos. So I am thinking/seeing more like a “plein air” painter preparing a new canvas. The charcoal is quick and gives a strong contrast but it smudges easily, the compressed graphite is good but delivers a very pencil draw tonal range (its hard to get the deep darks). The woodless pencils seemed ideal, I have two hardnesses HB and 4B. They gave me the fast loose sketching of the main shapes and a decent spread from light to dark.
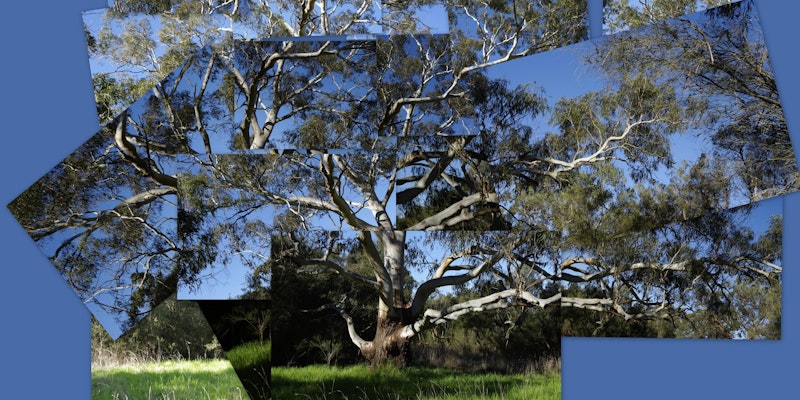
The composition was fine and I wanted to emphasise the lead in of the pathway in the lightest tonesand the contrast of the intersecting but hidden path and bush behind it. The strong dark blocks of the bush on the right hand side blocks this in a balanced sort of way. The lacy effect if the overhanging tree had some potential so I went to a wider angle and took a series of vertical (portrait orientation) bracketed images going from –2.0 EV to +2.0 EV. I have just recently purchase Aurora HDR 2018 and wanted to test it out. The default result was pleasing but having a notan sketch beside me when I did the post processing guided me to set the tonal balance to better match with what I saw. It also prompted to do a crop closer to the original framing of my sketches.
Sunday, October 08, 2017
#AIart and using Hashtags
I haven’t been as active on Instagram this past month, no real help from Alvin, just a lot going on. I did notice a massive drop in followers while I was off the net in the Kimberley's, and I have seen a more gradual return recently, and I probably attribute that to a bit more of a focus on using specific hashtags. The “fame” of a good image on Instagram is a fleeting thing, last a day or so at most. For am image to be found it has to be searched (either by your name, and not so many folk know me by the weird Instagram names I have, or via hashtags). Using hashtags is however a double edge sword. Some tags are so generic there are hundreds of competing images and often conflicting themes, for example #FollowTheSun is used a lot but more importantly it is used by the folks promoting bikinis and beach wear or travel services. My project of following the sun around Australia and my sketches don’t get notice beside a pretty girl or a dreamy location. Also the folk that follow the sun are more likely to be the fair weather followers (they want more and more beauty each day, if you don’t post it seems its the unfollow button for you).
A better strategy for me has been to focus down on more specific Hashtags. The good example here is the #AIart tag I started using it in Flickr & twitter late last year, and from about April this year on Instagram, to describe using neural networks trained to recognized a given style (or content) with a regular photo to produce a hybrid work somewhere between the photo and the art work. The real trick here is to get at least one of your images displayed in the opening nine. Instagram has a algorithm, no idea what it weights to include photos in this opening nine, but they probably represent the better and/or more popular images within this hashtag group. In the case of #AIart I am fortunate to currently have 5 of the top 9, within some 1410 post. It is probably easy to have a hashtag only you use and you will be in that top 9 for sure, The magic happens when you encourage or inspire others to use the hashtags as well. Alternatively construct composite tag so it shows up in more general searches (eg AI + art) or the little related topics that often appears that the top of a search include it because it is similar. Now many more people might see your work.
Its not only Instagram posts that I tag with the same hashtags, I use them in twitter (where photos have a much shorter life, and without so many followers virtually no general exposure for me) but a hashtag means they can be found. (eg #janesweather, which means several have been on the TV weather report) I must admit I’m not a twitter fan, have had very little feedback/engagement and probably will abandon it soon. Finally tags, without the hash symbol have always been a good tool for finding things in flickr, they still are.
Keep on (hash) tagging. Just not with spray cans or a Posca on walls, landposts & postboxes.
Thursday, October 05, 2017
Single Image HDR

The new Aurora HDR 2018 for Windows can perform all its normal tone mapping on a single photo.The original for this was a bit over exposed (as you might expect for a largely white bird high in the sky). The default "HDR" was in fact very realistic, yes the clouds where that dark and threatening rain. So I only changes a few of the basic tonal slider and smoothed down the noise in the sky. Since this was only the fourth image I had processed in Aurora HDR 2018 so I'm impressed already, just a bit more to work out on defringing.
Monday, October 02, 2017
INKtober and now for something completely different
October seems to be the month for Sketching, flickr are running INKtober (so expect my photofeed there to suddenly become drawings), the YouTube SketchBookSkool are running monthly sketching themes on Instagram (some background on @oz_endless_summer) and pastel artist Marla Baggetta is also recommending a month long sketchbook challenge.
Given that I was unable to keep up a year long daily sketch routine last year I figured I should at least give a one month of drawing & posting a reasonable chance. So expect less photos and more drawings, wish me luck and get drawing yourself.
Sunday, October 01, 2017
Does Exposing to the Right make a difference?
Exposing to the right, isn’t magic and it not applicable everywhere. Its a relative simple method (“trick” is not the right word) to help capture more light and reduce the underlying signal to noise ratio issues in lower tonal ranges. Whilst it can be applied in jpeg format, with lesser success, it really needs photos to be taken in RAW format, which records more detail and give the capacity to adjust tones with suitable post processing software for the “finished” photo. It also helps to have a digital camera that can display a histogram (of the light illumination levels) on the back of the camera.
Just a word of warning there is a lot of rubbish written about exposing to the right that will come up early in google searches. If you read this post and try it out for yourself you will realise that it isn’t a hoax or a myth (they are just BS, Fake news)
The other requirement before you can exploit exposing to the right, is having an image with some “head room” in the histogram to increase the exposure without hitting the dreaded white clipping. Once your sensor fills with photons to its maximum, no extra detail can be captures. in 8-bit RGB terms you have reach 255 level in each colour channel. The histogram will be hard up against the right hand edge (see lower right of the examples below). If your camera has the settings you can turn on the feature to show this clipping. They are frequently displayed by blinking zones of colour usually referred to as the “blinkies”.
I took this series of photo on the way home, trying to beat a storm, the new growth on the oak trees looks photo worthy so I stopped for a quick shot. The sky was darkening and the trees largely in shadow so I got a typical result (photo above left) with what appeared to be an reasonably exposed sky and most of the foreground in deep shadow. Looking at the histogram the exposure is probably ok in terms of average illumination. There is very little bright light recorded on the right hand side of the histogram. The photo on the left is just not what the scene looked like, it appears darker than what I saw. This is the type of situation where exposing to the right can help achieve a better image.
In my series I am using the exposure compensation to try letting in more light, but if your are shooting on a DSLR you can use any combination of ISO, F-stop or Shutter speed. Just changing f-stop by one stop doubles the light, change to +1.0 EV achieves the same. I have taken +1 Ev (the middle photo above) and +2 EV (The photo on the right above). Immediately I can see that the +2 EV option is too much I am clipping the sky and no matter how much darkening I try to perform it will remain pure white. The histogram for the center photo looks better the histogram is just touching the upper edge but now a lot of the illumination has moved to the upper right, This is what exposing to the right is trying to do. The trouble is, the photo looks overexposed, particularly in the sky.
The important next step in the exposing to the right method is to post process (the center photo) to “pull back the tones”, particularly the whites & highlights, the sky in this case. I’m using lightroom and just the basic tonal sliders. I’ve moved the exposure slider back –1 (one stop), highlights most of all, white & shadows less and blacks hardly at all. I have moved all slider to the left, darkening the tones. Essentially I’m reversing the lightening step I deliberately took in the camera, when using the +EV compensation. Avoid pressing Auto (tone) here because it will take you photo back to essentially the same as your first exposure. Just experiment with the sliders and remember “less is more”, be gentle don’ try and over do it.
The result (shown below) better captures both the sky and the shadow detail, with the important side benefit of reducing noise in the dark tones and making the colours and mid tones a little clearer (without having to use the clarity of vibrance sliders). It is definitely closer to what I saw.
It is also worth looking at a bit of the detail
An insert from the original photo shows some noise in the shadows and flatness in the mid tone details.
Similar insert of the tonally adjusted Photo that was originally exposed to the right, showing less noise in the darks and also better detail in mid tones and slightly richer colours.
With RAW it is also possible to also lift the tonal range, (ie lighten the darks/shadows) of the original but this will only increase the obvious noise.
Exposing to the right can be a rewarding approach if your shoot in RAW, and have access to good software for post processing. Try it out next time you see a photo with the “head room” in your histogram to up the exposure (and collect more light).
Tuesday, September 26, 2017
Matching GPS Log Files to Photos
When first trying out the GPS match up in photo mechanic from GPS wayfiles and my photos I was out of internet accessible areas and could not look at the result on a map. When I finally did get a chance to check things where out all over the place. A real mess. Since I had had massive issues trying to synch my phone and camera I figure that was the issue. And it was … just not a matter of synching the current time.
The real issue was the fact the google my tracks app which I use on my phones, actually stored the time stamp in UTC (univeral coordinated time) which most people know as Greenwich Mean Time or GMT. This is for the simple reason that satellite position is reference to this time standard. At the moment its 11 hours behind our local time here on the eastern side of Australia. Once I realise this (its not documented anywhere I could find) everything else about loading the GPS wayfile (in gpx format) and merging the coordinates to my photos in photo mechanic was easy.
I’m doing the gps merge straight after the ingest step. I have to export the gps wayfile from My Tracks app in .gpx format (and despite what the app says it does not reliably export to my google drive anymore), so this is now a two step dance, export to the card in the phone, connect the phone to my computer and up load the .gpx file into the same directory as the photos. I then run File/Import GPS coordinates… from the main drop down menu. Which starts the dialogue show above. There are just four things to do/check.
1) Press the little add button in the GPS log file dialogue up on the top left, and use the normal file browse to select the .gpx file. Then press the plot GPS logs (you can have several files being processed together) and this will display a map of your path on the right hand panel.
2) the next important place to set up and/or check is the GMT Offset of photos panel on the right below the Map panel. First time you use it either enter the difference in your local time to GMT (11 hours in my case). You can also try using the Auto, but it seems to match your first photo with the first way point, and often I start the gps tracking well before I photograph. So there can be a mismatch (as I discovered the hard way)
3) The small panel on the right will show the first photo and coordinates. If the photo is miss located because of time difference you can make those changes easily by clicking on the small + and – button over under the map. Each time you press the button it moves onto the next way point (the ++ give you bigger steps). You just need to move the blue pin along the way path till it reaches the correct spot. you will also notice that the time offset is being changed in accordance with the shift. You can also step through the photos using the -> arrow keys below the photo in the panel on the lower right. Despite my best efforts to synchronise everything one camera is 4 minutes 30 slow the other 1 minute 25 seconds fast. These time difference make a difference even at m walking speeds. The time differences are “sticky” and show up next time you import more coordinates. So after a few ingest the small shifts are usually not required.
4) The last step is to click the Import GPS coordinates button in the lower right hand panel.
The whole process usually only takes less than a minute.
In the past I found picasa a reasonable way to review photo location for .jpeg files. Even Microsoft photo will display a map for an individual photo once it has lat and log coordinates. However I have had very mixed results trying to use Lightroom (it will read the coordinates from the way files and do a merge with photos but very often refuses to display map backgrounds so it a bit impossible to check and got it wrong more often than not. I had used a special apps such as geotag and geo tracker to do the merge but that was also tedious and error prone, so I had got used to only occasionally bothering to geotag a sample batch. Just manually locating a few photo in Flickr, when appropriate.
The new approach with photo mechanic is so quick and easy I am doing it routinely again. I’m even going back and redoing a few of those batches of the photos in the past for which I still do have gps wayfiles. Geotagging is back on my agenda
Monday, September 25, 2017
Monday, September 18, 2017
Photowalk & Replacing an old reliable companion
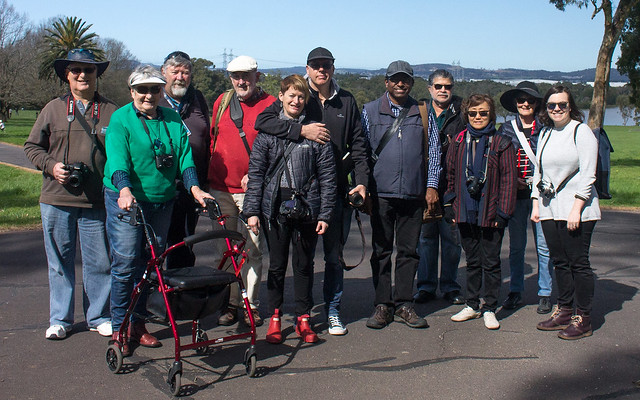
As I packed up from taking this group photo of those that went on my first Jells Park Photo walk. A light breeze and a stray camera strap caught my old travel tripod and it just fell apart. Luckily the camera was in my hand. Its not the first time the very light tripod has collapsed or blown over, The poor thing is 13 years old now and has one foot replaced by a champagne cork, a broken leg lock and a winder ratchet that something drops a few inches or slowly slips down. Its saving grace that it has never actually caused damage to any of my cameras and it really light and compact. It can be put in my case when travelling or in the back of my car. When really needed it was usually at hand. It was a reliable friend. Yet fall apart in a light breeze isn’t exactly being reliable.
I hadn’t planned such a sudden change but I noticed essentially the same model out the front on special in JB HiFi and a very reasonable price. It is still Aluminimu, not carbon fibre, lighter, smaller and extends higher. I’m sure my old friend, the silver model, can retire quietly without any incident.
Sunday, September 17, 2017
Thursday, September 14, 2017
Wednesday, September 13, 2017
Cleaning up the Gear Shelf
I have a shelf in my studio that I keep my camera gear (that I am not using). The gear I’m using is usually in one of three camera bags. It has become full of stuff (mainly empty boxes). So I decided to get rid of the really broken stuff, some of the broken stuff could be repaired and/or has sentimental value (like my first spotmatic) so it can stay. I’ve put a lot of older lenses back in their boxes and thrown out boxes that don’t match up to gear. I’ve keep a couple of camera sleaves/covers but damaged and cameras bags are going. I will keep the boxes of my working gear as that might help resale. I have created a lot of space! This reduced my cameras to just 7. Four Pentax (the original spotmatic hasn’t worked for years), leaving a 35mm film and two digitals K100D & K20D) Two canon, a compact 35m film camera and a Canon EOS digital Rebel. Finally a much loved Olympus digital compact (till works fine but the card reader is now very unreliable).
Given that this range of camera gear has covered my photography well since 1970, I’m pretty happy that I’m getting good use of what I have. Ok I don’t take 35mm film anymore, but I could if I really wanted to. The important part is I have not been chasing the shinny new things really focussing on what works for me. I do have an affinity (or maybe muscle memory for the Pentax cameras, But really I just loved their colour capture back in the 35mm silde days and like their colour capture now.
I haven’t got into micro four thirds or Mirrorless cameras, which doesn’t mean I won’t, I and just still happy with what I have. I will resist the urge to fill the clear space I created. Well until there is a compelling case to do so. Yet I wonder what my collection of cameras might be like 46 years from now?
FYI: If you have any camera that takes batteries and you are storing or not using it it for a while (eg 3months plus) take the batteries out (this is what kill my original pentax Spotmatic). Used batteries tend to leak strong and corrosive acid and salts.
Monday, September 11, 2017
On a Bright Day
Experimenting with a long lens for macro photos (in my garden). Unlike portraits flowers can still look beautiful in the harsh Australian sun
Sunday, September 10, 2017
Why aren’t you Celebrating this?
Alvin : Wow why aren’t you celebrating 200k views?
Me: I know I know if I only had a $1 for each view.
Alvin {Thinks}: Be real even 1c would be OK.
Alvin : So why don’t you have Ads?
Me: No simple answer there. First I don’t like pop ups and Ads. Second I did try to monetize the blog with the Google's AdSense but I was disapproved (for a strange reason? My blog was considered unsuitable!). At the time a troll/lowlife was skimming off my blog posts and posting them unaltered on a site that looked like a legit camera review web site and it had Google AdSense ads but it the content all totally fake (thanks to copyscape for helping in this research) . However Google was clearly paying him for my content. Didn't seem fair at the time. After a lot of investigation and DCMA notices, with the troll changing the countries hosting his rip-off website many times the hassle eventually stopped. I also wrote to google many times during this period via links in blogger and forums but never once got an answer back about why I was considered unsuitable. So I just lost interest.
Alvin: Ok makes sense but why are you still blogging?
Me: Good Question. I must like it.
Alvin: You mean a fun way to waste your time then? What happened to your enjoying the social media silence?
Me: No comment
Saturday, September 09, 2017
Big Celebration
A brand new day :: Kimberley Coast
Its an important day my beloved HP Spectre has come home with a new screen (sadly the previous screen got cracked in my previous travels). I must admit I had become very used to tablet mode and speediness of the little computer with not a lot on it. Welcome home my little friend.
Thursday, September 07, 2017
The Second Shooter
I had though a lot about which camera (or camera body) to take as my backup on my Kimberley Cruise, the latest of my Endless Summer trips. The logical choice was my old Pentax K100 body, if was just for backup and it takes the other lenses I was carrying. In the past an important aspects is it takes 4 standard AA batteries (which can be bought almost anywhere, even on cruise boats!), if power to recharge batteries wasn’t available. I carry spare recharged batteries and they last several days so that is seldom and issue. Instead I choose to take my trusty old Canon Rebel (EOS 1100D), which was basically my work camera used in mines and for making training videos (it has decent quality video except for the sound). Its pretty light and plastic and whilst I have had two lenses fail it has taken the rough and tumble well. With a small zip bag of accessories I planned to put in my art kit backpack. Storing it, with lenses detached, in my computer backpack on airline flights. Well that was the theory.
This last minute inclusion became my main camera in a lot of situations. The reason was a cheap wrist strap and sling system I bought just before the trip. I love the wrist strap! I have always hated the camera maker supplied neck straps! What proved invaluable clambering over rocks, landing on mudflats and beaches in the Kimberley was the over shoulder sling. Just a word of warning to use this style of sling you must be happy for the camera to hang upside down at your side. This leaves your hands free to do the climbing and support stuff with the camera with the lens aligned beside you body just above your hip is safely out of the action (you should adjust to find the safest most comfortable spot using the clips on the strap accordingly). Rather than sticking out in front of your chest, which in many situations is in harms way. I tended to leave my bulkier Pentax in its camera bag, which was awkward and sometimes inconvenient in rock hoping situations. It was thus left behind in many landings and zodiac trips. The camera and I where safe hanging on my side but I could also quickly grab the camera in one hand, lift it to my eye focus and take a photo. With the result that a lot of my better photos where taken with this second shooter.
Wednesday, September 06, 2017
Windows Beta of Luminar has reached 1.0.0
I have been testing the Luminar for Windows Alpha & Bets version for a while and they have clicked over from pre-release versions to version 1.0 so I’m expecting that they will be officially release very soon. The last updates are for specific tools, adding a radial mask and texture (tweaks to clarity & structure sliders). Without doubt the best filter is the Enhance AI filter with the single boost slider (its magic, you have to try it out to appreciate its power) A lot of very ordinary photos will be quickly made impressive with this single click filter and single slider. If you are on a Apple Mac you can get the free trial now, and Windows user will have to register for the beta in the short term. Visit Macphun for the details.
However there are lots of other filters in Luminar made up of numerous common adjustment sliders. Rather than have to set the slider individually or use presets (like lightroom) you have pictures of how the adjustments will look on your photo (like OnOne & instagram). Here I thought I saw a great photo with the dusk sky out to sea reflected in a sheet of shiny stainless steel (A public sculpture on the Coolum board walk, referring back to the seaside fun parks).Well because of the extreme dynamic range the photo ended up insipient and flat (such is life). However loading it into luminar and skipping through the filters I found “Dull no more”, it looked a bit dark but closer to what I was trying to photograph. One click and I as 95% there. I just added a fraction more clarity and I was done.
Luminar is currently a single image editor, it works with all the RAW & Tiff files I threw at it, but it doesn’t have a photo browser within it (ie it will not manage your photos). As a single file editor it really shines and gets the job done super fast.
Monday, September 04, 2017
Sunday, September 03, 2017
Jells Park Photo Walks :: A Sense of the Place

I just realised I haven’t posted anything about a series of free photowalks I will be hosting in Jells Park (over the next 10 months). The series of walks follow the notion of Photography with an Artist Eyes, so they are a little different. The first photowalk is only two week away and has the theme A Sense of the Place. The number of participants is limited to 20 and this first photowalk is almost full now. If you want to join the fun please register via Eventbrite at the link above.
Saturday, September 02, 2017
The Social Media Diet, that isn’t going so well
Alvin (aka my Social Media Diet Coach) is very disappointed with me. My social media posting hasn’t really reduced and I was travelling. He is particularly exasperated as I was off line for 10 days and still managed lots of posts. He claims I have become a social media glutton, that I might need to detox. He is threatening to change the passwords, or worse install apps that limit the time I can waste.
Secretly I enjoyed the silence, He is right but I won’t tell him that.
I dare not mention that rather than deleting software this month I’ve taken on two more packages. Photo Mechanic, which I won in a give away contest on Instagram (and I already like) and a public beta of Luminar for Windows (I also like it). Maybe I am truly a glutton? So ssssh!