Showing posts with label google earth. Show all posts

Sunday, May 12, 2013

Trying some alternate geotagging software

imageI’ve been a bit quiet about geotagging lately, because I was been happy with my two favourite approaches to geotagging, using picasa/google earth &/or geosetter, also I am still a little worried about the dangers of over publising my location details. I do like being able to set the gps on my phone on, and collect a wayfile as I take my photos. Then I can later use this to match up with my photos, and have the embedded location in the EXIF metadata, the hassle here is getting the time matching, but once you figure out how the time shifting works it is nice to have your photos also organized by location.

Picasa (and google maps)

picasa locationThis is probably the preferred google way to do this. Rather than use the tools/geotag/geotag with google earth... you can just click on the red map tag on the left hand side of the individual photo or folder view screen. This pulls out the map dialogue, which is essentially a google map window. You must basically navigate to the photo location using an address, and you can not load your gps wayfile. However it is very easy to use and it immediately write the GPS coordinates (rather than the address) back into EXIF Metadata of the photo.

Lighroom 5 beta

imagePossibly like most Lightroom user, I did look at the Map module in version LR4 and had a little play but kind of dismissed it as nice but not what I wanted. Probably the biggest thing at the time was the fact that the location details where keep back in the main catalogue. It was a fair bit of work to ensure that the location detail got back into the EXIF data, also I has trouble loading and particularly got lost on the time shift dialogues. I suspect that not many lightroom fans have really delved However I have had a relook at the LR5 beta Map Module , and although I can’t see any major updates but I have found the gps tacklog load and matching does work well now. It also has a nice reverse geocoding feature that will determine the address and write that into the IPTC data. There is still the issue of the extra steps to write this back into the photos (or XMP sidecar files) however overall I it is pretty easy to use.

Photo Mechanic

 Setting location details manually Importing gpx wayfiles Showing geotag details
I’m only trying out the demo version of photo mechanic, initially just to review photo load times, but I soon discovered it has neat getagging feature, being able to merge gps wayfiles (albeit I have only had success with .gpx files captured my google’s my tracks app on an android phone) and also accommodate timeshifts between the camera and gps device. Like picasa the details are written back into the embedded metadata in the original file (both jpeg & RAW). Photo Mechanic also have some very nice features for working with EXIF and IPTC metadata, including a IPTC stationery pad that lets you quickly update a lot of standard photo captioning. Also like picasa this is efficient and fast. This is a serious alternative to geosetter, that many keen photographers may already have.

Getting location into your photos is only the beginning, the real power comes with being able to use that as an additional means to organize and view your data. all of these options do give decent maps but you have to select the photos some other way first before you display them on a map.

Wednesday, May 19, 2010

Tripper Map App

If you like and use flickr, why not have a look through their APP Garden, Its a place you'll find home grown applications created by Flickr members (like you!) using the Flickr API. The garden continues to flourish so go forth and frolic amongst the apps! Like Iphone apps there is a lot to waste your time on but there are some great creations and it worth an occasional wander around.

If you follow my geotagging threads you will know I don’t really like Yahoo maps and prefer to work off google earth. Well Mark Zemen (a kiwi traveller) has produce a wonderful app called Trippermap, which basically lets you geotag in flickr using google earth. Yet it does a lot more. including showing your trips in flash maps for your website or blog (see example below and the small side map & slideshow down under geotagging on the right) or browse you photos from with google earth. This is a really great tool for travellers.

Sunday, August 10, 2008

Giving a rainbow the google street view treatment

If you haven't tried it out yet check out google streets within google maps. Unfortunately only a few countries are covered at the moment but (for a change) australia is one with great coverage. But how is it done, whell its a whole lot of photos, several at each location taken simultaneously from a special camera mounted on the roof of a car, which also includes a gps unit to loate the photos. if you look into the link that you can obtain when inside street view you will see the keyword geocode followed by the latitude and longitude, in decimal format and to 6 decimal places.


I'm not sure just how many photos where required for the 360 degree panorama. I have just used a few taken with my mobile phone and stitched them together with autotstitch. I wonder if google streets has captured a rainbow yet?
Of course the challenge is now on to find the "noteworthy" (aka most notorious) street view images, well there vis a good start of things to look for in the google street view gallery.

Wednesday, June 04, 2008

location, location, location


big rock panorama, originally uploaded by imageo.


This is a mutli-image stiched panorama (using autostitch) and I had forgotten to geotag it in google earth. No worries I thought I'd do it in Flickr. Think again!

Ok, I did try with Yahoo! maps and I only got with a few hundred meters of the shore (at least the loaction name was right, in the past yahoo maps has also given me the wrong location name by kilometers) but compare the detail with the google earth (below)at roughly the same scale.


In google earth I was able to zoom much further and see the actual rocky headland. An this area is still just average accuracy in google earth. By the way you need picasa to geotag in google earth.

Sunday, February 03, 2008

No need for special gadgets

Whenever I mention geotagging to others, the topic automatically seems to become about GPS in gadgets. Well I start to explain you don't need them you can geotag your photos already without fancy stuff.

  1. You can use Picasa and Google Earth. If you haven't done it yet click on the link in the previous sentence, to my original post of 18 months ago. The method is still thPicasa's geotagging dialoguee same and it is still my preferred approach. My one disappointment is you can not make use of the coordinates in the management of searching for files within picasa (as yet).
  2. You can uses the map feature in Flickr. I must admit I am not happy with the yahoo map engine flickr use, its hopeless in terms of detail and frequently gives and incorrect location description, for the yahoo maps fails again!places i visit. For example when I geotagged my last photo in flickr it gave the location as mirbo south (which does not exist to the best of my knowledge) and mirbo north which does exist is about 50Kms away!
  3. You can use software such as the popular RoboGEO, which embeds the geotagging coordinates inside the photo's EXIF data. It has a wealth of features to match automatically from Garmen units, and most other GPS unit via wayfiles, and other tracking format as well as some nifty export features. There is a downloadable demo version.
  4. A nice freeware application is called Geosetter for windows. Whilst this does have the ability to sync with some track files, it is its very simple method of manually geotagging with google maps that makes this a very worthwhile tool, for those without the fancy gadgets.

But if you are still gadget mad, read the wired article GPS Adds Dimension to Online Photos

Friday, August 18, 2006

The geotagging buzz

The geotagging buzz

There has been a fair amount of discussion on the web and flickr in particular about geotagging, even flickr central is a buzz with rumors. Most of what I read is so amusing, having watched geogagging in flickr grow, mainly from the effort of key geotagging group member.  So I found the average “Joe in USA” complaint, about really needing a GPS in their camera, or cameraphone before they will tackle geotagging sad but it is a just another reflection of the self opinionated “net celebrity” appearing all over blog space I guess

Now there is a bit of diversion on which tools may be used. Will flickr railroad members to use yahoo maps?  Sergey Chernyshev has a nice Google versus Yahoo Maps comparison tool. It really brought home to me, why trying to using Yahoo maps, here in Australia, for locate anything is such a big ask. I’m happy to stay with google earth (via picassa) and google maps (via flickr using the localize bookmark applet)

Using the google versus Yahoo maps comparison this is the most detailed I could get with Yahoo. I’m lucky to guess where I am (since few minor roads are shown on the yahoo map) with a kilometer or two.

Switching over to satellite image, I can zoom in a little.

But Yahoo gives up well before google maps. Even thought the satellite image is starting to pixilated I can still see enough detail to get routinely within 3 meters using google maps/earth.

Friday, June 02, 2006

Making Photographic Placemarkers in Google Earth

Those who follow this blog regularly might remember seeing photos with geotagged tag in the comments and also coordinated to locate the photo. When these are used as tags in Flickr, they can be used by a number off applets (and I won’t go into them now) that will let you place your photo on a map. For a good example see the “my geotagged photo” link on the righthand side panel which uses the fylr applet

Well what about tagging your own collection. If you have google earth it is much easier than you might imagine. No GPS required!
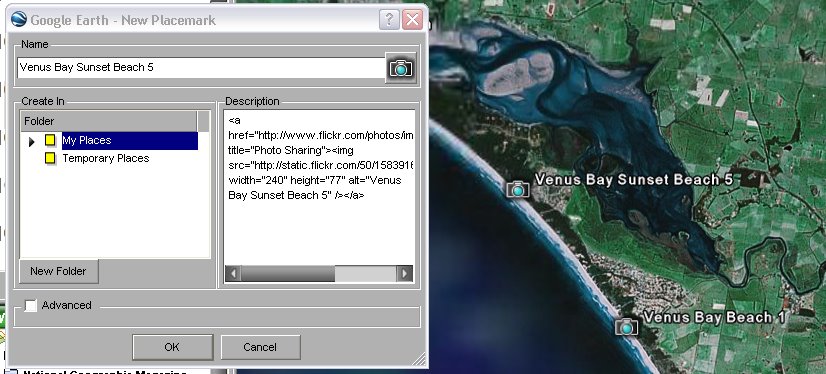
The Google earth Placemarker dialogue

The first step is to run google earth (if you don’t have it you can download it for free, but you will need a broadband connection to let it work well). Zoom into the area that you took the photo. You will probably be amazed at how accurately you will be able to find the location of your photo (even on the satellite mosaic only areas, such as Venus Bay). Then click on the little place marker icon (it’s a map pin) on the control bar at the bottom and select the placemaker item at the top of the popup list (you can use <crtl> N if you like keyboard short cuts)

The flickr image linking areaThis brings up the placemarker dialogue box. While it is open you can as accurately as possible move the place marker over google earth to position it was accurately as possible. The last step is to past a link to your photo into the comments. In this case I’m using Flickr, but you can use any online photo album that lets you use links, like photobucket . So I  click on the small show all sizes icon above my photo and then I select the small size (I find this is a good size to display in google earth). I ten cut and paste the HTML link back into the google earth dialogue area. Click Ok and that is it!
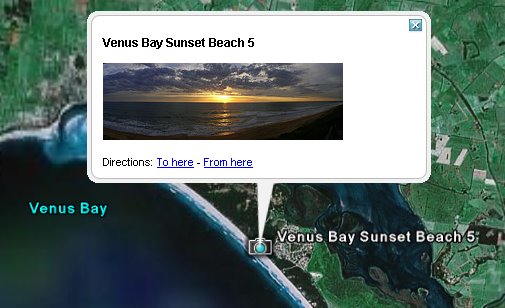
The final place marker in google earth
Clicking on this new icon, shows the image, clicking on the image opens a window below the control bar and takes you to the full image in flickr. You can email the placemark and links and/or the image to friends (they need google earth to view it, but the can easily also download it). Have fun!

Monday, July 25, 2005

My GeoBlogging begins

Some time ago I came across the Geobloggers in Flickr. They tagged their photos with the location (in latitude & longitude), which seemed very cool to me. Well how to do it?

Option ONE: is spend a lot of money and get a camera with a GPS built in. (even I considered this a bit extravagant, but I bet it will be a common comsumer level feature before to long) Such cameras store the location within the EXIF data embedded in the header of Jpeg files. A sub option might be to have a seperate GPS and note down your location when you take each photo (hmmm more notes, mess and transciption, no thanks)

Option TWO: Use websites that give you lat & long location. For Australis try Geoscience Australia's Place Name Search or Charles Sturts University's Guide to Australia and then use cut and paste as I am uploading the photos (hmm a bit tedious, but free!)

Option THREE: & the most fun! use google earth. Without much effort you can zoom down onto the place you took the photo. You can even leave place markers (as I have done for agnes falls in the image above). The only disappointment is I have to retype in the coordinate for my geotags as I upload my photo to flickr. (hmmm i need to investigate ways to simplify this)

Thursday, July 14, 2005

Google Earth


I had been waiting with anticipation for my invitation to use google earth beta. Well it has been released and I have a copy. If you want a copy, it’s free for personal use, click on the link below.

Google Earth

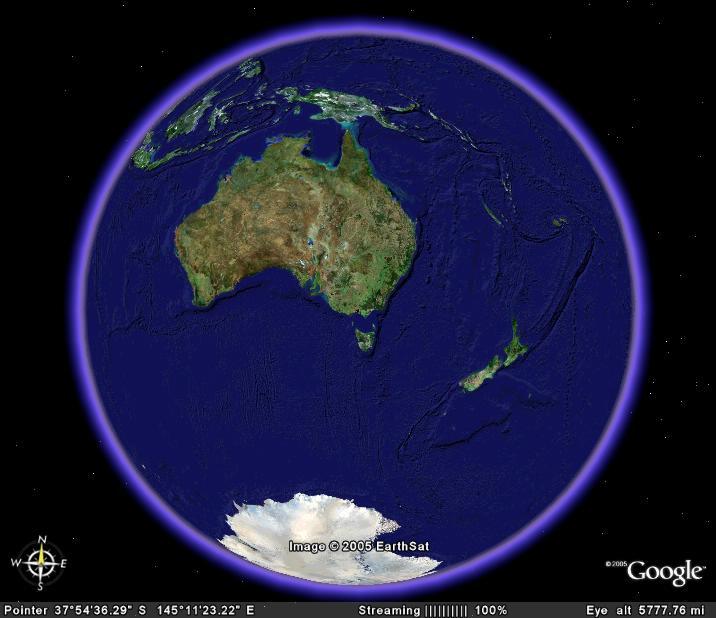
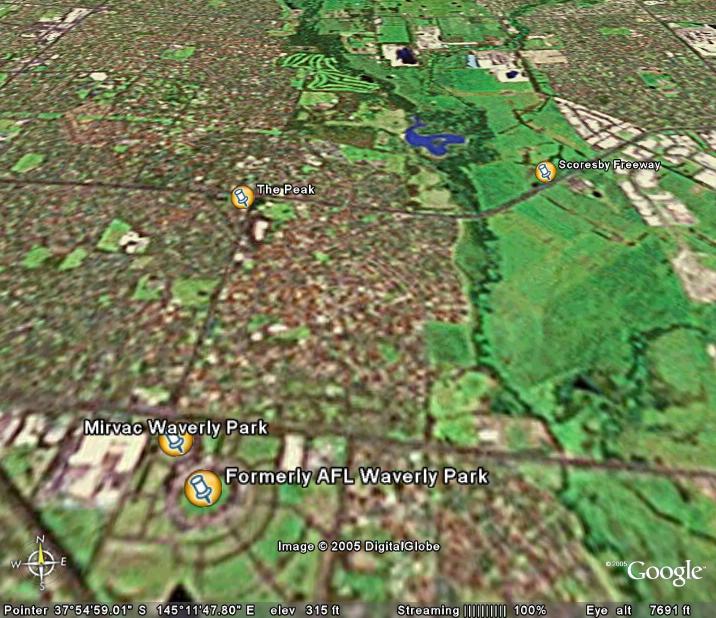
I soon realized that it gave me my own “digital” camera in space. Not only can I easily get conventional photo mosaic of relatively current satellite images and some aerial photos. I soon found I could create my own aerial views of anywhere, using combination of the simple zoom, tilt rotate & pan controls. Another nifty control lets you put place markers, just like mapping pins, which you can use to navigate your way around. You can even email these pins to others (in what is called KMZ format). Here is a simple example below.


Footnotes:
  • The peak is a proposed development by AustCorp, it was rejected outright by the Monash Council last year. The Wheelers Hill Action group believes that there is atill a strong possibility for development beyond the three or four storey recommendation (see my cameraphone post below)
  • Work on Scoresby Freeway has commenced already, Despite the "toll" controvesy costing the labor party several adjacent &marginal seats in the last federal election
  • AFL's Waverly Park has been torn down to make way for a housing development, the playing surface, part of the stand remains and will soon be the training home of Hawthorn Football Club. The planning of this development was taken away from the Monash Council by the state government and given to Mirvac to build their vision of for a brand new suburb (closely spaced) homes for approximately 4000 residents
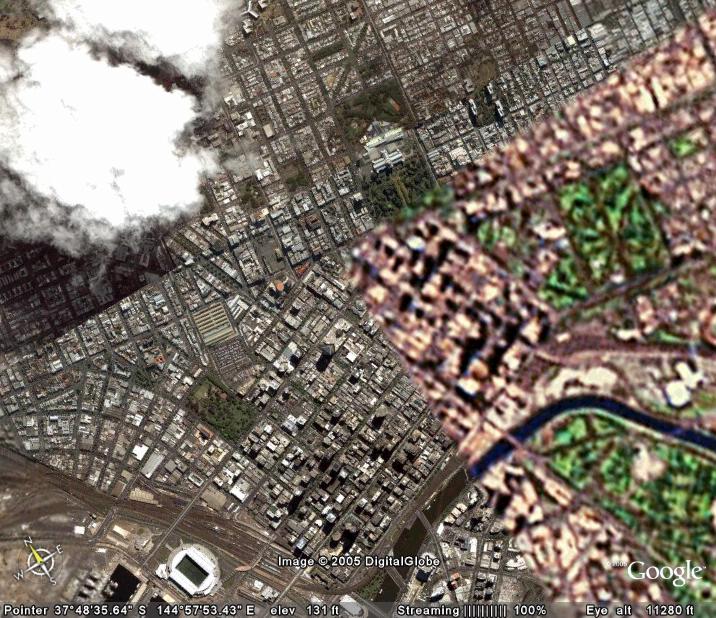
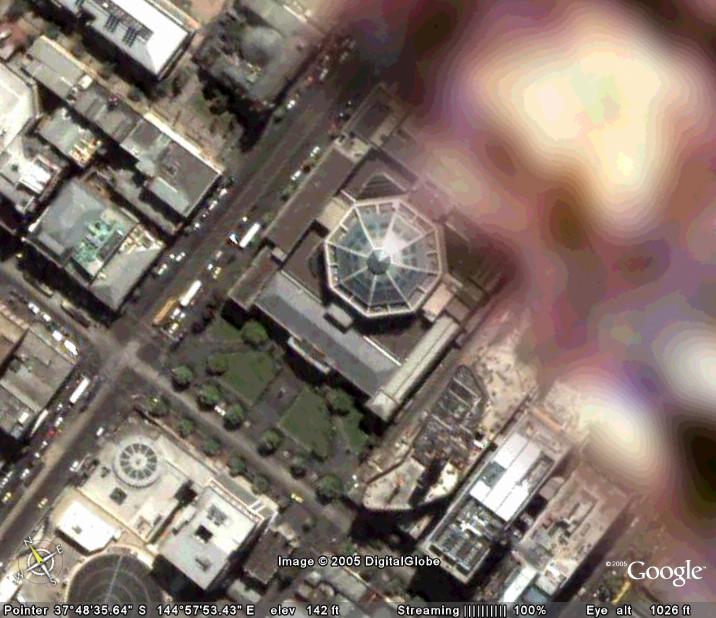
There are a couple of things that you need to realize, the resolution of the images varies from place to place. Only a small area of Melbourne is available at highest resolution (mainly to north & west). The image below on the left shows the junction of high resolution and lower resolution parts of the mosaic running through central Melbourne. The image on the right has zoomed in on the state library’s domed roof. Note the detail, individual trees & cars but the low resolution satellite image part of the mosaic has just become a blur. You can click on any of these images shown here and see a larger version of that image.


The software will only run on more recent PCs and needs decent broadband link to download the images

I got google earth because I am interested in geotagging my digital photographs, but that topic will have to wait while I play with my newest camera