The world of
paper sizes has standardized a lot on the A size ranges, well except for the USA which still clings to a multiplicity of inch based measures. So most of us now have A4 sized printers and scanners and life is easy, right?
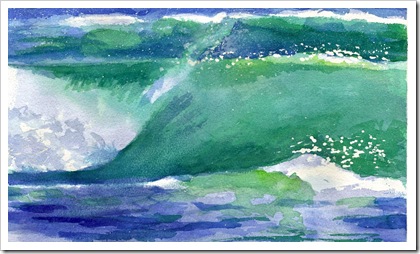
Not quite, most photo systems are still geared to those American sizes, 4” by 6”, 10” by 8” etc. wasteful if you can only print on A4 sheets. It is ok most printers can not print to the edge of the page so a blank border is necessary. The conspiracy deepens because most pre-cut frames are also made to suit those inch based, so now perhaps a bit of trimming is required. The mistmatch becomes even more frustrating when it comes to flat bed scanners. Few of use want to scan nice A4 sheets, we want to scan thick text book, notebooks and even perhaps your own painting and sketched, like me. The trouble is whilst most of my sketch books are in fact A3 or A4 I like to paint on quarter watercolour paper sheets (which is approx 11" by 15"" and these are too large to fit on the scanner bed. The best watercolour papers are still largely "handmade" using same "Impreial sheets" (22" by 30") as in pre-industrial times. Interestingly the paper weight is now usually measure in grams, and 300 grams is my favourite.

The solution is really very simple, just scan the image in two (or more passes) and use your photo stitching software to paste the two images together.Voila! you have just doubled the size of your scanner. You need to ensure there is sufficient overlap between parts, 10% is probably the minimum 20-30% might be extravagant. If your stitching software is having trouble you can always add your own registration marks to the edge of the scan drawn on a price of masking tape if you don’t want to mark the work.
Most scanners will try to automatically adjust

the scanning to get the “best” image quality and many now have “advanced” filtering but using photo software will also give you access to more control of colour bias, contrast and brightness controls, cropping and straightening than you Multi-function printer bundle includes. As I mainly manage all my picture in picasa I find the simple tuning and filters jus perfect to bring the scan as close as possible to the original.
An ordinary scanner & your favourite photo software can make a powerful combination
 Sunny one moment and then a full on thunder storm with driving hail the next. The storm was so intense it even made the National news (complete with a photo of a water spout further up the coast).


 It was a very overcast day and that makes large view distance photos very washed out. I saw the sheep on the next ridge and thought it would make a good photo, so I took a bracketed set (5 photo at 1 EV steps). And surprise, surprise they are washed out! Not to worry I took the set expecting to use the HDRI technique to restore some tonal depth and detail. Using my version of picturenaut on my portable apps memory stick, I used ass the basic defaults and exposure tone mapping with automatic contrast set in the histogram dialogue. This insures that picturenaut tries to use all useable pixels across all the photos to reproduce tones across the extended tonal range. So you will be able to appreciate how closed to the edge the sheep are grazing.

 These multi-image stitched panoramic views of Lake Taupo are more about the clouds and sky than the lake and landscape. I’m informed these unusual clouds are locally know as “Mare’s Tales” (thanks Wendy). Clouds alone are something that I have found can be a challenge to match up for Autostitch, especially for hand held sequences. So I was careful to keep a little bit of the horizon in each image also I have taken the photos in the vertical “portrait” mode to maximize the vertical range and having two rows of images within each composite panoramic image.


 One thing about living on the side of a hill, you don’t except a flooding to come from above. Last night changed my mind. The intense storm saw the roadway turned into a creek (see video below, sorry about the quality it was taken on my phone). My own rain gauge read 155mm from when the rain started yesterday to 8:30am today. Considerable more than the 115mm registered at the Bureau Of Meterologty weather station at Scoresby.
 of the soil around them. However very clearly the storm water and drainage around here largely worked! Well done city planners.


 Still nature always seems to provide something nice to photograph. I’m guessing the spider isn’t so pleased!


 The solution is really very simple, just scan the image in two (or more passes) and use your photo stitching software to paste the two images together.Voila! you have just doubled the size of your scanner. You need to ensure there is sufficient overlap between parts, 10% is probably the minimum 20-30% might be extravagant. If your stitching software is having trouble you can always add your own registration marks to the edge of the scan drawn on a price of masking tape if you don’t want to mark the work.

 the scanning to get the “best” image quality and many now have “advanced” filtering but using photo software will also give you access to more control of colour bias, contrast and brightness controls, cropping and straightening than you Multi-function printer bundle includes. As I mainly manage all my picture in picasa I find the simple tuning and filters jus perfect to bring the scan as close as possible to the original.


