Showing posts with label shutter speed. Show all posts

Wednesday, November 07, 2018

PhotoProject :: Capturing Rain

I have tried many times to find a nice ay to capture rain. Basically it falls to fast to nicely capture drops in detail and its usually dark anyway.

PB060012PB060014PB060015

It was raining heavily yesterday and I saw an opportunity to photographs the drops backlit against dark foliage. Then I took photos at three different shutter speeds

  • 1/500th. second (ie fast enough to freeze a bird in flight)
  • 1/50th. second (a comfortable hand-held speed that should avoid blurring my shaky hands)
  • 1/15th. second (very slow, I have to rely on the in body stabilisation (IBS) of the  camera)

The result is obvious the best photo telling the story of raining is the slow exposure because it has elongated blurs hat captured the motion of the water droplets. Sound obvious in retrospect. Slow shutter speed to blur the motion and hold the camera steady (and/or IBS)

Wednesday, May 16, 2018

Day Five … M is for Manual Mode

M mode stands for Manual which means the camera is expecting you to select and set the three exposure settings (Aperture, Shutter Speed & ISO). I’m sure if you are a first time camera owners this mode is very intimidating and if you just select it and started clicking away you may get a few good photos but you will also unfortunately plenty of under or over exposed photo (they are really only good for deletion, so hopefully they were not of an important occasion). The key is don’t panic, manual mode can be very powerful but requires some practice.

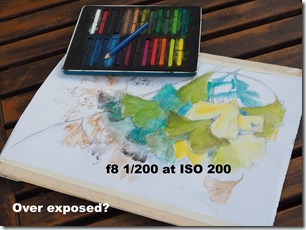
If you are happy with the concept that the correct exposure will be somewhere inside the Exposure Triangle, it is pretty easy to find a good exposure even without a light meter. If its a normally sunny day and you are shooting outside, firstly selection M (manual) on the mode dial, next set the Aperture to f8 (usually its a control dial on the front top right of your camera) and the Shutter speed to 100 (1/100th. sec) (usually the control dial on the top back right handside of the camera) and ISO to 200. The ISO is usually setting via the menu and/or a shortcut key on the thumbwheel style dial on the back of the camera. How do I know these settings? Well these are my favourite starting settings I’m taken a lot of photos with these. Other photographers might have different favourite settings to start.
P5160288P5160289

Now press the shutter and  take the photo. Look on the back of the camera (assuming you have an LCD screen), does it seem a bit bright (Over Exposed) or dark (Under Exposed). If its over exposed like first photo appears, you need to let less light in. This could be achieved by using a higher fstop like F9 or F11, I used f9, or by using a faster speed 1/200, or as I choose in this case using a lower sensitivity (ISO 100).  Maybe this is a bit underexposed now. I’m still shooting just jpeg if I was shooting in RAW these difference would not matter I would be easily able to adjust the exposure in post processing. If the image is to dark you need more light and do the reverse adjustments to the settings. Change the setting(s) and take a second photo. Usually with a little practice you will nail the exposure by the second or third attempt and you can just discard the exposure tests, on a digital camera they cost nothing.

I was a bit shocked with my new Olympus OM-D E M10iii which actually recommended that my manual is exposure was not spot on and suggest F9 1/100 at ISO 100! Some other newer cameras will also highlight a suggestion or blink a setting that it would like to change. Smart little buggers they are.

Once you have practised this a little, preferable outside. You can move inside or into the shadows, but start with settings that would give your exposure more light to the sensor such as F6 or ISO 400. This is all great practise and should quickly let you find your preferred starting settings in manual. However there is an easier way, either take an Aperture priority or S Shutter priority test shot first and look at the settings the camera has chosen and start there.

The real power of manual mode, comes with a lot of practise and personal experience of really seeing the different intensity and quality of light. You will soon know the type of scenes you like to photograph and how you like them to look in the final print. There are dozen & dozens of ways shooting manual can help you get better photos, Such as “protecting” highlights or shadows (avoid “clipping” or “blow out”) restricting the exposure just to the subject … lots of creative ways. Too many to even to begin to discuss here. All I wanted to get across is don’t be scared of manual mode.

Tuesday, May 15, 2018

Day Four …cont. introducing the Exposure Triangle

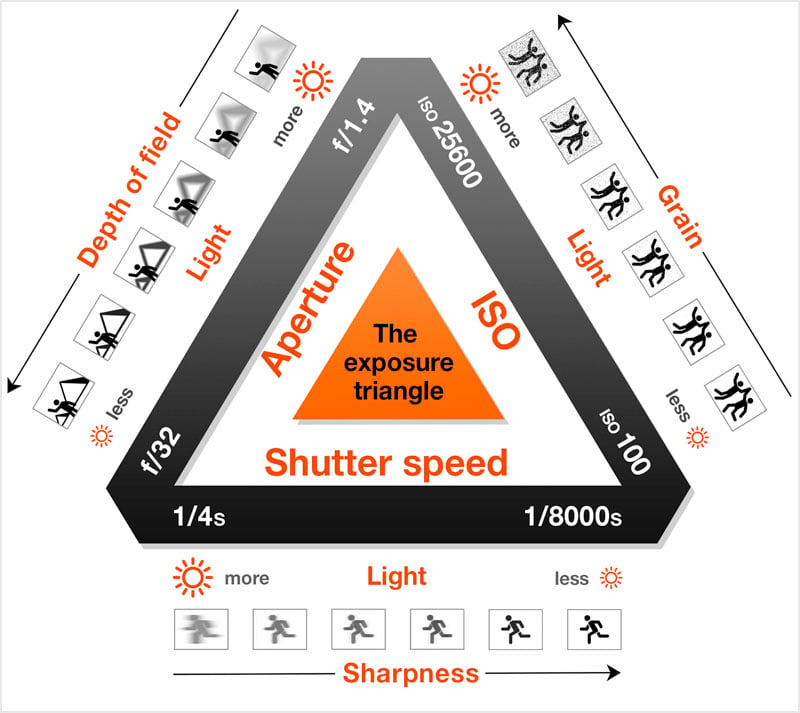
If you are a new camera owner, you and have been following this series of blog posts by now you have realise that I’ve moved into the advance area of setting modes, without asking your to remember the exposure triangle or complex formula. You won’t totally escape, but it is just a brief overview here, and no test afterwards. This stuff is actually quiet straight forward, and it is much easier to understand when you apply it. I like this little infograph from Peta pixel because it includes a basic graphic representation of what happens with each setting.

Somewhere inside that triangle should be the perfect exposure for your scene but where?  Setting the mode to A or S lets the camera change one or both the other sides of the triangle and aims for that best exposure. Tomorrow we will explore M mode which simply means you will have to make all these exposure settings yourself.

The other thing you probably noticed is there is no I (for ISO) on the mode dial. I’m pretty certain this a throw back to the film days when the ISO was dependant on the film in your camera and you got to set that when the film was loaded but that was that and the ISO setting stayed until you changed film. Each type of film and its development process produce different sensitivities to light for that combination. The ISO was written on the outside of the film packet.  If you wanted a different sensitivity you had to buy a different film. These days on digital cameras the ISO can be changed electronically to let the sensor be more or less sensitive to light. In some cameras you get to change it to a single value, more recently most cameras let you set it to Auto within a given range and this lets the camera also flex the sensitivity.

There is a downside to higher ISO, in darker scenes which seem to demand higher ISO (and thus sensitivity) the darker shadows become subject to more noise (seen as a grain or an unpleasant spottiness). So staying with lower ISOs (setting your auto range 100 to 400) will probably be a good move when you are starting out, and you are not trying to take photos in dark rooms or alley ways. You can see am example of this noise in the shadow, of the flying duck photo in the earlier post, and look in the shadows behind the duck. You might have to click on the image to enlarge it. The noise is there because I had hit the maximum aperture of the kit lens I was using f4,6 and the low light meant the camera had to select ISO 5000 to get sufficient light at 1/2000th second. Normally I would have used a noise filter which would probably smooth this out nicely, but I am showing images straight from the camera (ok the duck photo where cropped) but otherwise not post processed

Day Four … S is for Shutter Priority

The S mode (Shutter Priority, TX on Canon cameras). Its very simple to use you set the shutter speed and ISO and the camera chooses the best aperture for you.

There is a lot of advice out on the net and in how to books about the importance of keeping shutter speeds fast enough to avoid camera shake. So setting the shutter speed sounds like a good option. It is also helpful if you need to you can “freeze” action by using and ultra fast shutter speed (like 1/2000th of a second), faster infact than a blink of an eye. While I did use this mode on older film cameras, I have seldom used this setting on any of my digital cameras (I’ll explain later below in this post). Like most cameras  my new Olympus OMD E M10iii does have an S mode and I was trying to think where I might use it and I settled on birds in flight (be warned that is a challenging subject to try yourself especially starting out, kids on a bike would be a better choice)

That was a bit easier said than done, It was a cold dull overcast morning that Melbourne gets a bad reputation for but aren’t really all that common. So there where not many birds out and about. I figured ducks would still be out, supposed this is the weather they like, so it was down to the lake.

Slow speed - stationary duckSlow speed moving duck -> blur
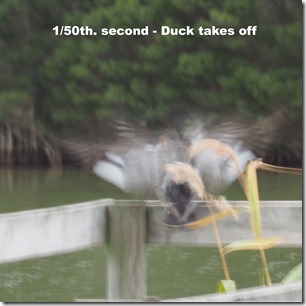
Fast speed flying duck -> sharpFast speed landing duck -> sharp

Despite starting to drizzle the duck did perform for me. He was sitting on the wooden rail on a small pier as I approached and a photo with the shutter speed set to a 50th of a second was almost ok (the image has a slight blur but the duck is recognizable despite the low light and slow speed). However as he took off, the next photo, also at 1/50th second is just a blur of feathers. He circled around which gave me time to change the shutter speed and catch him flying in and about to land at 1/2000th. of a second. Now most of the duck is in sharp focus (perhaps expect for him trimming his wing tip feathers). So Shutter Priority mainly helps in deciding weather you want blur or sharpness when you subject is moving. I probably won’t be using this mode to often, but it will help is some situation (if I have enough time to change the mode dial and the shutter speed before my subject has disappeared into the distance. Which it generally has.)  Thus you need to plan when using this mode before the action starts.

Wednesday, May 08, 2013

The Shadow Portrait Method, free light meter for digital cameras.

Looking back through my photos I notice I have a lot of “shadow self-portraits”, those shots where you take a picture of your shadow. However there is method in my madness. With a digital camera it is possible to get a reasonable idea of the correct exposure even without a light meter. Just point your camera at your shadow on the ground. Looking at the image on the back of your camera, can sometimes be difficult, because of the glare and strong reflection but even so you will usually be able to tell where the detail is in the image. If all you see is a very strong silhouette of the shadow and some detail in the ground you may be underexposed and you should do one or a combination of the following,open the aperture by perhaps an F stop, move to a lower f number, decease the shutter speed or raise the ISO a little, Alternatively you could increase The EV Value (exposure compensation). When detail is spread across the shadows and sunlit ground your exposure will probably be ok for an subject also illuminated by the same light (except if you are wanting to point at the sun or the sky!) If the sunlit ground looks washed out and the shadow not so strong and/or the shadow has the best detail you are on the overexposed side. So in this case you might close the aperture, move to a higher f number, decrease the shutter speed or lower the ISO a little. In this case you you want choose a negative EV. If you don’t trust the screen because of glare, the histograms for shadow portraits generally have two distinct bumps. If the bumps are over on the left there's a risk of under exposure, over on the right your probably find your photos are overexposed. Once your changed your setting taken another shadow portrait to check
IMGP5713 IMGP5720 IMGP5727
imageUnderexposed
Shadow Detail Lost
image
Exposure OK
imageOver exposedLosing detail on the sunlit sand
image
Next time you are out on a sunny day, set your camera to M (for Manual) and point it down and at your shadow. Then start experimenting with a few or one of the above options. You should find you can find the correct exposure with as few a three or four test shots.