Showing posts with label blur. Show all posts

Sunday, April 28, 2019

More Experiments in Camera Motion

Sharky James of the PetaPixel podcast has teamed up with FujiFilm to create a series of weekly photo assigmnents. Last week’s theme was “Share your streaks of creativity”, in other words, movement and blur/slow shutter. A classic theme to look at moving the camera during the exposure. Something I have tried before and enjoyed. I decided to be a bit more investigative this time and try out a range of movements.

 Note that I never really need an excuse to experiment with potential photographic techniques.

JiggleSwipe to the right
Pan Right Pan Down
Rotate ClockwiseZoom Out
All of these show some merit, but I think I like the jiggle the best (its just part of a grape vine)

Tuesday, May 15, 2018

Day Four … S is for Shutter Priority

The S mode (Shutter Priority, TX on Canon cameras). Its very simple to use you set the shutter speed and ISO and the camera chooses the best aperture for you.

There is a lot of advice out on the net and in how to books about the importance of keeping shutter speeds fast enough to avoid camera shake. So setting the shutter speed sounds like a good option. It is also helpful if you need to you can “freeze” action by using and ultra fast shutter speed (like 1/2000th of a second), faster infact than a blink of an eye. While I did use this mode on older film cameras, I have seldom used this setting on any of my digital cameras (I’ll explain later below in this post). Like most cameras  my new Olympus OMD E M10iii does have an S mode and I was trying to think where I might use it and I settled on birds in flight (be warned that is a challenging subject to try yourself especially starting out, kids on a bike would be a better choice)

That was a bit easier said than done, It was a cold dull overcast morning that Melbourne gets a bad reputation for but aren’t really all that common. So there where not many birds out and about. I figured ducks would still be out, supposed this is the weather they like, so it was down to the lake.

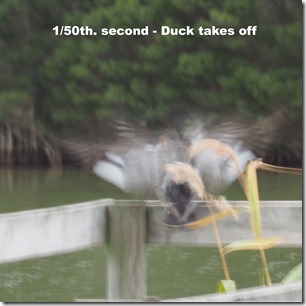
Slow speed - stationary duckSlow speed moving duck -> blur
Fast speed flying duck -> sharpFast speed landing duck -> sharp

Despite starting to drizzle the duck did perform for me. He was sitting on the wooden rail on a small pier as I approached and a photo with the shutter speed set to a 50th of a second was almost ok (the image has a slight blur but the duck is recognizable despite the low light and slow speed). However as he took off, the next photo, also at 1/50th second is just a blur of feathers. He circled around which gave me time to change the shutter speed and catch him flying in and about to land at 1/2000th. of a second. Now most of the duck is in sharp focus (perhaps expect for him trimming his wing tip feathers). So Shutter Priority mainly helps in deciding weather you want blur or sharpness when you subject is moving. I probably won’t be using this mode to often, but it will help is some situation (if I have enough time to change the mode dial and the shutter speed before my subject has disappeared into the distance. Which it generally has.)  Thus you need to plan when using this mode before the action starts.

Tuesday, July 26, 2016

Russian Roulette with the forest

_MG_8376One of a few problems I soon discovered trying to get decent photos from the train, is to do with a clear view. The Canadian train travels up into the Rockies along deep river ravines and there are lots or trees, which get taller and taller. The train only travels up the steep railway at 45 mph, which is slower than normal car travel. However it is still fast enough they trees beside the tracks just flash past.

_IGP9949_IGP0001

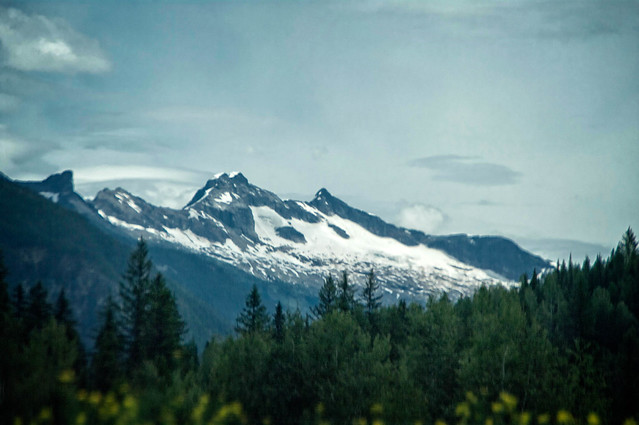
So I quickly found there was an anticipation game, when to snap the photo. Its harder than you might think, and I have quiet a set of blurred trees. But once in a while the mountain will be nicely framed between the tree.

  #208_IGP9941-rocky mountain high

(Hint: I used a higher ISO than usual so that the shutter speed was faster and more likely to freeze reasonably close trees)

Saturday, May 07, 2016

Right Place, Almost Right Time & Not Quite Right Tools

Can you see the pelican?As I was taking the dusk HDR set for the post below, I noticed a pelican in the last frame gulping down something at a great rate. It was fishing, and very successfully, so I quickly changed over to my telephoto lens. However the pelican was in the shadow and the light was failing, and the pelican moving so much it just became a white blur. I opened up the f-stop and cranked the ISO higher so I still had a exposure time of 1/60th second, but hand holding a long (lens 300mm) is a challenge. Back button focus (which usually helps when trying to pan on moving birds in flight at dusk) didn’t help, mainly because it was difficult to follow the pelicans movement (eg panning). How I wished I was closer (I could have walk around the lake but the pelican may have move on and I would be looking into the light) or had my tripod with me, or that it all happened a little earlier in better light. So I had to do the best I could (and accept that I would not get a perfect photo) just enjoy the moment, use my memory as inspiration and the blurry photos just as reference.

some on the blurry pelican fishing photos

This is a prefect example of my constant message that “Being in the right place at the right time is difficult but being there with the right tools is more important to creativityA dreamscape angel hair interpreation of the pelican fishing

Thursday, May 01, 2014

PhotoProject :: Blurring the Edges II

When I made the suggestion to +roz to try the idea of blurring the edges to tame strong lines on her wonderful photo, I realised that I wasn’t very specific about how to do it. So that prompted me to put together this little video to explain how edge blurs can be achieved in a number of common photo software editing/management software, because after looking around I found it is not obvious or even implemented in many popular post processing software, presets, add-ins and filters. That never stopped me in the past so here are a few ways to achieve blurred vignettes in the software you may already have. Please bear in mind this is my first attempt at a how to video and the sound quality particularly is poor and all over the place (plenty of room for improvement). Anyway I hope the video helps inspire some experiments in your own work. But be warned its a bit long (13 minutes)

If video isn’t your thing here are some very brief descriptions of various alternative. I start with a few “free” programs and apps you may already have.

Google+ Photo

I firstly played around in the edit tools within Google+ Photo, since The Patch is a Google+ community and everyone will have access to these tools. The Centre Focus panel does provide nice blur panel & control, which seems to add a radial Gaussian blur and the edge brightness slider works like a conventional vignette allowing you to darken or lighten the edges at the same time. Its really simple to use, once you find it.
For those lucky enough to have new android phones and have recently updated the default Google Camera app (and have gotten pass the PhotoSphere feature) there is a similar feature called lens blur that can be adjusted on your photo on your phone.

Picasa

Picasa is Google’s desktop photo manager, which has become Google+ Photos on the web application component. But many of the Snapseed features that have been added into Google+ Photos have not been migrated back to upgrade Picasa itself. The Desktop version does have a very similar filter called soft focus, again using a circular inner zone and allowing control on size of this shape and the amount of focus
Picasa also has an interesting Focal B&W filter. What it does is maintain the colour inside a circular shape and destaturate anything outside that to black and white. There are only two controls the circle size (I've moved it fully to the right) and the sharpness (which is like feathering) and I’ve moved that fully to the left. The shadow lines are still sharp but the desaturation has tamed them.

Paint.NET

This is a free program to download (you can donate to its upkeep) and it is a very handy little program. It has even has layers (not used in this example) and the variety of tools to select areas within your image and a number of blur tools. The method is again simple I just used the elliptical select on the tool bar and select my area of interest. Next I chose inverted selection from the edit menu. then on the effects menu under blurs I chose the zoom blur (my favoured blur for this situation). Gaussain Blur would work just as well. Paint.net does not have feathering in the selection control so it may be necessary to do a second selection and blur less to help blend the blur.
Google+ Centre Focus  Picasa Focal B&W  Paint.NET Gausian Blur

lightroom adjustment brush settingsLightroom

Lightroom actually does not have a specific blur tool, but I have found if you use the adjustment brush which has its own panel of settings. If you take sharpness down to a large negative number, move it to the left, it does introduce a subtle softness (not a full blur) which you can further emphasis by moving down contrast, clarity and/or saturations