Monday, October 18, 2004

Flash intensity control for free

A really simply application of the ability to change the sensitivity of your camera, is to tame the built-in flash unit that your camera came with. I soon learnt to turn off the flash because I didn't like the "startled animal in the head lights" effect it consistently produced, even when photographing flowers!


Straight Flash


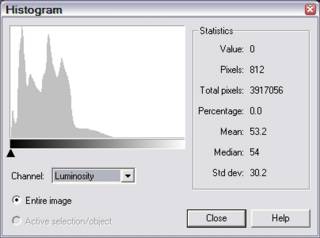
Since changing the EV lets you change sensitivity to light, you can in effect give yourself an intensity control for your flash. The actual flash will still be same intensity but your film will see the light as less bright when you use a negative EV adjustment. This is useful when the subject is close to the camera (as these dolls where) and you need to lower the intensity of the light from the flash.


Flash with -1EV


Flash with -2EV


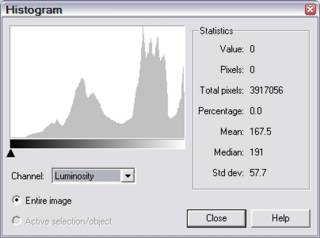
Similarly a positive EV adjustment will brighten a photo. This may be useful when you can not get close enough to your subject. If your subject is close this may wash them out (as it has dome with the dolls)


Flash with +1EV

The Lunimousity Histograms where produced with Ulead's PhotoImpact.

Just a final word of warning, this "apparent" flash intensity control only works when your flash is the main source of light. It doesn't work for in fill flash, because the exposure adjustment works for the whole exposure of the scene. Don't take my word of any of this go try it out yourself.

Sunday, October 17, 2004

Along the Grand Ridge Road

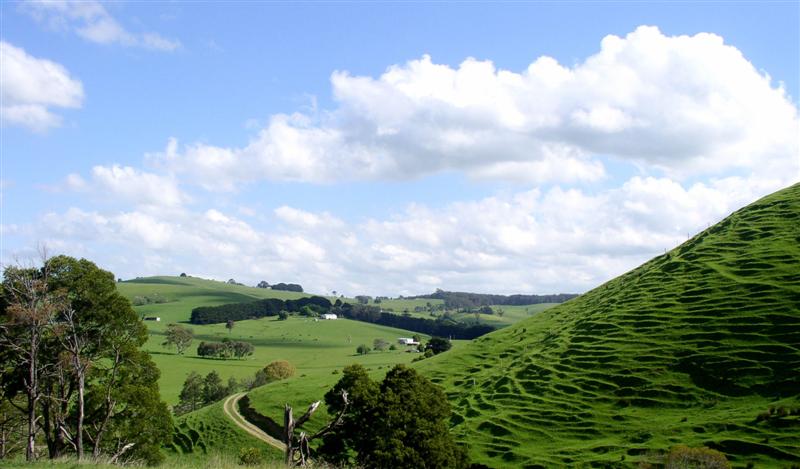
The Grand Ridge Road is a narrow dirt road that winds through South Gippsland.


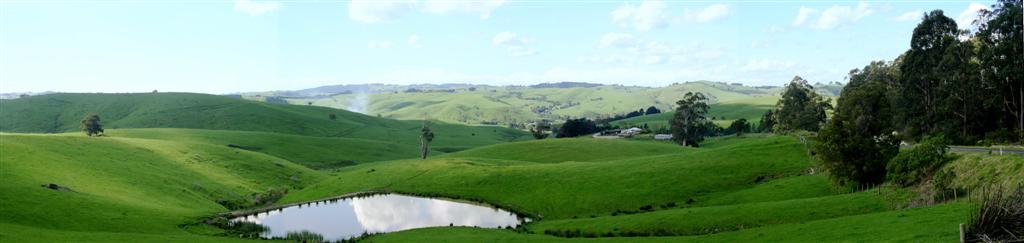
This panoramic view is three photos spliced together


Looking south

The journey offers many sweeping scenic views, exactly the type I love to photography.

Friday, October 15, 2004

Watching the background

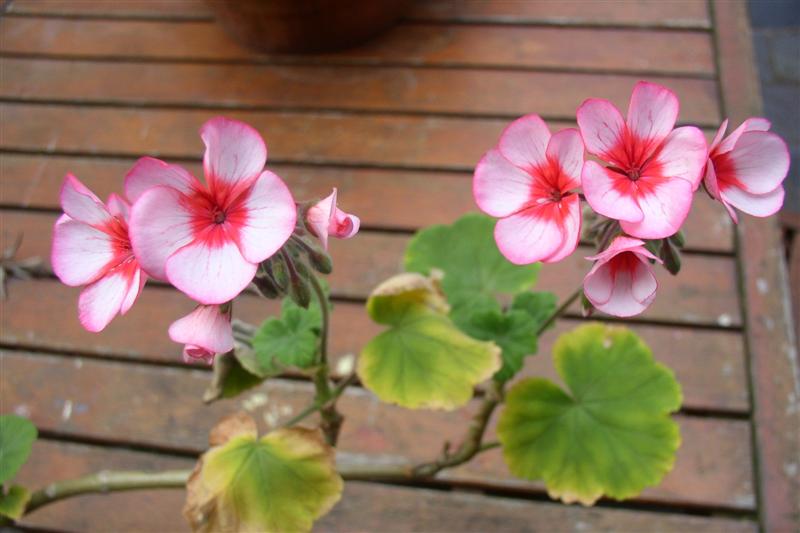
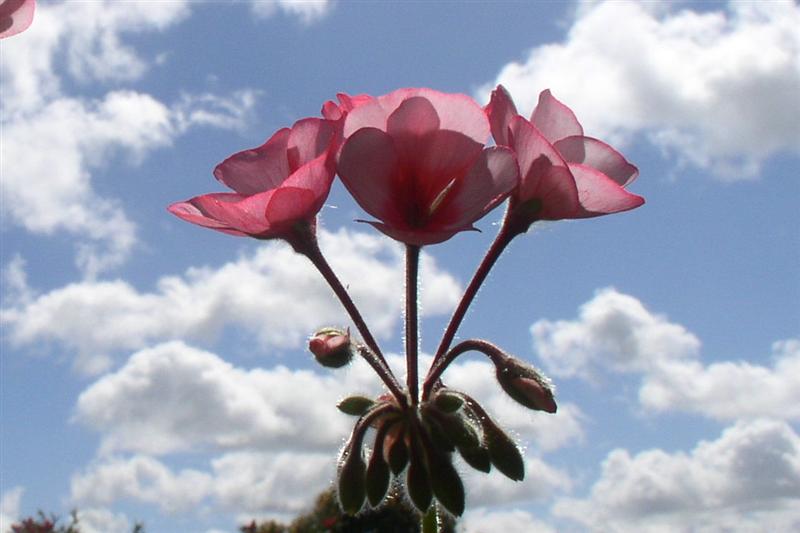
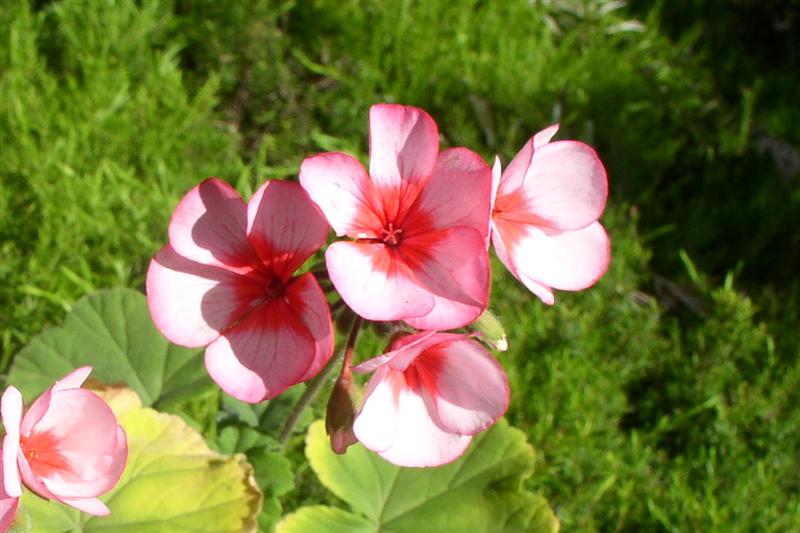
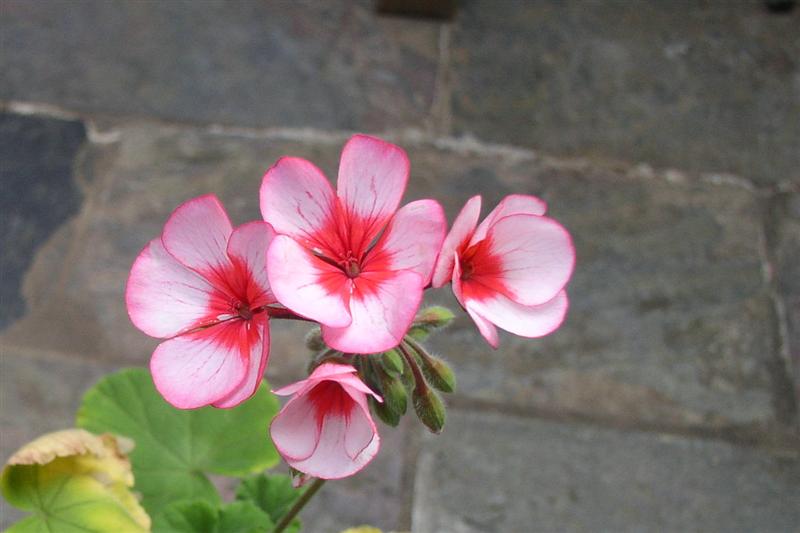
I'm not sure when or where I heard this but I do remember being advised "Take Care of the Background and the Foreground will take care of itself" (presumably a photographic parody of the "Take care of the pennies, and the Pounds will take care of themselves" axiom). Well background do have a big impact.


These flowers are in a pot plant so I just moved them around, to compare the color saturation on the final photo, other than re sizing to upload here, there was no editing/post processing of these image. The wonderful thing about digital cameras, is that a small calibration exercise like this is both fun to do and costs nothing other than your time.

Thursday, October 14, 2004

Pondering my Wanderings

I was not sure why I chose the title wandering in the light for this blog. The light being the basis of all photography, and hopefully that is pretty self evident. PhotoGraphy literally means LightWriting (I Just discovered that in a H2G2 past called Bluffing your way through Photography) The wandering bit is a lot clearer to me now. It describes perfectly my efforts here so far. I've barely touched on a lot of topics I had in mind when I started but I trust I have stumbled across a few interesting things on the way.

If you are a bit impatient and looking for a really succinct Beginners guide to Digital Photography or How to take better photos why not try the BBC's wonderful take-over of Douglas Adam's pet project H2G2.

If you don't mind wandering, follow along I will get around to all the important stuff eventually. Why not join in by leaving a few questions or ideas in the comments.

Wednesday, October 13, 2004

Sliding into a New Audience

One thing that really appeals to me about digital photography is the fact that it is so easy to reproduce the image with light. In conventional film based photography this was possible with various forms of projection. I was quiet a fan of 35mm slides when I was younger. They where pretty much the majour force in camera clubs at the time. The problem is you needed special projection equipment and a darked room. The really unfortunate part is everyone from that era has nightmares of a night trapped in that darkened room with uncle bob's holiday slides.

Slide Show = Terminal Boredom. (circa 1960s & 70s)

With digital images there is a massive range of devices, you probably already have, that can be used to display your photos. Computers, TVs, Phones (yes pretty well all new mobile/cell phones come with nice coloured screens, even if they don't come with cameras).Yet there are few technical issues, like calibration of the screen, resolution, media, format and possibly what software to use. If you have ever had a digital photo printed and conpared that with the same image, displayed full screen, on your computer you'll know what I mean. Its just not the same (generally the screnn image is way better). Yet the key objective in my mind of exploiting these new media of light, is avoiding the fear of total boredom that the old slide nights conjured up!

Slide Show => Good use of a Terminal Screen (maybe)

Towards the end of my colour day

This is was one of the photos I took yesterday in my quest for colour.


I have certainly found thet softer lighting, in the morning and evenings or even during the day, but in the shade with some reflected diffused light, can help you capture more saturated colours.This image is used for the small image in my wallpaper below.

I also took the opportunity to actually do the creative image enhamcement exercise I had planned as my final test of Photoshop Elements. I took my wisteria photos and had a good play with the different filters and tools, see the towards the end of my colour day thread Sharing Photo Worldwide Forum for the outcomes.

Free screen wallpaper


I have decided to reward the visitors of this blog with a free screen wallpaper which I will update from time to time. I plan to have links to the current wallpaper maintained over in the right hand side navigation area,I already have three different series of screen wallpaper already underway so watch this space, and if you particularly like am photo leave a comment. it might just turn up as a screen wallpaper

I have a nifty screen wallpapers building feature as part of the Camedia software that cam with my Olympus camera. It always you to overlay a shaded area (along one or more edges of the screen. I've taken the idea of mutli-layered a step further using Corel Photo Paint to overlay and feather a small photo and some text. The background image in this wallpaper has been enhanced using the Corel Photobook Texture Effects Macro/Tapestry.

This Wisteria is growing over my son's out-door spa pool area. I took these photos just before the sunset, looking to capture the enriched colours of the golden hour (many photographers swear by the first and last hour of light each day; some even only consider the morning light golden; you supposedly get warmer and more depth in this magic light. I'm not totally convinced just yet!)

Photographer of the Month

I actually think this is shameless self promotion, but truthly I am pleased about it. So I must tell you I've got a few photos published on the senior spin site, under their hobbies section, as their Photographer of the Month.

A couple of the photos you may have seen here but most haven't been posted anywhere before and they are wonderfully presented, so worthy a quick look.

Tuesday, October 12, 2004

Colour My World

Digital photography at its simplest is just the recording of light. Since it is light that gives colour then digital photography should be able to capture the beautiful colours of the world. If only it were that easy!


I decided to brighten up my polarographic life by spending the day capturing colour. So full of enthusiasm and a pocket full of tissues I went to the shops. I was anticipating lots of colourful displays. Well the christmas decorations are out!

I'm not going to get technical on how to get the best colour just now. Just start looking for it and see how much extra life your photos suddenly get.

TRIAL EXPIRED!

Yesterday I had plannned to use the last few days left on my downloaded verion of Adobe Photoshop Elements to investigate it a little more thouroghly. I fired it up and found I hadn't been counting properly, the trial had expired, What's more I still felt miserable from my cold and just thought ok thats that! No I won't be lining up to pay for a copy.

Trial versions are a great idea, particularly for software as comprehensive as Photoshop. Unfortunately for adobe it only convinced me I already had most of the features adobe offered in other packages I already own, sepcifically Corel Photobook. Yet I'm also convinced that photo editors are not at the all singing all dancing level just yet. Some simple tools, like the power tool resizer from microsoft and red eye reduction paint brush from HP Image Zome Express have found their way into my standard practices (scroll down a bit and look in the archives for examples). I like simple and easy to use, and not obscure error messages (That was Adobe's greatest downfall in my view)

Monday, October 11, 2004

Sharing Photos on the Net

Lila: "Hello anyone out there!"
Norm: "Yes, Lila, but what do you want?"
Lila: "I was worried you didn't blog yesterday,"
Norm: "I had a cold ok!"
Lila: "and you did promised to give us some extra ideas on ways to use digital photos. Well I want you to tell me how to share my photos on the web."

Sharing Photos on the net is pretty easy and most software comes with big claims on the box of how easy it is to do. Or should I say easy until you start reading the instructions! Don't despair, There are easier ways. How you do the sharing mainly depends on whether you want to -

  • only share with your friends and family
  • share with the rest of the world

If you don't really want the rest of the world to see. You should look at an on-line albums like Ofoto. This allows you to upload and organize your photos in albums. Then you can select individual or albums of photos and send an email invitation to others. This email has a link and password that lets the receiver click on the link and see just the photos you have selected to share. Ofoto has been taken over by Kodak and you can order prints easily, making it ideal for special family photos and events, so granny and aunty maud can order their own copies. HP Photo offers a very similar service.

There are dozens, if not hundreds, of public photo albums, or more precisely image hosts, on the net, a lot are free. Some of the better ones will offer both private and public folders/albums, so you can control what is public and what is not. As well as the email invite, you will usually be able to use the photo's URL address. To do this display the photo, find its URL via right clicking and looking on the properties screen. This is a great solution for putting your photo on a blog or web journal. Photo Bucket actually shows the URL underneath the photo's thumb nail.

I've actually only tried two such public photo albums, and found both fine.

Sunday, October 10, 2004

How Alvin & Lila come to Life

Lila is Alvin People's partner and I created them both a year ago, after some inspiration at a creative cartooning work shop conducted by Kevin Burgemeestre. He has illustrated a couple of great children's books Bernard was a Bikie and Supa Dooper.


Unlike more conventional cartoons, I have draw up a series of very simply shaped body parts, heads, arms etc, Then I just assemble the illustration and scan them. If I need to draw extra bits, I draw them, cut them out, and add to the collage. I've found it a fun method and the freer simpler characters have developed a life of their own.


Friday, October 08, 2004

Straightening up an image

I love sweeping views, with a distant horizon and plenty to take your eye around the middle and foreground of the landscape. The problem is, if you make the horizon a focus of your picture, the viewer will expect it to be perfectly horizontal! Even a fraction of a degree will be obvious.

So short of setting up a tripod with a spirit level, (I do have one but I still manage to get the horizon off by a few degrees frequently) you will have to resort to rotating the image. Looking at the main Photo Editing packages this is not such an easy task, because they don't have any nice referencing tools. Most just have a little panel that you type in the desired rotational angle. Some packages might let you copy the image to a separate layer then rotate it by freehand, which means by mousehand! If you've tried either you know why I'm suggesting they are not so easy to get right.

So here is a little trick I worked out. Most editors have a rectangular masking tool that stretched out perfectly horizontally. Just point to one end of the horizon and stretch it out. It will give you a good idea of which way and by how much to adjust.


Some editors automatically select the area inside your mask, in which case only inside the mask will be rotated so remove it before rotating. I then prefer yo use the rotational dialogue. Say starting with 3 degree clockwise. I then check with the rectangular mask. Ok that was to much I do an Undo and then rotate it by only two and a half degrees.


Check with the rectangular mask again. Perfect!


Now just a quick crop


Actually when you get up high enough in an aeroplane the horizon becomes a curve.

An observation on auto straightening tools

The automatic straighten and rotate tools available in some photo editors are pretty hopeless. They often pick the wrong part of the image to use as a reference,


I can only presume that adobe had picked the strong contrast of the window edge to use as its vertical reference. Problem is, few auto straighten tools know aeroplanes have portholes!

Approaching Cairns

Ellusive Lighting

A Flock of Cockies


Strong side lightening and a grey sky, after a late afternoon storm. Winter (well its actually spring) lighting can often produce some very dramatic lighting effects, but they normally only last for minutes sometimes even seconds. So don't put yor camera away when the strom clouds are billowing.
Rainbow at Sunset

Tuesday, October 05, 2004

Hoisted on my own Pitard

I must apologize for the appearance of this blog over the past few days. I was so excited at being able to upload pictures, while i was intransit, using the Hello Blogbot that I just assumed it was responsible for the sudden shifting of the right hand column to the bottom of the blog. The right hand column is where the navigation stuff lives, that hopefully helps you find your way my rambling. I like the layout, well so far I like it!

Anyway I got home and next day noticed the layout disaster, when using internet explorer. I also tried using netscape, seemed ok! So it was just explorer stumbling on something. I assumed that Hello, or more precisely its code, must be to blame and the larger thumb nail size the most likely cause. So I diligently resized the thumb nails smaller (actually also easy in hello) to no avail. I read all I could about photoblogging in the blog knowledge section of blogger. I seemed to be doing all the right things. What is more Hello is a really nice simple bit of software, that just does what it is supposed to. This is the type of software I like.

To cut the lengthening short I finally found the culprit, it was the very long link to the microsoft power toys download site, which I had cut and pasted the day before. This is a nice bit of poetic justice really. A Microsoft URL address causing microsoft explorer to get indigestion and go into a format tantrum.

It is fixed now but I did learn to trust Hello and I'm sure I'll write some more about it soon.

Almost Home 5PM

The approach into Melbourne Posted by Hello

Monday, October 04, 2004

Crossing the Outer Reef 10AM

The Barrier Reef look nice today Posted by Hello


At Cairns I transfered to the domestic airport. Just inside, after security there is a stall type shop that sells the work of Ken Duncan, a very colurful australian photographer (I mean that literally). His panoramas are truely extrodinary.

Decent into Port Moresby 8AM

Looking down on the Owen Stanley Ranges Posted by Hello


The infamous kakoda trail crosses this range of "hills" and it is well known to all australians. It was the site of a heroic retreat by a few recent "schoolboy" guards, who mangaged to withhold the overwhelming japanesse advancing army as they clambered up over the hills. Helped by the local papuan new guinians, they called their Fuzzy Wuzzy Angels

My Journey Home Began at around 6Am

I left Lihir early.

Looking down on Londonovit Posted by Hello


I had decided to take some photos of my trip home and even try getting them on the net en-route.

Sunday, October 03, 2004

Image size on the net

One aspect of digital images I haven't discussed is file size, which also includes stuff like compaction and resolution, when sending and displaying files on the internet. I haven't discussed it because the more I investigated the more complex it seemed to become. Curiouser & Curiouser to quote a certain Alice.

The basics are really simple, for the net keep it small. Hit the printer with everything you've got, Max res!

But how small is small?

Most computer monitors at the moment only display 800 by 600 pixels. Which is curious because most monitors sold have much higher resolution now. The possible explanation is that microsoft XP, and Windows 95 & 2000 all install with the 800 by 600 resolution as the default. So go check your control panel/display/settings and you may be able to slide the little screen resolution slide to the right and give yourself a screen upgrade for free. But back to the point, on the interent large photos take time to transfer. Both as an email attachment or as they are downloaded from a web page. If you are sending more than 800 by 600 the detail is probably going to waste and annoying the receiver because of the wait! If they are using a dial up connection the wait will be very painful.

What I've found is that 640 by 480 is fine for email attachments. At that size they are fast and still detailed enough. If you really must you can take them to 800 by 600, but check that the recipient has a broadband and wants to see the photos anyway.

Ok what about images on websites, web albums and photo sharing sites. Well the 800 by 600 limit is good also. But you might consider setting up some small thumbnails at say 240 by 320 (or smaller) and link the thumbnail to the larger and higher resolution version. That is how I do the images in this blog. It means the page will be delivered quicker but the user will have to click on the image they like, to then see the larger image. Hopefully they will be happy with the slight wait.

Playing with power toys & re-sizing tools

Now here is the really cool bit. an angel at Sharing Digital Photography Worldwide Forums has drawn my attention to the resizing tool in the to the resizing tool in the microsoft XP power toys collection. It sets up an extra item, resize image, when you right click on an image file in explorer. I have found this is particularly useful when you are in filmstrip mode.

It only has four sizes, but they are just what you need -

  • Small 640x480, Ideal for emai;=l attachments
  • Meduim 800x600 About the limit for normal Web images
  • Large 1024x768, I already suggested above this was too much!!!
  • Handheld pc 240x320, Good for thumbnails.

You can download the
XP power toys collection can be downloaded for free

Now you see it, now you don't

Original Photo With Pole Without Pole

A cloning tools is a fantastic way to "invisibly mend" a photo. What you mend could be dust blotches or scratches on the scans of old photos or simply just annoying things like power poles. The clone tools work like paint brushes, or spray cans, that carefully copy a bit of texture from another part of the same image.

There is a reasonable difference in how these tools work in each photo editing package and I like the one in corel photobook, which I used for the above photo. (Abobe Photo Elements has a similar one, but with different short cut controls, so I got quite annoyed trying to relearn how to use it). The good setting are being able to change the size and shape of the area being cloned, the relative position of the clone and destination and feathering (blending out) at the edges.

Saturday, October 02, 2004

Towards more natural portraits of kids

W.C. Fields famous warning for other actors was apparently not to work with either children or animals. Well I have warned you before I do like breaking the rules occasionally, even the silly ones.

Click here to see Alannanh & Scratchy larger Click here to see Rhys & his mates larger Click here to see Scratchy larger

Most portraits of children end up looking a lot the same, either very strained smiles or bored expressions. I guess thats fine for aunty maud but I really like more candid shoots. Well there is a simple trick give them something to play with while they are "posing", Here Alannah and Rhys's pet parrot Stratchy is helping to keep things more natural.

Friday, October 01, 2004

What is this?

What this is, is a photo with no particular subject, but lots of repeated pattern. Such images can be very interesting or very boring.

Abstract Composition of Repeating Patterns

I trust this photo is on the interesting side. Geologically it is! The photo is of amorphous silica/carbonate, the same sort of mineral as your teeth, deposited on a pile or rocks beside a geothermal well. The white coating has formed from dripping condensate, water droplets, from the steam escaping at high pressure. The mechanism for the intricate pattern is not fully understood, but may relate to droplets and puddles forming. Then evaporating to form a rim at the edge of the droplet. The red colour is iron oxides in the silica forming a jasper-like coating in the depressions. Ok thats the geology.

Why might this photo be pictorially interesting?

More precisely, how have I tried to maKe it more interesting?.

The answer is taking care in composition. In this case I did that it as took the photo. You can always change composition a little with cropping afterwards also. If you consider it as an abstract. Firstly there are really only three colours the white, the red/brown and the mid-tone greys of the shadows. Normally your eyes firstly seeks out the strongest contrast. In this case the red to white and this is strongest on the rocks closest to the camera, they are at the top of the picture. Secondly there are two dominant textures, The bigger rounded rock stapes and the more delicate and intricate cells of the silica coating.The bigger unblocken areas of these intricate pattern are more likely to be attctive to your eye, The eye will examine them first.because they are more interesting. So in this image I hope your eye is doing a bit of traveling around and finding interesting bits,the strong colour contrast in colour on the rocks at the top, the big area of silica cell coating pattern on the broad rock just below it, the greys of the shoadow being more boring are holding your eye in the central parts of the photo. Your eye is scanning around the image and telling your brain this is interesting! Well I hope that is what is happening!

Did I do all this analysis as I was framing the photo? Well no and yet kind of. If you half squint as you look at the LCD screen it degrades the detail in the image and enhances the contrast, which lets you "see" only the things your eyes,and hopefully other's eyes, might find most interesting. Moving the camera around while you squint might sound strange but I think you'll be surprised how it improves the way you compose your picture. By the way the squinting method doesn't work for me through the view finder only on the LCD screen or looking directly at the scene.