Monday, April 29, 2013

Numbered Stacking, is great BUT…

I often take a number photos, in a specific set, usually bracketed groups of +/- EV settings, or adjacent & overlapping images for panorama stitching, etc. These can clutter and overwhelm your grid view or film strip. Light room has a great feature called stacking (it has been around since LR3 days) that lets you, hide the rest of the series behind the first image. It works a lot like having a set of photos underneath the first photo (normally the first photo taken, although it is possible to select the photo you want to be on top of the stack. The photo stack are identified in the library model and grid view by two vertical lines on each side of the photo. Clicking on either line will expand the stack, click on the vertical bar again with close the stack, The short cuts for this is S to open the stack (and once the stack is open press S again to close it). There are a few more stacking options under the menu item Photo/Stacking.imageI use this feature a lot and couldn't help noticing a very nice new way the stacks are displayed in LR5b (that's lightroom 5 beta). The stacks now have a small stack icon displayed (the icon is simple overlapping rectangles with the number inside the inner rectangle) at the upper left which shows you the number of photos in the stack. This is much more obvious than the two vertical lines (which are still there) and because I know what it is I usually leave the stacks compact. The problem at the moment is if I am showing others my recently loaded photos, they are immediately inquisitive and expand the stacks, or  want me to expand each stack. So I got to wondering was it possible to toggle off the stack numbering (and I can't find a way to do it) Then I realised it would be wonderful to be able to flag these boxes with colour (or a different shapes) to differentiate the type of stacked images, (eg HDR set, stitched panorama, group photos). Oh that’s right lightroom doesn’t yet support any form of photo merger (yet!)!
So here are a couple of interim solutions that work fine for me.
  1. I must remember only show others my lightroom collections (not original folders) so they only get distracted by what I want to show them.
  2. I have started to use the colour flagging to identify what are bracketed EV ranges (red) versus overlapping images for stitch panoramas (green)

Friday, April 26, 2013

Lightening, Overcast & Humid, No Glimpses of the Moon

2013-04-26


I did get up especially and spent nearly an hour with my camera pointed skyward, hoping for just a glimpse of the lunar eclipse, but the skies here in Jakarta remained heavilyovercast. In fact the clouds where so low they where well lit my the city lights. The constant thunder and lightening did backlight the clouds and give hints of a few gaps, but the slightest trace of the moon, or the shadow of the earth on it, never materialized. Adding to the challenge was the extreme humidity, so everything on the camera fogged up. Even after half an hour to acclimatize, I found I still need to have my cleaning cloth wrapped around the camera.

I did manage an available light photograph of the fountain, beside which I had set up my tripod.

IMG_1518-1

Thursday, April 25, 2013

Cross Town Traffic

IMG_1473-1MVI_1476-2-1MVI_1477-1IMG_1480-2IMG_1481-3The traffic in Jakarta is a really intense, albeit very slow experience, but it is a challenge to show in still photos. Such disorganised chaos that actually still moves is pretty amazing, but oh so tedious if you are in a hurry. To help those stressed out many street corners now host massive flat screens continually showing commercials!

Watching the Sky Cloud Over

A seven panel autostich
This morning I had high hope because the sky was so clear (very unusual in Jakarta at this time of year) but as the day progress the storm clouds began to form and my nightfall it was totally overcast. Not so hopeful about photgraphing the lunar eclipse tonight.
Posted by Picasa

Tuesday, April 23, 2013

Look out for the Lunar eclipse on Friday Morning

Clear ViewThere is another lunar eclipse about to happen on Thursday night to early Friday morning before sunrise.It will be a partial eclipse for New Zealand and eastern Australia in the hours lending up to day break. In Indonesian there will be a full eclipse earlier in the morning. I happen to be in Jakarta at the moment so I will be hoping for clear skies. Its been very wet and overcast here for the past few days but tonight there was some hope the clouds cleared and the sky was clear enough to get a good view of the moon.

I did some some decent photos for the last partial/almost full lunar eclipse in June 2011. Including a free wallpaper/poster, which you can download from flickr.

There will be 2 more lunar eclipse this year.

Taming the Glare with my Polarizing Filter

My polarizing filter has been on my camera for most of summer and it does a great job, although I have noticed the general exposure is often appears a little under exposed on some foreground detail, It is well know to photographers that such filters do a great job making the sky more interesting, specifically making clouds look whiter and giving depth to the sky. This is well know and discussed often and probably the main reason given to use a polarizing filter. However there is an even more amazing feature that filtering polarizing light.can fix. That is cutting the glare reflected on the surface of water. This glare is strong polarized itself by the reflection from the flat surface of the water,and crossing the polarizing filter normal (ie at 90°) to this actually cut the glare so you can see into the water.

Vertical

Horizontal

Deeper Blue in Sky Greater contrast, Whiter Clouds
Strong Glare on water surface Without the glare can see underwater detail

On my polarizing filter their is a small triangle ∆ etched into the rim of the filter, That marks the direction of the polarizing filter alignment. So I can reference this to see when it is vertical (Ie on top of the lens), Or rotated to horizontal (ie point to the right or left side of the lens). You can also see the effects are fairly dramatically through the view finder.

Saturday, April 20, 2013

Underwhelming or out of balance?

The User Apeal See-saw
Looking at the Adobe Forums and the social net, it is apparent that many users (not everyone) share my private view of the Lightroom 5 beta. It is very light for a major release, There is quiet an imbalance between what it delivers and the general user needs/expectations.Here is a incomplete list of things different folk (including me) had expected or desired to be included the next upgrade to Lightroom, but alas none have been delivered -
  • LAN support, Catalogues on the server
  • MultiUser access to shared catalogues
  • Face Recognition
  • Multi-image merges, HDR, Pano, Photofuse
  • Better Publish Services to #social #net #hashtags
  • Multi-Catalogue Sync/Exchange
  • Custom Brush Shapes
  • Non Alphabetical #keywording
  • Book –> eBooks (e-Pub)
  • Folder Flagging/colour
I still think Lightroom is great but I have drawn the see-saw so unbalanced because I fear Adobe might not realise, rather than achieving an equilibrium, the plank could break and the users will either just stick with version 3 or 4 or maybe abandon lightroom altogether, while they go looking for solutions to their needs elsewhere.
Version 3 was a dramatic improvement, I think everyone knows that and version 4 has some beautiful improvements in the Development module.. The Map, Book, Slideshow and Web stuff have had less universal appeal and are often not used. I can see the advanced brush healing feature saving a lot of tedium and time, but is that compelling enough for the majority of existing and potential new users? .
On a very cynical level, maybe more frequent, lighter and hopefully a little cheaper updates are just be a way for Adobe to make their Creative Cloud Service a more attractive proposition.

Friday, April 19, 2013

What is so important about 2048?

  • This is the size in pixel of photos you can upload to google+ for free (as long as the longest side of your image is 2048 or smaller the image can be loaded and does not count against your 2GB limit.
  • It is also the size of the DNG files (again the longest dimension) stored as the smart previews in Lightroom 5 beta.
  • 2058 by 1536 is equivalent to 3.1 megapixels
  • Most current smart phone cameras are around this size, or a little larger.
  • Probably Ok for a 10" by 8" blow up.
  • Definitely fine for a 6" by 4" print.
  • It is bigger than necessary for an email or blog post.

Dimensions
in pixels
Mega
pixels
Jpeg
File size
DNG
File Size
2048
X
1536
3.1
0.5-1MB
1.2-1.8MB


Posted by Picasa If you click on this photo you will see what 2048 by 1361 looks like on your screen. Big isn't it

Photos that are 2048 across apparently are now considered Standard Size! (at least for the web)

The forlorn pelican


Posted by Picasa I haven't seen a pelican at the lake for some time. This shot was a good chance to play with Ligthroom 5 beta's new radial filter (aka flexible vignettes)

Thursday, April 18, 2013

Many Mistresses, Master of None, continues…

I’m sure I’m not the only one in this position, and I’m not ashamed to admit it. I have too many mistress in the form of software to help process my photos and I can not choose a favourite. I have photos flowing across several computers and stored in a number of locations (see my ABC photoflow) and this is works fine BUT the real problem is that my photo management software just won’t play nicely with each other or even play nicely across more than one user on one computer. So here is an update to my earlier realisation that I have many mistresses but I’m still master of none!
clip_image001
Perhaps it will make most sense if I focus for now on the physical places my photos are acquired, edited , displayed and saved. I have tried to be fair and have no preconceived ideas of what software (or workflow) to use, I have just concentrated on what works and works easily. I have a Local Area Network, which has both an ADSL router and local WiFi. My photos can exist locally on any of the computers and/or be stored centrally and shared across the network. This all works reliably using standard feature of the Microsoft Windows Environment and the hardware I have.

It is when I come to use software to edit and organize my collections that I start to run into problems. You see I have developed a liking to use different software in different locations, Namely picasa and lightroom. they are both non-destructive systems (so the originals remain untouched and the edits and refinements are stored separately and replayed whenever you share, print or display the photos. Trouble is the way each handle the storage of the processing is very different and they both hate having the files taken from under them. They are both very protective of their collections and only work for one master at one place. They just don’t play well together. The goto software on each computer is shown in bold on my flow chart above (you might want to click on it to see a larger size that will be easier to read).

clip_image003My main desktop computer is called Obsidian (it’s a desktop HP pavilion and also a 64 bit machine) It has a calibrated screen and thus I used to use it to evaluate photos before printing, but I am more confident now and seldom use it just for the screen. My main photo archives hang off this computer on an external hard drive and are shared across my network from there. This is where my many mistresses project began, but lightroom fell into disuse has been moved. Windows Live Photo Gallery, a flickr uploader and geoSetter sit here but are largely unused also

clip_image002My main laptops is called Ice (its cool, a white Toshiba Qosimo and is 64 bit, which does make it quick with lightroom etc.). This computer travels everywhere with me and when on the road it is where I load my photos. Somewhat slowly my photo processing favourites have migrated from Obsidian onto this computer.


clip_image004My studio computer is an older laptop computer called Sandstone II ( another Tosihba which is 32 bit and still stuck on Vista) its deskbound these days but matches the mess of my studio. It has become a bit of a USB hub, promiscuously overloaded with USB plug and play stuff, a second waterproof key board, a Wacom tablet, a USB card reader, a cheap slide scanner, an old HP photosmart printer, and the frequent connection of portable external USB drives or memory keys. Not to mention a data projector, acting as a second screen. Whilst it’s a little slower and a bit short on space, the semi-permanent Wacom tablet and data projector as a second screen make it very comfortable as my goto photo processing place. The studio is pretty much an "interruption free" hide away and this really makes it a better place to work on photos, Lightroom and RAW files are the dominant players here.

clip_image005I occasionally share a small netbook computer with my wife, called Dune (yet another albeit baby Toshiba) which has been very handy when travelling. I only keep the minimum of software (just picasa really) and photos on it and rely on the portable photo Apps on a USB key (it’s the one with the green lanyard and called DARKROOM, which lives in my camera bag). When travelling I usually carry a small Seagate external drive to maintain a backup. I have also used this little netbook for some presentations.


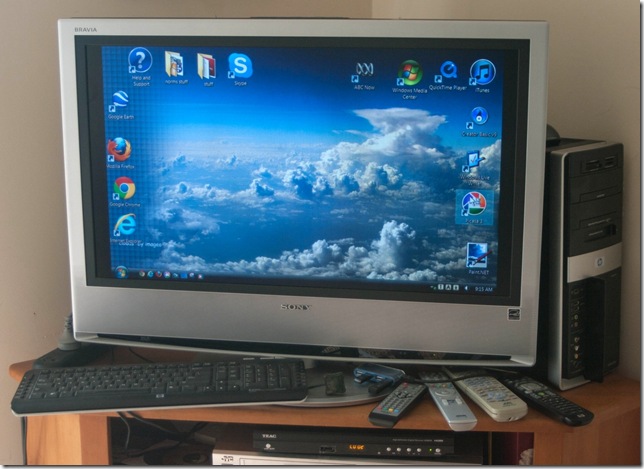
The oldest computer is called Onyx (another HP Pavilion that is still running Vista) but has the original metro style media center running on it and it drives a big screen Sony Bravia TV screen. It is a place I can preview videos and share photos with the family from the comfort of the couch, It is slow and past its use by date but does a perfect job where it is.

I almost forgot to add my android phone here, because I look on it more as a camera than a photo processing device. Yet it is a powerful little camera and competent for editing and sharing at the same time.

So clearly Picasa has become the dominate and well loved assistant to load and manage my photos across the range of computers and places, It is definitely my first choice for processing jpeg images.She is good at loading photos from cameras and any source, She is very helpful for viewing and rating a lot of photos and can organise your photos in a number of ways, by date, by keyword tags, by face recognition and by place (via geotagging). Her photo editing capabilities cover most of the common needs, cropping, contrast and exposure compensation, white balance and straightening. her only shortcoming is in the way she tries to best adjust and renders RAW files. However it is Lightroom to which I trust my best photos (in RAW format) and more creative tweaking. She is very talented and does most things a photographer would ever want, including deeper metadata integration, yet she is very protective and doesn't like sharing her workspace and can be tediously stubborn or slow in some steps.

Now the problem is getting these two to play nicely together and share the computers on the network, without wanting to take control!

Autumn is upon us


Autumn is upon us, originally uploaded by imageo.
Experimenting with Lightroom 5 Beta's new Upright feature, on a natural landscape with the horizon hidden and no strong uprights or horizontals (ie no buildings). It seems to have made sensible decisions, but I'm puzzled what it based those decisions on? Perhaps the shadows and trunks of the trees? The poplar in the left?

Wednesday, April 17, 2013

Smart Previews in Lightroom5 (aka Offline Mode)

Lightroom 5 Libray Mode showing smart previewsThe second thing that grabbed my attention in the Lightroom 5 Beta is what is being termed Smart Previews (aka Offline Mode). Not that you will see much at all, the only hint they exist will be an empty square rather than a square with a question mark when the photo is actually on an external drive that has been removed. If you do have smart previews set up in this situation you can continued to edit and updated the image and metadata (as if the photo was accessible). then next time you connect the missing drive the updates and metadata changes will be synched back into your catalogue. For those that have big phone collections, stored on external hard drives this is a massive thing, and will make life much easier for a travelling photographer (like myself).

Despite all the excitment in the adobe forums,the smart previews it isn’t a panacea for working with large collections in a collaborative environment or even distribution across a LAN, I’ve had a good play around and I really like the feature BUT it is really best described as just Offline Mode, it is still very much single user, single computer oriented.. The smart previews are stored in a separate smart previews. lrdata file  beside your active catalogue, storing smaller version of your originals (not thumbnails) and associated metadata. They also maintain the link back to the original photos. So these previews are not suited to transferring your edit settings and metadata around to other locations (eg moving parts of a library of photos to a another computer or hard drive). What several users have noticed is that working on the smart previews rather than the library of originals on an external drive is a lot faster, and so it should be, its working on smaller files and on the local hard disk.

Dust removal & Advanced Brush Healing Tool in Lightroom5

Adobe Lightrooms Spot cloning Healing ToolIts been a long time since I first mentioned DSLR's dirty little secret, dust on the sensors. Back then (late 2006) I was also looking at the beta that was to become Lightroom and I was severely flamed in the user forum for asking about a brush adjustment. to fix dust spots among other things. The volume of negative comments didn't bother me because at the time I had already "discovered" how to fix the dust spots with a cloning tool. Well I lot has transpired since then and perhaps a little behind its counterparts Lightroom does now have good dust spot removal, shown here. Spot being the important word (it does circular clone or heal), so trying to fix a linear tear or hairline might involve a lot of fiddly cloning. In reality I still prefer to do any dust and other tidying up in Corel Photo Paint. Now I find myself trying out the Lightroom 5 beta and the first thing that grabbed my attention is its Advanced Brush Healing Tool, which could well be the very tool I asked about 8 years ago. The "hardedge" surreal visualize spots view is particularly useful, like my photograph the blue sky trick, at helping you find the dust spots. I think a fair bit of drudgery might have just disappeared. spot removalThis time I dare not ask the obvious question about synchroninzing these fixes across a series of photos (because the dust spots will be in exactly the same place). Phew someone has already asked that, thanks Juergen. Providing you just use the auto selected “source” for the clone or blend (blend is better) you can go ahead and synch the dust spot removal, with other photos, its just that occasionally you will want to shift the auto selected source location in some, hopefully only a few, of the synched copies. By the way you can do this in Lghtroom version 4 as well.

Adobe’s video on YouTube does a nice job of explaining the advanced brush healing features, make sure to pay attention to short cuts and tricks towards the end.

Lightroom 5 Beta is available for download now. Remember, as advised in the video, it is a beta version, so don't work on your existing catalogue, and don't use your original photos!

Tuesday, April 16, 2013

The Old Cottage on the Bend


The old cottage on the Bend, originally uploaded by imageo.

Sharing DSLR Photos on the Net via Low-Fi

You actually don't need a lot of extra hardware, or fancy WiFi Cards to be able to upload your photos from existing DLSRs or compact cameras. If you have a smart phone that uses Mirco SD cards, and perhaps a healthy bandwidth/data upload limit for it. Here is a very simple and inexpensive (providing your on a good data plan), albeit not so high tech, way to do it.

  • Make sure you have an SD adaptor that your mirco SD card slots into (reputable brands are generally sold this way)
  • Use the micro SD card inside its adaptor in your camera (the camera will treat this as an normal SD card)
  • After your have taken the photos, take the SD card & holder from your camera and remove the micro SD card
  • Insert The micro SD card in your Phone.
  • Upload the photo to the Social Web, Flickr, FaceBook, Google+ etc.

Monday, April 15, 2013

Using Lightroom like a Painter

lightroom Develop/Basic tonal sliders
I have become a fan of doing the tonal adjustments “by hand” using Develop/basic Tonal sliders. Rather than the Tone Curves and Presets. This is because this approach matches the way I like to develop a drawing or painting. So here I will take you through my approach to developing a pastel sketch based (loosely) on this photo taken at Mt. Buffalo looking down into the gorge.

Rough CompositionDeveloping the midtonesStaring in the midtones, in this case I have selected a colour paper that is perhaps a bit darker than the mid tone i want to establish. So I am adding a few areas of colour and tone to set up the composition and develop the midtones


adding shadowswith highligjts and darksThese steps are bringing in more of the shadows and then emphasising the highlights. A few darks help settle the image and bring out the feeling of depth in the painting. The final steps are really just adding some extra colour and detail.


Putting in the finishing touchesThe Final Pastel Sketch

The Pastels Themselves

Thursday, April 11, 2013

Trying to keep HDRi real

bracketed sunset HDR seriesTaking the sunset tonight, with the polarizing filter still on the lens, I was conscious that the images on the back of the camera was very dark (underexposed) but the colours of the sunset looked rich, like the actual sunset in the +1 EV image from a bracketed set. So I figured I should do a bit more experiments with HDRi in picturenaut using high bits per channel, which this package can only export as .tiff files, but minimal tone mapping. In this case I used just an effective +1.3 EV exposure adjustment of the whole image.. Again I was not able top read the 32 bit version into lightroom, where as picasa could display it? However the 16 bit per channel files loaded easily into lightroom and responded beautifully to some tweaking of the shadows & black tones and slight clarity and luminosity increases. These adjustments did unfortunately highlight the digital noise, which is typical of low light exposures, but this was easily corrected with the lightroom 4’s development/detail sliders.The combine file is no longer a RAW format but it does hold and extended dynamic range that the basic lightroom development controls can adjust, and I feel this approach does it naturally, not in the lurid surreal formats so often blamed on the HDRi technique itself, but are actually related to some preset concepts of the tone mapping options in common HDR packages. So Instead of “finishing” your HDR work in picturenaut, photomatrix or other HDR software, instead try saving the combined image at a higher bits per channel and do the final tonal adjustments in lightroom (or photoshop)
Sequence: {IMGP0673.JPG: TV=0.002857, AV=6.7, Bias=-1.0} {IMGP0674.JPG: TV=0.004000, AV=6.7, Bias=-0.5} {IMGP0675.JPG: TV=0.004000, AV=6.7, Bias=0.0} {IMGP0676.JPG: TV=0.005556, AV=6.7, Bias=0.5} {IMGP0677.JPG: TV=0.008000, AV=5.6, Bias=1.0}

Late Afternoon Visitors

Wednesday, April 10, 2013

PhotoFriday :: @ Rest


For PhotoFriday‘s topic at rest

More about WiFi and photo uploading

Most keen photographers know about Eye-Fi cards, I haven’t got one but I understand they do the job, are perhaps a bit slow and need extra software and drivers on the receiving computer. Then there is the cost which is between 3 to 8 times the equivalent memory SD card and there are some issues of compatibility. Now there is a competitor, Toshiba has announced a new FlashAir wireless LAN SD card. It works somewhat differently to the standard Eye-Fi approach, when the camera is tuned on it becomes a WiFi hotspot and all you need to download photos (or any files) is a browser. So you can access the photos from a wide range of devices, including smartphones. Looks like it will be a similar price to Eye-Fi for the FlashAir cards here in Australia, This Engadget review view explains more.