Showing posts with label JPEG. Show all posts

Tuesday, October 30, 2018

Getting more colours with Bit Depth

Another area where there is a lot of misconception about colour is the topic of colour bit depth. Really there should be, because it is a simple the numbers of binary numbers (0 or 1) have to describe each primary colour (red, green, blue) in the pixel (colour channel) the more unique colours will be available (and the closer the steps between colours will be. It does not necessarily mean that a wider range of colours will be possible (ie colour gamut). This effect is most easily seen in the image histograms.

As an example and 8-bit coding system, of SRGB, gives each pixel up the 8 bits  or 28 = 256 combination. By convention zero (0) is no colour (black for that channel) and 255 is the maximum intensity of colour in that channel. When all the three primary colours are combined there are 28*3  = 16,777,216 different colours definable for any given pixel. This is often described as “true colour”. This is often called the “bits per pixel” (bpp)to describe the sum of all three colour channels and that represents a pixel.

An interesting fact is most human eyes can only perceive around 10 million discreet colours, so displaying any image in more than 24 bpp will go unnoticed.

Most modern camera, will capture images in 8 bit SRGB (24 bpp) and standard .jpeg has this bit depth. Some higher end cameras now offer other colour spaces (Adobe RGB or ProPhoto) and greater bit depth. Remember you probably will not be able to see the difference in terms of enriched colour or image quality. The extra bit depth however can be very handy for post processing and particularly when “stretching” the tonal range of an underexposed RAW file (which can often lead to colour banding in the shadows). Much photo editing and computer graphics software can handle 16bit colour and  .tiff formats can be saved up to this bit depth.

The Cambridge in Colour site has a simple tutorial of Bit Depth, including a great visualization of the effect of bit depth. The African Shutha project has a wonder summary of the topic my Graeme Cookson.

Saturday, September 22, 2018

AI enhanced .vs. classic HDR

I’ve already commented that I am finding the jpeg straight out of my new Olympus camera fine for those quick uploads (eg instagram or email) where time is important. I also have Auroa HDR 2018 & now Photolemur 3.1 on my handy little HP spectre and both of these came give really great images from processing RAW files (.orf files) straight up with little intervention. So here I will to compare the three approaches.

Original

Photo

ISO 200 f11 1/320sec 42mm

3 Bracket

Photo HDR


PhotoLemur

AI Adjusted

P9220019 P9220019hdr P9220019
There are differences, however they are subtle. I do see the two images derived from the RAW files to show better detail and crisper colour rendering. It probably then gets down to personal preferences which you like best. The classic HDR required three bracketed images (here at 1 EV steps) and then some time to merge, align the photos, tone map the HDR version, and a couple of personal manual tweaks (in this case polarization to get a bluer sky and lifting the exposure a little at the bottom of the image) perhaps 2 minutes of editing, compared with the 10-15 seconds that PhotoLemur takes to do its magic (automatically). Both are fast enough to appear pretty instant but I probably still prefer to spend the extra time on the classic HDR approach (which includes taking the three bracketed photos)

Monday, August 20, 2018

Out of camera .jpeg versus RAW …continues

OLYMPUS DIGITAL CAMERA out of camera jpeg    Continuing a comparison of the jpeg photos straight out of my camera with RAW images, from my new Olympus E M10 iii. I’ve chosen a photo of a passing pelican that came up to say hi! (ok he was probably looking for food) but he seemed happy enough and continued down the canal oblivious to my camera. I must admit I like getting candid bird photos this way.

The two images below are default rendering by ON1 Photo 10 and just default tone mapping from Aurora HDR of the single .orf file. Once again I was using the 2x digital tele-converter, so the jpeg is enlarged whereas the .orf RAW file isn’t. I must admit I prefer the Aurora rendering, interestingly it is also much closer to the out of camera jpeg.

On1 Photo rendering of the .orf RAW file Aurora HDR rendering of the .orf RAW file

However I then did my own cropping, tonal & colour tweaks in ON1 photo develop.

On1 Photo used for cropping, tonal & colour tweaks

Confirming that the jpegs out my little Olympus EM 10 iii are really decent but if you have the time and motivation you will be able to bring out a little more from the RAW file. RAW+jpeg is still my preferred setting

Saturday, August 11, 2018

Comparing .jpeg & RAW ..with a surprise

I’ve deliberately left this just a simple comparison, so you can decide yourself.

RAW taken into Auroa HDR & Tone Mapping with Realistic Balanced Preset  Default jpeg out of camera (no post processing)RAW taken into ON1 and default render of .orf

Which photo do you like best?

Move you mouse over each image to find out more about it

Thursday, August 09, 2018

Are the jpegs good enough to Abandon using RAW?

I am conscious that the jpeg version of any photo from my new Olympus E M10iii is pretty damn good straight from the camera. Potentially alleviating the extra effort to post process a RAW (.orf) image file. So let’s do some comparisons. The original photo is on the left. The default render of the Olympus is shown on the right, I'm guessing it is not a surprise that they seem very close (if not identical).

Original Jpeg Default rendering of .orf file from Olympus Viewer 

Compare these with the default RAW Rendering by On1 Photo 10 & Aurora HDR images below.

New Caledonia, Noumea P8070342

Once again this does convince me that the jpeg file straight out of my Olympus are very good and probably perfectly adequate for typical social media uploaded (eg like this blogs or Instagram). The rendering from different Raw processors find a little more colour and tonal range, however this stars getting into personal preferences (and the time to tweak).

Saturday, May 19, 2018

Archive Obsession Two :: What makes a good Photo Archive

I know I bang on a lot about the difference between an Archive and a Backup. The key difference is a backup can consist of anything, even a great messy mass of files, whereas an archive is a clean long term place to store and easily retrieve information. A

rchives, to be useful must include straightforward ways to find and view photos relatively quickly and easily. It needs a logical structure and whilst an archive should seldom be required, it should not be difficult to use or complex to learn. In other worlds KISS (Keep It Simple). It is desirable that it does not contain duplicates and damaged or corrupted photos. The essence is the collection, whilst it can contain a wide variety of photos and style needs to be clean and consistent. Archive should be managed and will grow with time. Backups should be kept of Archives

B

ackups, their purpose is to quickly restore the mass of data effected in the event that the media on which it is stored is damaged or lost. The emphasis is usually on a full restore, but a few systems do allow for a selective restore. Backup software seldom concerns the structure and viability of the data/files included. A corrupted file will be backedup the same as a good file. They are also focussed on the short term recovery of data. Old backups can become a liability if their contents is not known &/or well organized. Worse still they might be on a media format no longer supported.

Most photo oriented online discussions at present revolve around keeping backups of photo collections not archives. Certainly backing up your working data is important and the 3-2-1 approach is a good starting point. However if your collection of photos is getting large and you want them to be preserved in such a way that you can easily find a specific photo now is the time to start think about building an archive

Features I consider important in an Archive

  1. Photos need to be indexed and catalogued (via metadata)
  2. Photos should be easily viewed
  3. Collection should be free of duplicates
  4. Collection should contain only decent images (out of focus, corrupted or low quality images removed)
  5. Photos should be in a limited number of standard (non propriety) formats

This is a pretty straightforward set of objectives but alas I have struggled to find a single commercial system that has these features. Lightroom sounded like it might be suitable but I found it both wanting and frustrating to use when several computers and people are involved.

  • I have given myself the added burden of quarantining the Archive away from the internet and even my own local area network and housing it within a Linux workspace.

At the moment I use a Hybrid collection of software tools, I now used mainly PhotoMehanic to ingest (upload) from camera cards (I used to mainly use Picasa) and straightway cull the poor quality images and add appropriate metadata. I usually have a short break (could be up to a day or so) and then come back to PhotoMechanic and rate and colour code the images. I use a simple 1, 2 or 3 star rating, photos with 2 or 3 stars are the ones I would like to further process. They will normally be the ones I take into Lightroom (Aurora HDR or On1 RAW these days). Each step in Photo Mechanic is set up to record in both the Jpeg EXIF data and the .xmp side car files for RAW formats. The one star and above photos are the ones that get archived, any unrated photos will be left behind. At present I store the native RAW formats (.cr2,.pef,.orf & .dng) exactly as uploaded from the camera but I’m not convinced this a great long term option. Whilst there is some form of propriety CRC checks in the .xmp files I also create a file in each folder being archived with the .MD5 hashtag for each file. These CRC style checksum are useful to find duplicates and also to check with the files has been in any way altered (ie corrupted)

At the Linux end I read the same files and folders on external hard drives but now I have Linux version of XnViewMP and Aftershot Pro (both of which can view RAW files and read the metadata and ranking in EXIF data and/or the sidecar files. Both these programs can build catalogues or just browse folders. I have not yet tried to catalogue the whole collection but I’m slowly working towards that objective.

Monday, May 14, 2018

Day Three … A is also for Aperture Priority

I’m leaving the new camera owners to play around with their camera and find what it is capable off. Also the big surprise with my new Olympus OMD E M10iii was how good the jpeg was straight out of the camera (I noticed this because I wanted to just look at the images straight out of the camera and not processed in any way when I post examples in here). Purest might argue that the camera is actually doing some important post processing, and I can only agree with that. This only reinforces the idea that not recommending new camera owners only shoot raw and use manual mode, because it is likely  to leave them with discouraging results. Instead if you are a new camera owner, I think you are much better to stay playing in jpeg and have fun with your camera. The results will be good and you will still be able to improve as you understand your cameras strength (and perhaps weakness).

Unfortunately I couldn’t wait, to follow my own advice, I’m jumping ahead and switching over to the traditional modes, starting with Aperture Priority. On my new Olympus this is marked by a single A on the mode dial. On a Canon camera it is Av. I’m probably letting a secret out of the bag but a lot of photographers, the majority of those I know, (there is even a current survey over on Digital Photography School that also supports this) shoot in this A mode. In this mode you must select the Aperture (which controls how much light is let into the camera, and probably the ISO (the sensitivity of the sensor to that light) and the camera will work out the shutter speed to get an average exposure. This is the mode I usually use, and my excuse is I got into this habit back when I bought the original Pentax Spotmatic film camera many decades ago. It was a technical marvel at the time because you could set the aperture and then use the built in light meter (not a common feature at the time) to balance a needle horizontally in the screen by moving the shutter speed dial. It was magic and it got good results. Ok the shutter speed dial is gone on most cameras and the camera does the balancing itself without showing a big needle in the middle of the screen but it works much the same way.

The big advantage of using Aperture priority is its simple to use and pretty logical. In normal light you can pretty well always use a middle f-stop like f8, in darker situation you may want to open up and got to a lower fstop like f5.6 or lower. Let more light in when its darker, its logical.  With this basic knowledge and your camera in Aperture priority and you will normally be able to get a decent exposure in a wide variety of lighting conditions. Its not fail safe, there can be a downside if the camera chooses a very slow shutter speed (less that say 1/30 second) you may find a hand held camera is inevitably moved a little and your exposure gets a little blurred. Most modern cameras have some built in logic to avoid this and might blink the shutter speed in the viewfinder to highlight that the exposure is getting too slow and out of a safe range. Alternatively the camera may allow ISO to be adjusted within a nominated range by increasing the sensitivity (a higher ISO) in order to keep the shutter speed as fast (quick) as needed.

There can also be a creative advantage (or hinderance) in being able to choosing the Aperture, and that relates to how closely the camera focuses on your subject. In simple terms a tiny hole (like a pin hole camera or say f22) lets the lens focus on a wide range of distances onto the sensor. The bigger the size of the aperture the lower the range the lens can get in focus either side of whatever you choose to focus on. This phenomena is called Depth of Field. As the fstop gets smaller (the aperture is opened wider) and the depth of field gets narrower. Portrait photographer for example often use the feature to get the subject’s face in focus but blur the background to remove fussy distracting detail.  Alternative a Landscape photographer might want everything in focus so they will usually use a narrow aperture, f11 is a good starting point. There are many ways to use this sharpness or blurring creatively. The smaller the fstop of your lens the more power you get too blur but usually the more expensive the lens.

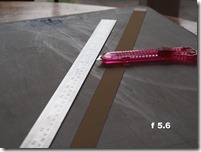
A narrow Aperture F11- Widest Depth of FieldAn Average Aperture F8- Medium Depth of FieldA Wide Aperture F5.6- Narrow Depth of Field

In the three photos above you can see this depth of field control at work. In all cases I focussed on the blade tip of my safety knife (also know as a Box cutter in the USA) which is opposite the 20cm (approx 8”) mark on my metal ruler. At f11 (a smaller aperture hole) you can easily read the markers out to 31cm (12”) mark before the marks and numbers start to become blurred. With the aperture set to f8 the scale starts to blur between 26 & 27 cm (between 10” & 11”) mark. At f5.6 the blurring starts at the 25cm (10”) mark. The important thing also to notice is that my pink plastic safety cutter is pretty much the same exposure in the three images because the camera automatically changed the shutter speed (and in my case also the ISO) to achieve this.

After becoming happy with Auto mode, I believe a new camera owner should next get the courage to try A mode (Aperture Priority). Moving to A will let resulting photos stay nicely exposed and occasionally you could start to pull off really good creative shots by  experimenting with and controlling depth of field. However don’t race out and buy an expensive fast lens (with a low f-stop number) just to become a bokeh master right now. Experiment with the lens(es) you have (a lot of kit lens will be f4 or f5.6, but they’ll be just fine to start).

Saturday, May 12, 2018

Day One ... cont. jpeg .vs. .orf RAW

This was not a surprise. My lightroom (still ver 4.4) could not read the Olympus RAW format .orf. The same thing happens to most owners of new cameras, they have to wait for an update from adobe and they complain a lot on the internet. Please don’t think I’m just complaining, I understand the issue but I not interested in the adobe subscription so this probably marks the beginning of the end for lightroom in my photographic tool set.

testing olympus camera original jpeg fileProcessed with basic Tone Mapping in Aurora HDR 2018

On the left is the jpeg image straight out of the camera, shot in Auto. On the right is the same image but the .orf version read by Aurora HDR 2018, which can read the Olympus .orf RAW format. To keep with the spirit of using Auto I have only used it’s basic Tone Mapping (just stretching the tonal range) as a fairly basic thing you might do with any RAW file. I like both but the one of the right feels more like being there, so I made it my PhotoFriday post this week.

Day One … A is for Auto

I am always advising those with a brand new camera, to start in Automatic (the green box) because that's where you get to know what the camera will do in any given scene. As opposed to starting in M (manual) which is the implied place “real” photographers hang out. Ok that’s just the myth on Youtube, Vlogs and social media. However pretty well all digital cameras (and smart phones) these days will take really good photos just by themselves. So my theory is, it is better getting some good photos and getting to know your camera (and those situations that the camera hasn’t done such a good job). Compared with struggling with manual setting and getting a lot of disappointingly over and underexposed or flat photos, That would be very discouraging to you, and its not your camera’s fault.

testing olympus cameratesting olympus cameratesting olympus camera

So its time to follow my own advice and thus today is A for Auto. Its the first day with my new Olympus and rather than go crazy and snap everything. I figured I’d go green, and look at straight out of the camera photos. All of these images are just the Jpegs direct from the camera with no post processing (including no straightening, which bugs my sensibilities a bit but I needed not to touch the photo after its come out of the camera)

testing olympus cameratesting olympus cameratesting olympus camera

testing olympus cameratesting olympus cameratesting olympus camera

testing olympus cameratesting olympus cameratesting olympus camera

testing olympus cameratesting olympus cameratesting olympus camera

With the exception of those with strong light and shadow (two on the bottom left which had a very high dynamic range) the photos aren’t bad. My advice seems to be justified.

Ok what about jpeg versus RAW, well that’s another post.

Saturday, April 28, 2018

JPEG vs RAW an update

Looking through my most popular post on this blog I was surprise to see how much an very old post on JPEG vs RAW was still rating. This was a personal opinion of the difference I had experienced on my Pentax K20D and Canon 1100D and why had choose to shot both jpeg+RAW and still do.

Some of the reasons have changed a little …

 BUT If you don’t have a way to post process a RAW file, you are likely to find it flat and boring (software companies and specifically adobe) tended to render a Raw file to the same overall recipe which in theory suits all situations, but in practice leaves images looking flat and grey/bland. No worries if you have the knowledge and software (eg lightroom) to take the image further you could create a miracle. However a lot of people get stuck there, and they see other competitive software doing a much better rendering up front (eg Luminar, OnOne, Capture and even Corel Aftershot Pro)

On the other hand modern camera come with a lot of settings ( like higher contrast, vivid colour and/or filters) that can enhanced your photo for various picture types and lighting scenarios and the Jpeg image it prepares (ie what you see on the back of the camera will be in part post processed and could look great). This same jpeg thumbnail is written into the RAW file.  You may notice as you first load a raw files it looks good but then pales to beige as the software tries to re-render the photo to a suit all situations.

I believe this is the issue that is really behind adobe’s moving the camera profiles (and picture type filters) from deep down in camera calibrations up to prime position in the develop panel. Its all just about a better starting rendering of a Raw file.

Moral of the story: If you don’t have the fancy post processing software or don’t have the time to finesse each photo perhaps you are better just sticking with jpeg your have nicer looking photos. If you want the best of both worlds shot jpeg+RAW like me.

Monday, November 10, 2014

Returning to the Jpeg vs RAW Question

In reviewing tonight’s photos in Picasa (which is where I load my photos because it is fast and I can quickly cull and metatag), I was struck by an interesting juxtaposition of a couple of the thumbnails, which nicely illustrate my thoughts on two big issues in the perennial jpeg vs raw debate.
imageI need to refer you back to when I first noticed significant differences in how they are displayed (in picasa). This is because after a while Picasa tries to give the best exposure to the RAW data (at first it just use the small jpeg embedded in the RAW file, which will match visually what the Jpeg from the camera looks like at thumbnail scale) it inevitably ends up with a fairly boring average look. Lightroom avoids this comparison because when you have a Jpeg & RAW pair it only displays the RAW version. How and when it tries its best on the rendering of the raw file depends on your load settings (I’ll leave the details on that for another post) but it will also pretty enviably gives you the bland average version. THUS it is my conclusion that RAW files always need at least a bit of post processing (usually just a small amount of colour and/or tonal tweaking). Whereas the Jpeg render follows my camera settings (which give me extra saturation and contrast because I prefer it that way). SO if you just want to post to the net, such as sharing on a social network WHY NOT just play round with your camera settings and just take Jpeg photos (they are smaller).

If you don’t mind (and enjoy) the time taken to do this post processing the RAW file will give you much more opportunity to enhance the image.

A big advantage of RAW files comes when your photo hasn’t turned out well (such as the BADLY UNDEREXPOSURED shown above). In this case you will be able to salvage an image (albeit a noisy one) from the extra detail in the RAW files. A more pragmatic approach is rather than relying on the RAW file just take another (better exposed) photo.

The RAW files are significantly bigger than the equivalent Jpeg so if you are like me and want an each way bet, expect to chew up your disk space quickly.

Wednesday, July 09, 2014

ETTR :: Exposing To The Right

E

TTR is aftershot histogram thats was shot, exposing to the righta digital photography technique that can be applied to both jpeg and raw photography but it is a very easy way to help extend the “apparent” dynamic range of an image when you want to stretch the tonal range in post processing, but there are some draw backs.

IMGP3369

The theory is by ensuring the the exposure is spread across the full range of the of the camera’s sensor ability, even if the image is slightly overexposed the strength of the intensity can be pulled back to better develop the fullest possible dynamic range. The biggest risk is that the highlight get blown out (turned white) and then the detail within them can not be recovered.

In this example I have taken the +1.5 EV photo from the original bracketed set (ie the one that was deliberately over exposed) and used Aftershot Pro to lift the contrast a little, pull back the exposure and lift the vibrance a little. This has darkened the sky a just a fraction but retained the detail in the shadows in the foreground.histogram shooting to the right


Once again Cambridge in Colour gives a great guide to this exposure & related strategies.

Friday, July 04, 2014

Jpeg+RAW

I have been taking and saving both Jpeg and RAW on both my DSLRs for some time. There are a couple downsides to this, and a few issues to bear in mind.

1. They take up a about 50% more space than RAW alone or about 4 times more space than just jpeg alone. So you probably need a larger SD card and certainly more storage space.

2. They take longer to write to the card, It takes longer to write both files to the SD card, so you should consider a faster SD card. It does take a little time for your camera to “develop” the jpeg rendering but this is usually quicker than the extra time it take to write the RAW file, so if you want maximum Blust speed best to just use jpeg format.

Another aspect that doesn’t seem to get much press is the an unprocessed RAW file is generally flat and boring in comparison to the equivalent jpeg, the truth is the raw file has more potential, so I need to add another downside

3. Most raw file will be boring and flat until post processing has been undertaken to achieve its full potential. You will have to spend extra time nursing it through that process!

Side by side comparison of jpg and RAW as loaded into lightoom.

I think this remains dull and boringness has been essentially hidden issue because most of the package Part of Edit/Preferences/General dialogue  in Lightrooms only show one version. For example lightroom will only show the raw version (unless you check the “treat JPEG files next to raw files as separate photos” box under Edit/Preferences/General dialogue). So you will not see the jpeg version, except for a short period as the file is being imported in lightroom when it uses the jpeg preview imageembedded in the raw file, but once loaded it will use an “average” rendering of the raw file (aka that flat and boring look). There is nothing particularly wrong with the exposure of this image of the beach at Venus Bay but it doesn’t feeling of a clear winter’s day. Different packages will have different ways to do this rendering of the raw files but one approach seldom suits all and the power of raw is really in selectively changing and tweaking the many processing options anyway. Most packages however do have an Autofix or AutoEnhance feature and many will offer plug-ins and presets to automate the processing of your Raw files into something special.

image

I’ll let you into a secret, I didn’t spend ages post processing this image I just selected the OnOne’s Endless Summer 7 preset and eased back on a couple of sliders.especially the vignette. It has lifted the blue, whitened the  surf and added contrast & clarity, and I could have done that myself too but…

S

o the moral of the story is, if you only use your camera to take snapshots and photos to post on-line, perhaps saving your photos in raw format is overkill (and potentially unexciting) and you will do better setting your camera to take the style of jpeg you like. Whereas if you have good RAW photo processing software like lightroom, camera raw/photoshop, aftershot pro, aperture, rawtherapee etc. and you can put in the time, you will be able to get better results from the raw files.If you are ok with the extra storage required (and possibly have faster SD cards) and have the discipline to handle both format why not save both?

Wednesday, July 02, 2014

A Sting in the Tail

The separation of the post processing from the original photo files (be it jpeg or Raw) in the so called “non destructive” editors (like lightroom, aperture, aftershot pro and picasa) brings with it a lot of power because you can then go back and undo and change the post processing steps later. However there is a sting in this approach’s tail and many aperture users are probably going to realised very soon. Most of the “non destructive” work is carried out by proprietary software and stored as procedures in either databases or specific files. Whilst the photos themselves may be moved around the broader internet, cloud services and computers, even smartphones and tablets, moving this post processing along with the originals is generally not possible. There are a myriad of reason for this incompatibility of proprietary approaches, some social services even stripping metadata, bandwidth and file size limitations.. Further the trend within the big software developers is definitely towards serving the smartphone and tablet market and storing photos in the cloud, but this gets you into an even deeper propriety mess, cloud services are very definitely little closed silos, and sharing between of across them a challenge. The situation is a hodge podge and crying out for some standards to be developed for exchanging at least the most basic processing options, such as colour and tonal adjustments, cropping and straightening.

I’m not sure there is a clear solution yet, although at the moment you can save your ”cooked” images as either jpeg or dng (but dng is actually a propriety format). The big disadvantage with jpeg is that its precision is size related (a file that displays well on a smartphone screen may not be adequate to print, and a lot of information can be lost compared with the original file). Dng is being promoted heavily as a great standard by adobe but really its acceptance is at best lukewarm.. The other good practise at the moment is to write the small side car files (.xmp format, again another adobe proprietary format) which can be exchanged between several programs, at least for the metadata and often the rating of photos. The highly prompted Ipad app version of lightroom, can render the images according to the post processing on the computer but can not undertake most of this post processing a fresh, but it will allow you to rate the photos and update some of the metadata. Lets hope the aperture demise and user dissatisfaction does drive the move to more standards to exchange metadata, rating and at least basic post processing option.