Thursday, March 19, 2015

In Search of Aurora Australis

In Serach ot Aurira Australis
 Last night had a high K index so I went out for a while looking for Aurora activity, but the ambient light of the city was probably too bright, the maximum activity was over New Zealand and probably I'm too far north anyway. Still I had a little fun doing some low light multi-stitch panoramas. This is a three photo vertarama, created with autostitch.


Looks like its back to the drawing board and a visible copyright icon on my flickr photostream.

Monday, March 16, 2015

PhotoEditingTools :: Straighten in Picasa & Google+ Photo

picasa basic enhancements tools panelFor me picasa was the first software to offer a seriously easy to use straightening tool. There were some tools with stretch out tilts but most only offered slides and or the ability to type in an angular change. They were not easy to use and generally didn’t show you interactively how the photo was being rotated. Picasa even in its early versions (pre-google ownership) included a straighten tool in the first basic enhance panel. By comparison the picasa straightener put a detailed grid over your image and as you move the straightening slider. Moving the slider to the right is a clockwise tilt and moving the slider to the left is anti-clockwise tilt. The big improvement was that as you moved the slider the whole photo was moved on the screen so it was relatively easy to line up the horizontal or vertical straight lines in your photo.

Adjustment in picasa

Google+ Photo Straighten/Crop TileThe on-line end of picasa is now google+ photo (I’m expecting that name to change name soon) and it also has some good basic editing tools. Specifically a decent straightening tool. However it is somewhat hidden because the tile that activates it is called crop, but it does have a curved arrow above the typical crop icon. To find it firstly click on the edit item on the tool bar above your image, which appears above any single photo display. This the brings up a side panel which has a number of tiles representing various tools and filters. At the top of this panel are basic adjustments and these are all green tiles with “identifying” icons. The crop & straightening tile is on the lower right.

Adjustment in Google+Photo

The crop/straighten panel (shown above) is then displayed and it has a number of tools to rotate the image. I’m using the ruler called straighten. Using it you first select one point, say on the horizon, click and then you stretch out desired the desired new horizon, and click on a second point on the horizon. The photo is then adjusted on screen and you set where the automatic cropping is also displayed (outside this the triangular salvages are still displayed but subdued). The two icons with the small rectangle and curved rotation arrows can be used to rotate the photo through 90° to right or left (ie correct for the camera held at 90°). The sliders also rotates the photo but only by a limited amount. Like the original picasa straightener moving to the right is a clockwise rotation and moving the slider to the left is anti-clockwise tilt.

Friday, March 13, 2015

Learning Workspace & Tools rather than Workflow

I have never been a fan of the idea of “the” workflow to control how you work on images. At least for a creative person this approach will guarantee that your work looks just like almost everyone else’s. Instead I prefer to think a better way to "learn" your own style and skills should be a self exploration of the workspace and the tools available.
I'm actually falling back on the way an artist might be expected to learn to sketch. Some of that instruction might be how to hold the pencil but most of the time will be dedicated to seeing the subject and making the appropriate marks on the page, sometimes using a HB pencil sometimes sometimes much softer like a 4B or charcoal and other times maybe coloured like a watercolour wash or crayons. To this end I began a series of simple post where I described the workspace available in common software (specifically software I have used). This was a lot like opening the page of your sketch book or perhaps a setting up a ready primed canvas and getting out your pencils, pens and/or paints. However once you are familiar with the workspace it is time to find out what tools are available and what they can do.
What I am going to tackle next is an exploration of tool types, by tool type. Not trying to cover everything  but definitely those which I consider the important photo editing tools. This is somewhat like using different media in the sketching but I will be focussing on specific tasks that most photographers and/o artists will commonly encounter. I have picked a dozen common tasks and the tools to do them and divided these into three groups

Basic Tools

Flourish Tools

Special Tasks

White Balance Sharpening/Smoothing Noise Reduction
Exposures Selective Refinements Red Eye Reduction
Tonal Enhancement Layers, Masks, Gradients Lens Corrections
Straighten Filters, Presets
Crop
You probably don't need to learn all of them or even learn them in the order given. They are just a set of tools I think are important to learn. They are not a comprehensive list of tools to answer every possible modification of a digital photo. I intend to discuss each tool, one at a time, and generally one tool in one or just a couple of software package at a time. I don't intend to explain every possible option for each tools but I want to start you on the journey of learn new tools and which tools can be used for which tasks. I particularly want to leave you with a desire to experiment with those new tools and skills.
So next time you have a photo you think has potential, look at which task/tool is likely to deliver that improvement and start to experiment with just that tool. Shift the sliders both ways. Look at the extremes. Perhaps even try the same image in a different package or the same tool on an on-line service. Like any artist you should become skilled at making your mark in the way you feel comfortable.  You could wait for me to discuss that tools (you might have a long wait) but If you aren't comfortable yet just set aside some time to experiment with the tool, try every which way. The big advantage with digital images is it will cost you little more than your time.
There are dozens of expensive books that follow elaborate workflows but I don't think you can beat learning how to use one tool at a time on a task that is important to creating/enhancing your own image.
Once you know the way in which you want to use the tools and you find yourself doing the same tasks time and time again, then  this is the time to considered work flow, But it should be something that suits you and enhances your creativity.

Tuesday, March 10, 2015

PhotoEditingTools :: Straightening up in AfterShot Pro

Something that everyone seems to be an expert on is straightening when the horizon is water. Everyone seems to “know” that the horizon will be flat and can be harsh when it isn’t. However straightening is one of the tools that often get overlooked when learning photo software. Further straightening is one task that is handled very differently in different packages.

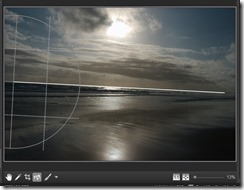
I am using AfterShotPro on my laptop much more, often in association with Picasa to review photos when I first load them. I find this is the best time to cull, rank, add the metadata and perhaps do some very basic edits. Whilst Straightening is never a high priority. straightening toolI find that AfterShot Pro has a really wonderful straightening tool, it is the small tilted picture icon at the bottom left of the main image display. The tool displays a bold arrow, clicking and holding the mouse will then select this point as an anchor and as you move the mouse away from this point a circular target style image opens up which has a horizontal and vertical grid markings (useful in aligning both vertical and horizontal items) Movement of the mouse can rotate this target circle. As you move away from the target a bold line is draw on one of the prime directions (right. left, up or down) closest you you movement. If you move the mouse outside a certain size (ie the circle almost fills the shortest axis of your image), the circle no longer expands but the bold reference line continues as you drag the mouse further. In the example above I have anchored the first point on the horizon on the left and side and draw out my desired horizontal to the horizon on the right hand side. Releasing the mouse rotates the image to use this new horizontal.

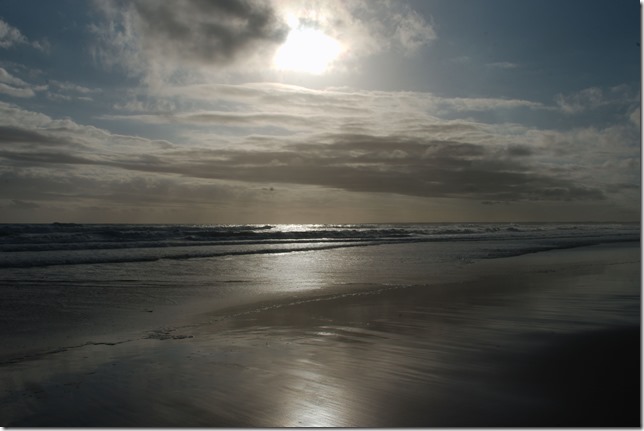
imageUnlike most other straighten tools, the one in AfterShot Pro does not automatically crop your image. So you are left with triangular salvages (shown in grey On the left) along the sides. The crop tool is the two overlapping L shapes with a tiny scalpel icon, its is to the left beside the straighten icon. Clicking on it displays a small dialogue box, in the upper right hand corner is a button labelled fit, clicking on this will then automatically fits your rotated photo into the largest rectangle that it can generate without displaying the salvages, (ie it trims off some of the edges or your image). This basically matches the automatic cropping of other packages. However when you rotate the image the aspect ratio of that fill rectangle can vary, so being able to crop to a defined ratio instead of the best fit could be desirable in many situations. _IGP2136Finally for all the “pixel peepers” and/or folk with a micrometre, here is my straighten version of my contre-jour seascape

Monday, March 09, 2015

Sketching & Photography ….continued

Artist have know about the golden hour(s) long before photography was developed. They realised that the intensity (and purity) of light transformed for a short period each day. Whilst is wasn’t until the British water colourists and later the French impressionist really focussed on painting en plein air, that the power of this magical lighting became recognized, and popular with the general public.

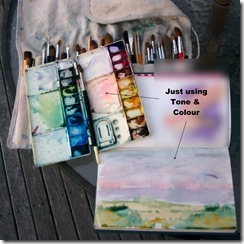
_IGP2101I enjoying trying to capture the evening light in a sketch. It can be a challenge because the colour and atmosphere can be fleeting, seldom long enough to mix more than a couple of colours. Last night I could not find a pen or pencil at hand so I only had time to try and capture the tone and colour with a few simple washes (no line work).

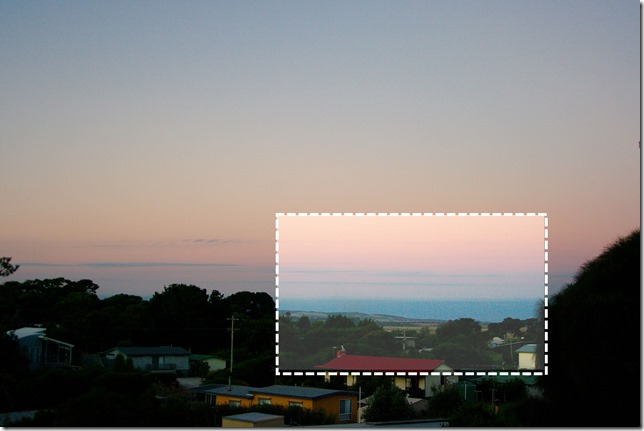
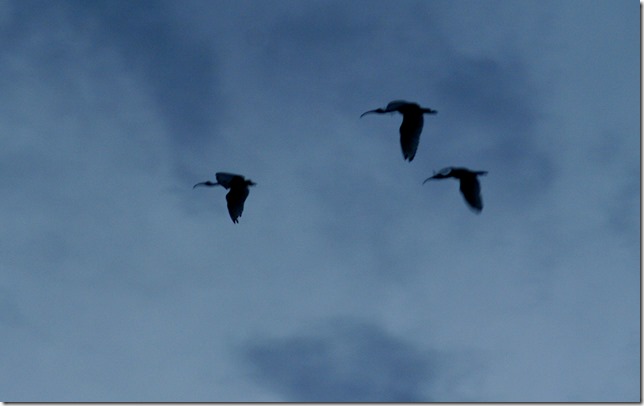
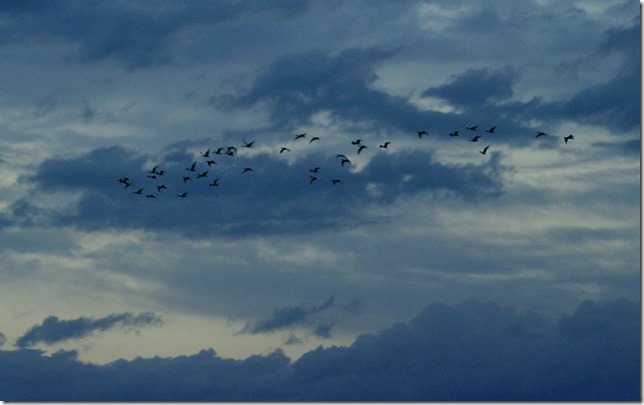
Comparing this with the photograph (below) taken immediately before the one of my sketch (on the left) my sketch might look pale and lack detail, but it definitely gives me a stronger sense of the moment, the descending cool and echo of bird calls. I also didn’t have a telephoto lens at hand so the sketch is just a tiny part of what I photographed in the failing light.

_MGP2100

I’m very unlikely to formally paint this image or sell a photograph of it. However in the scheme of things, understanding light and knowing what I am actually seeing is more important. I feel the sketch, even though it just a couple colour washes, is likely to help better recall the scene. More importantly it highlights that we should not always assume a photograph straight from the camera is always the perfect record of what we saw.

Sunday, March 08, 2015

Recuva to the rescue yet again

I’ve had a few SD card trouble of late and have upgrade to a new set of SD cards (named brands 8GB and 10mps ie decent cards), No problems in the Canon but the cards with Pentax files have played up, on two occasions the files where not deleted by Picasa as I uploaded. No real problem I could clear the the photos in the camera. Then I uploaded a few photos and was looking at them in picasa on my laptop and picasa refreshed the screen, but the new folder had disappeared! Really disappeared! No amount of search the recycle bin or scanning for the photo file names of just recent files could locate them.

image So I decided to run a disk recovery utility but it had been a long time since I had had to used such a utility and it was nowhere to be found on my computer or useful photo tools USB key. Also I had forgotten the name (which is recuva, remember that name) so I had to do a little search back into my blog and then check on-line, recuva still has a free downloadable version. Just 4mb, so I had it downloaded and recovered the files in just a few minutes. The two things that are important to note are. Firstly recover the files to a different disk (not the SD card). Second Recuva will not see the RAW files if you just ask to recover photos (it will however recover the .jpeg files). So it is important to recover all files. So I will make sure I keep an up to date copy of recuva on my useful photo utility toolkit

I’m a bit puzzled by the loss of files within picasa, this has never happened to me before. As a precaution I’ve also reformatted the SD cards in the camera I will be using the cards in and not swapping them between cameras.

Wednesday, March 04, 2015

Returning to the Sand Goddess

I am getting more and more convinced that it is truly important to ensure that the first place to post my ideas and photos is a place of my own (or controlled by me) this is the POSSE approach. The down side is very few folk actually look at my places (perhaps with the exception of this blog), The compromise, which is what POSSE is all about, is to syndicated that post elsewhere after you have posted on your own place. For example I post the above photo on Known and then syndicate the image (above) in Twitter. This establishes a precedence (and thus “legal” ownership of the intellectual property via publicly searchable publication and time stamps) and also very importantly clearly established provenance.
IMGP8357-1IMGP8307-1IMGP9612-1
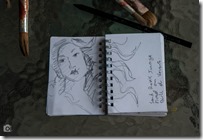
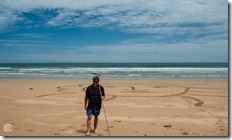
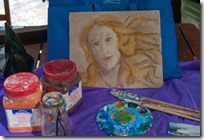
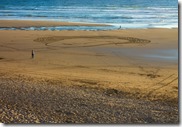
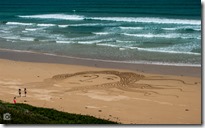
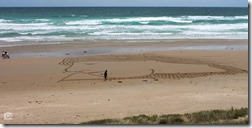
My sand Goddess project is about recreating some of the classic imagery of goddesses in sand, where better to start than raking these images on the magnificent beach at Venus Bay.
IMG_9038IMGP8352-1IMG_8223-1

The Human Camera - Stephen Wiltshire

Stephen Wiltshire has an amazing talent, he can sketch incredibly detailed images from memory.

Tuesday, March 03, 2015

Experiments with the Long Black

I'm normally an espresso drinker (aka the Short Black), but over summer I've been getting used to larger coffee's still black but larger (aka the Long Black), Trouble is the quality from different cafes is very variable, and often undrinkable. So I've been experimenting with my own variation of the "standard" procedure, and I might have found a good and repeatable method.

Ontop of a small amount of hot water (not boiling) "float" a double espresso shot. 

That's all there is to it, and it keeps the crema & flavor of the short black without seeming diluted or heavy & bitter.

Monday, March 02, 2015

PhotoFriday :: Tree Fern in the Rain


Tree Fern in the Rain

For PhotoFriday‘s topic Leaves

Sketching .vs. Photography


Here are a couple of YouTube videos by Kenly Dillard giving a demonstration of sketching and its similarities to still photography. Whilst he is demonstrating sketching the context about seeing the light and creating a picture, his video and examples are well worth watching, even though they do jump around a bit (Unfortunately the talk is incomplete, some bits are missing)