- Step 1, Take a set of bracketed photos, (three is a good number but you can take more) at different EV exposures.
- Step 2, Load those photos into software that can analyse the exposure range of each photo, it is normally necessary to align the individual photos, if you use a tripod this will not be necessary. I actually rested the camera on a wall to keep it steady so i have jumped over this step.
- Step 3 now create a virtual photo space with a wider
range of exposure range, using a composite of all intensity recorded (ie the darks from the darkest photos, tone range from the normal exposure and detail in the light from the lightest photo). the display in FDRtool shows this nicely, you can see histograms of the exposure intensity beside each photo. At the top of tjos display you can also see the expanded range of tones in the "virtual" composite space is usually called the HDR image
- Step4, you finally need to tone map the virtual exposure space into the
dynamic range that your output device can handle. Yes computer display and even printers have a limited range that they can display compared with what the human eye is capable of seeing. i FDRTools the main control is the silders under the histogram, moving the left hand slider sets that tone to the darkest setting (in simple terms the blackest part of the photo) and moving the right hand slider sets the lighten tone (in simple terms whitest part). there are also sliders for gamma (which i ;like to think of as colour contrast) and saturation (intesity of colour).
Friday, February 15, 2008
Understanding HDR (High Dynamic Range)
You may have notice I have been playing a lot with the HDR (High Dynamic Range) technique later. I offer no excuse, I am playing, I just need to figure out how it works and how I might be able to use it. So here is my simple explanation of the general process. Note I am using FDRTools in this example because it is easier to show what is going on (I already prefer dynamic photo, see my previous post why)
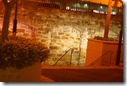

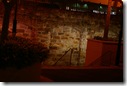
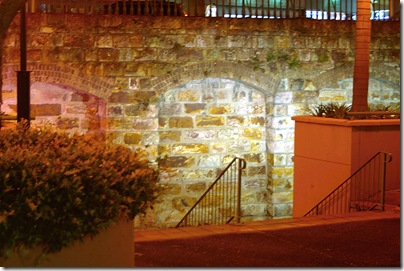 Providing you don't go overboard with the gamma and saturation sliders (if you do, you might get pretty radical over coloured images) to should end up with an photo to looks much closer to what you saw when you took the photo, compared with any of the actual exposures (compare the image above with any or all of the three original photos at the top of this post).
Subscribe to:
Post Comments (Atom)
1 comment:
Hi there ! I'm also experimenting with HDR myself, but in panoramic images... It's not easy but the results are very enjoyable sometimes...
Please check my images and tell me your opinion.
Best Regards
Nunor
http://panoramicas2007.blogspot.com/search/label/HDR
Post a Comment