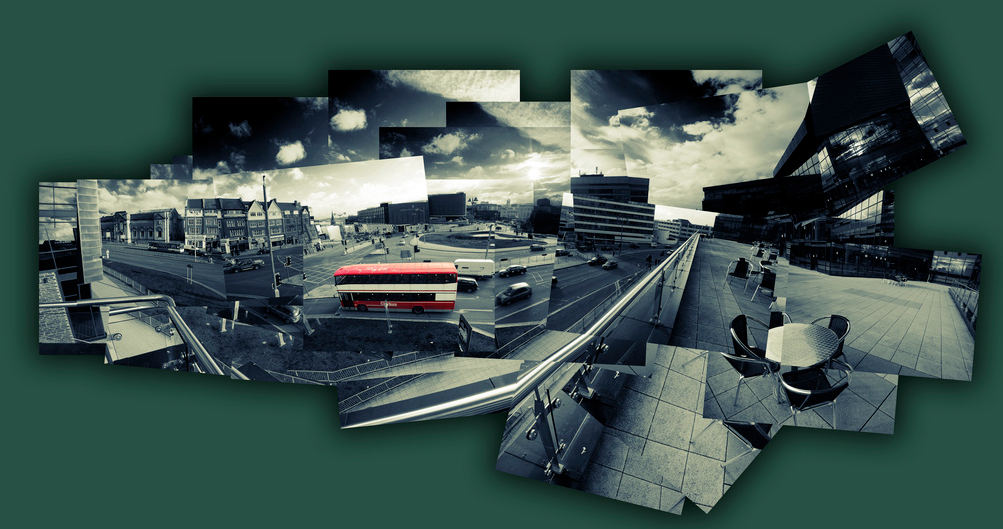
 Whilst photo collages have been around a long time its is the joiners developed by David Hockney that can bring a rich artistic feel of personality and being an original work. His original joiners where just polaroid images (lots of them) assembled and stuck down to make a larger image. Not necessarily taken from the same vantage and often deliberately not quiet matching. I have found the collage maker in picasa is an idea place to build similar joiner style collages. However there is plenty of software out their to do a similar job (Hockneyizer is a wonderful “filter” style app,originally for flickr photos but you can upload any photo to it directly, that will take a single image and break it into a hockney style collage)
 In picasa you just need to select the photos you want and the select the collage builder tool (either the Create/Picture Collage menu item or collage button if you have one on the bottom toolbar). The first step is to select the picture pile format which is as if you are just scattering the photos on your desktop. under that is a series of border templates (the collage above has the polaroid frames, in homage to Hockney but they are not what I wanted for the final image. I prefer borderless option.) However I like to using a drop shadow which emphasis (rather than hides) the join between photos. The next step is to move around and possible resize and reoriented to photos. When you select a given image a control circle if overlayed on the photo click on in and moving your mouse slides the photo over the surface. You can resize the photo with the mouse wheel (or clicking on the orange dot on the little control button on the edge of the circular tool and moving it in and out (horizontally). To rotate the image again click on the orange dot and now move the mouse vertically and you will see the image rotate. the controls are very easy to master and you will soon be able to rotate and resize at the same time.
 One of the bigger charms of Hockney’s later joiner work is that he did not try to fill the whole space and left ragged edges and some gaps but he did take time to judge a suitable background colour, something that could bring the whole together. I like this approach and so I used the eye dropper tool to select the dark blue of the sky as my background, Then a bit more rescale and realignment of all the photos together (press select all at the top of the workspace and all the photos will be outlined and can be reoriented and scaled as one). You must then hit the create collage button, which creates the composite image and puts them in a separate album called collages. You can then work on this as any other photo in picasa so I did a fraction more cropping. The advantage of the picasa’s tool is you can return and re-edit the original collages in the collage album at any time.
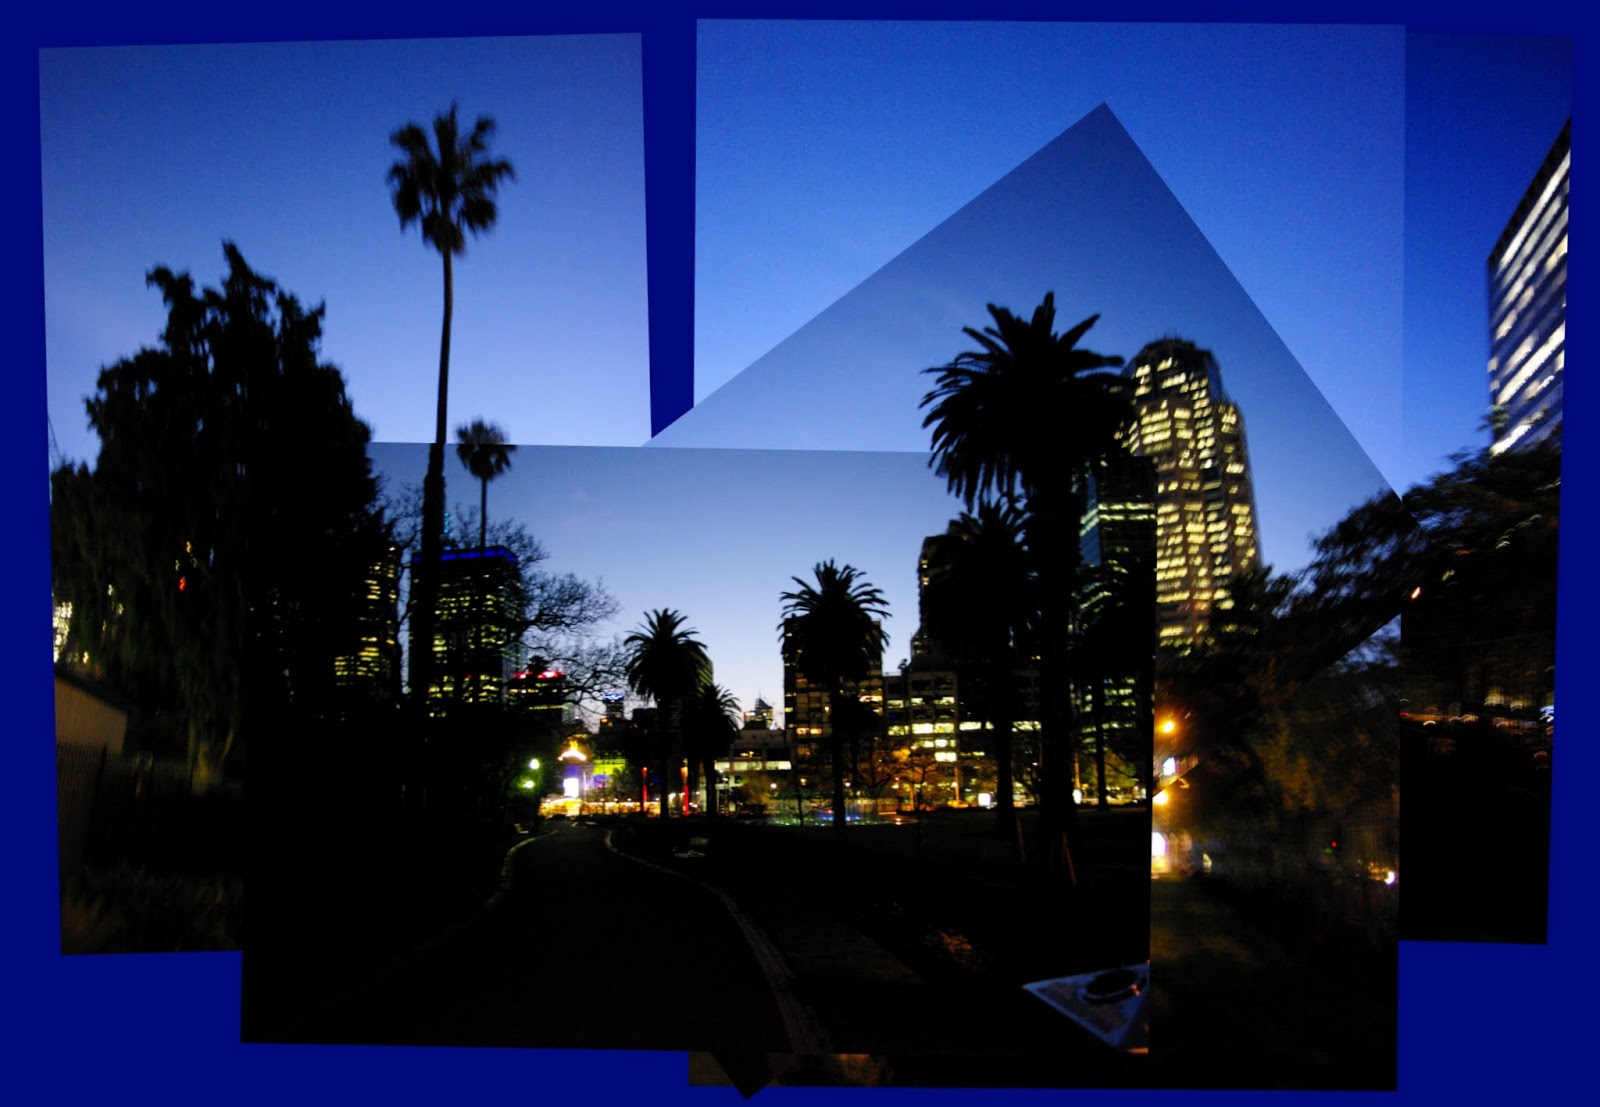
There should of course be some “art” applied to your selection and arrangement of the images but if you are lost for inspiration you could always try the scramble and/or shuffle button at the bottom of the collage workspace (remembering that any alignment of images will be lost)
1 comment:
nice blog embroidery digitizing services in usa
//
Post a Comment