Thursday, April 30, 2020

The Window IX :: Inside Looking Out

Exposed for Outside
This has been an age old challenge, to get both the inside exposure and the outside scene balanced.  Whereas our eyes can automatically adjust to see detail over a wide range of lighting levels than even the best digital camera. Also our eyes are constantly looking around the scene adjusting focus on regions of varying brightness. The image our mind sees is a reconstruction, and not a direct measure of the light entering our eye(s). If you are skeptical, read the Cambridge in Colour article Cameras .vs. TheHuman Eye.

Exposed for Inside
The camera just has to take a single image and because it has a limited dynamic range, and if its using the light meter to choose exposure it is likely to choose something in the middle.  The inside is very dark compared with the intensity of light outside. Finding a compromised for these two lighting condition may be too hard and any exposed in the middle will leave the interior in deep shadow and/or the exterior view bleach out.
You can override the automatic exposure metering and take two exposure one for inside and one for the outside view. Then blend them together assuming you have that capability in your postprocessing software. This is a very common procedure recommend elsewhere on the net, but it can be tedious to do.

Another alternative is to use the HDR methodology, which combines different exposures or can also exploit the extra information in a single RAW photo to expand the range of tones that can be reproduced. The article I have linked is somewhat old but does explain the method well. Most post-processing software now has a HDR capability. I prefer Trey Ratcliff's AuroraHDR and using a set of three EV bracketed photos (underexposed by 2 stop. Normally exposed & over exposed by 2 stops) which I have dialed in for the camera to take as a series.

Bracketed EV Series

A word of warning, be careful when tone mapping (or using presets with HDR images because it is easy to overdo and end up with ugly. faux painted look that is disturbing to most viewers. I prefer to just use the default HDR image (with AI controlled tone mapping and looks natural) from AuroraHDR and do any further tweaking in my chosen post-processing software, usually using On1 Photo RAW. It is my best solution to the Indoor and Outdoor View at the same time dilemma. Most real estate photographers must also believe!
Final HDR Result


Wednesday, April 29, 2020

The Window VIII :: Getting really close


When you think there is nothing more to challenge your photographic desires taking photos of TheWindow, its time to get closer.  "The closer you are too the subject, the more detail you see and the greater the impact of your photograph" ... Rich Sammon. This advice is not new but now is a perfect time to take the advice seriously.

You actually don't need a specialist macro lens, although they can simplify the tasks when getting really close up. You can use any lens really, but there will be a few challenges to address.

118/336 the sunniest spot in the house
Most lenses have a minimum distance that they can focus and in general terms the longer the focal length the greater the minimum focusing distance. This can work against you when trying to use the magnification capability of a telephoto lens to get a larger image. With your impressive Telephone Zoom you might have to stand a meter or more away!  Whereas with your wide angle lens you could get with a few centimetres.

The next obstacle is depth of field which is a bigger topic than I need to address in full here, where by the longer the focal length of the lens the shorter can be the width over which the camera is able to achieve sharp focus and to confuse things the Aperture (which controls the amount of light let through the lens) also affects the apparent depth of field. Wider Aperture (lower f-stops) narrow the zone within which the focus seems sharp.

118/366 I did tell you the Windows needed cleaning
The distance to the subject also affect perspective. Wider angle lenses (lower focal distance of the lens) make close objects seem larger. Telephotos (large focal length lens) make distant objects appear larger and more similar in size to close objects (they seem to compress space). This difference can be amplified for close up photo.

The final issue that might prove a challenge is the about of light. Consider that there is only a fixed amount light coming off a subject so as you use more magnification. The amount of light landing on a given sized pixel in you sensor gets less. You will need to either expose longer of move to a wide aperture. Leading to the possibility of blurring via camera shake or soft focus due to a narrower depth of field.

I'm deliberately not telling you how to find the compromise between all these issues. I'd rather you figured this out yourself. You should have plenty of time to work through your solution. No need to keep those trial photos this is an exercise in understanding not make a single great photo. However I found this nice explanation of what depth of field Is and Isn't on a new YouTube channel called Photography Online. Its quiet an informative show so perhaps check out some of the earlier episodes as well.


"When you think you are close enough, Get closer"
... Rich Sammon

Monday, April 27, 2020

A Surreal Selfie #photoproject

Le Violon d'Ingres


I got inspired whilst looking through Man Ray's photos (I was looking for but never found his Jazz series). He was a Dada &/or Surrealist artist and photographer who came to fame in Paris in the 1920's & 30's. His most famous image from that time is probably Ingre's Violin, but he was also a very successful fashion photographer and filmmaker after the war.

“It has never been my object to record my dreams, just the determination to realize them.”
...Man Ray


The object here is to take a "self portrait" (it doesn't have to include your face, could be just a shadow, an empty chair, your hands holding a camera, or a coffee cup!) that tells much more of your story than a standard head-shot selfie. What story do you want to tell? Perhaps it will be about your aspirations, what you have achieved, what you want to do after lockdown is over?


Short Black

Sunday, April 26, 2020

The Window VII :: At Dusk


This is an image from the window I should have taken as part of my windows snapshots and I missed the opportunity, because I had other things like eating dinner to distract me. Tonight I was ready BUT a normal standing  shot it didn't take in the sky. I had to move the camera down almost to the floor. Which gave a slightly skewed view.  If this is done deliberately this is know as a Dutch Tilt and can add drama, though strong diagonals in the composition.


 Lets just leave it as a happy accident and I like it. However trying to capture the light at dusk at The Window is now struck off my list of times (ie no Golden Hour photos)

Saturday, April 25, 2020

Window VI :: Day & Night

Dappled Ambient Daylight
The quality of light varies a lot during the day but the changes to night and artificial light can be even more dramatic. This is even more obvious in any photographs we take. The artificial light normally has a different colour temperature and this may show up as a colour cast. (orange in my example below)

This colour cast can be fixed by a process normally know as White Balance, which is just a name for the task of removing that cast and it will vary depending on where you undertake it. It can be undertaken in digital cameras by the camera as your take the picture, often as little icon in the menu for daylight, sunny, cloudy, artificial light etc).


Jpeg direct from camera showing orange colour cast despite AWB
Most modern Digital cameras have an AWD (Automatic White Balance) setting that the camera best guesses the colour temperature (usually very well). If you are taking a jpeg image this adjustment is applied to the image, if you Capture in RAW the adjustment is applied to the preview but the un-altered data from the sensor is also stored and the white balance is easy to change later.
RAW image post processed with a WB adjustment
Most Photo Processing software also has white balance tools built in, and it is possible to make the same adjustments to removed colour casts in the post-processing step (as I have undertaken in my example above). How the adjustment is carried out varies with each package but most offer a simple approach using a dropper tool (that is pointed at part of the image that should be a neutral colour) through to sliders that adjust the colour temperature in degrees Kelvin (how colour temperature is measured)

Friday, April 24, 2020

Stay at Home Photo Scavenger Hunt

You don't have to use this list, its just a start. Set 10 items to find around the House &/or Garden and give everyone at home a phone or camera and a couple of days to find the items.

  1. The red-ist thing/place in the house
  2. The oldest item in the house
  3. My favourite outfit
  4. My happy place
  5. An old neglected favorite toy, book, pair of shoes
  6. Something made of wood
  7. Something beautiful
  8. Something that's living
  9. Something that was lost and recently found
  10. Something smelly


I thought I'd start with the smelly-ist, 
in my favourite bit of afternoon light.
(yes they are my shoes)

Wednesday, April 22, 2020

The Window V :: Backlight with Available Light

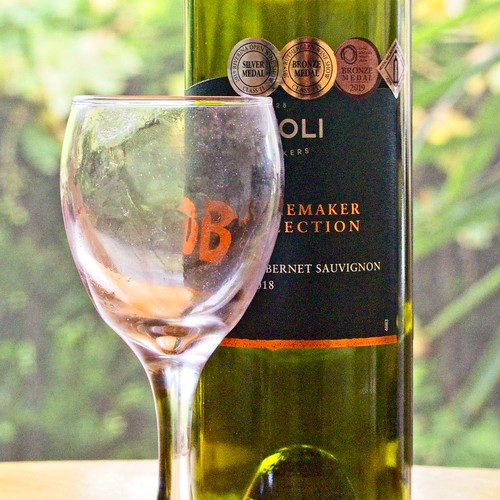
110/366 Must have  been a good night!

The natural ambient light can be perfect for back lighting close up subjects. This bottle and glass where not cleaned up from a homemade pizza dinner the night before and this simple composition using the soft indirect morning light caught my attention.

Always be on the look out for good lighting opportunities now that you are staying at home.

Tuesday, April 21, 2020

Keeping your gear clean

When you get out to exercise, I trust you are taking your camera, or at least your smartphone, to take the opportunity to also exercise your photographic muscles. There is then the issue should you also disinfect your gear when you get home, The answer especially now is yes,  cameras and phones are something that you think nothing of bringing up to your face, for some time and there a couple of other important issues.


  1. Do not share your phone or camera with anyone you meet.
  2. Just putting it back in your camera bag is not enough.
  3. Wash your hands (thoroughly) as soon as you get home (you are more likely to be a source of infectious than your camera).
  4. Avoid using liquids to clean or disinfect any gear. (alcohol wipes may be out but probably unnecessary)

So when you get home take all you gear out of the bag and wipe it down with a microfiber cloth (the type you get from the supermarket as fine, they don't have to be black with a camera manufacturer's name on them. Take the opportunity to clean any lenses you used. It is not necessary to clean your sensor unless you change lens on a windy dusty day,, and that's not recommended anyway. You should wash the microfiber in soapy water, rinse and dry thoroughly before re-using.

Derrick Story goes into a lot more detail in his podcast "How to Disinfect Your Gear." The link goes to his show notes as well the podcast, as he has a some important sources of information there.

Saturday, April 18, 2020

The Window III :: inside Out, Outside In

Because these are large windows they lend themselves to including much of the outside as well as aome detail of the inside.

106/366 Inside looking out

The obvious pair to this is  looking back inside (I need to wait till the afternoon when the sun was streaming in and giving similar illumination to the light outside).

  105/366 Outside Looking In

Friday, April 17, 2020

The Window at different times

This a great exercise to begin the Window project with. Just take much the same view of your chosen window at different times of the day. Perhaps even on different days so you see the differences between a sunny and overcast days. Don't worry that these photos just look like simple snapshots, they are not intended to be shared.

Set up the images side by side, before post processing, and evaluate the levels of natural ambient light. What is the best time of day and type of day to take photos. Of the window? Or objects in front of the window. Spend a little time doing this, because now you will be thinking of the quality of light. a great step towards becoming a better photographer.

Wednesday, April 15, 2020

watercolour postcards


At last..., this has taken me 4 days to figure out to make, and I know there are a lot of stumbles and some bit filmed upside down, but it is my first real attempt at an instructional style video (so feedback welcome, but expect nasty comments to be deleted)

This was primarily made for other watercolourists, but the idea probably applies beautifully to small photographs (10 by 15cm or 4" by 6") just turn them over and put a stamp on the back. Most prints have a paper base so 8 hours or overnight quarantine on a shelf at the recipient's place is all that is required. I have however come across some plasticized and synthetic papers from some commercial labs and papers for inkjet printers (so they would be less suitable eg 72 hours or over 2 days quarantine required) but still worth sending. The recipent will undoubtedly appreciate their connection with you.

Sunday, April 12, 2020

COVID19, Conspiracy Theories, Rumors, Memes & Beliefs

The internet is flooding with fake news false rumors and straight out wacko conspiracy theory (the trolls, hackers and other undesirables are also locked in). The big disappointment is that so many folk seem to believe them and circulate them further, its like a really dodgy chain letter. Here is Trey Ratcliff (a photographer I do admire, believe in his honesty and upfront approach) with a his personal evaluation of the situation.


So how does this relate to the stay at home photowalker?

 Firstly you now have time to be a bit more discerning in what you believe, and you can afford to dive a little deeper to understand things before hitting that share button. Secondly a long standing peeve I have with a lot of YouTubers particularly  is they may be biased and restrictive (follow my work flow exactly, its the best, I am the greatest, buy the latest full frame camera, fastest lens, more megapixel etc) that can be ok  but the advice may not suit your way of working and too often is positively appropriate or incorrect anyway. Thirdly there are a lot of idiots and nasty people out there on the open net that are just out to offend and put you down, just ignore them and focus on those you can trust to share your work with (it might be specific groups or even just individuals)

Find your trusted news sources (and those you trust on your favourite social media), stay in contact with your family and friends and ignore the rest.

Friday, April 10, 2020

The Window II:: #photoproject


Ok this looks a lot like a snapshot but I was actually trying to follow the idea of sticking with the "rule of thirds" (I despise it, its not a rule its a myth but in some ways its close to the golden mean). So this more about trying to get a pleasant composition and the three panels do lend themself to a three-way split.

When you take a photo inside you may not be able to get far enough away from a subject and have to use a wider angle view to get everything in the frame. However, what happened is the edges of the resulting images can tend to bend and often curve in. Typically if you are photographing slightly down the verticals may bend out, if your looking up the verticals can bend in. I'm sure you have seen these effects. So you might have a couple of issues to fix. On really wide-angle lens you get what is often called barrel distortion. Things are wider in the middle and bend in at top and bottom. If you are using an exchangeable lens camera a lot of software (like lightroom, On1 & CaptureOne) will have lens correction tabs and tools which will recognize the lens type and focal length then will correct for this barrel distortion. The second item to fix is the converging or diverging verticals, and for this you should use a tool usually called Keystoning, Some cameras now have this ability built-in, the great little app Snapseed (see Tools/Perspective) can do it on your phone and many large software packages can also do it nicely (but not always called keystoning). 

Thursday, April 09, 2020

The Window I :: #photoproject

This is a return to a project that I posted earlier. Infact it is exactly the same project. I just want to add a bit more detail about the aim.

I expect that the first day or so you will find a window (you might just have one if you are in imposed self-isolation so that window will be it) and photograph it at different times of the day. I also expect the photos will probably just be snapshots. You know the ones you just pick up the camera aim at the window and snap. There is nothing wrong with this, just get this approach out of your system for the time being.

The real purpose of this project is to look deeper at something familiar. Now you should spend some time looking at the window, looking at light and shadows before you pick up the camera. Think of abstract composition, perhaps just a small segment of the window. Don't just do it once make some time to return to this project several times over a few days and focus on different aspects.

Wednesday, April 08, 2020

Challenges of Photographing the Moon

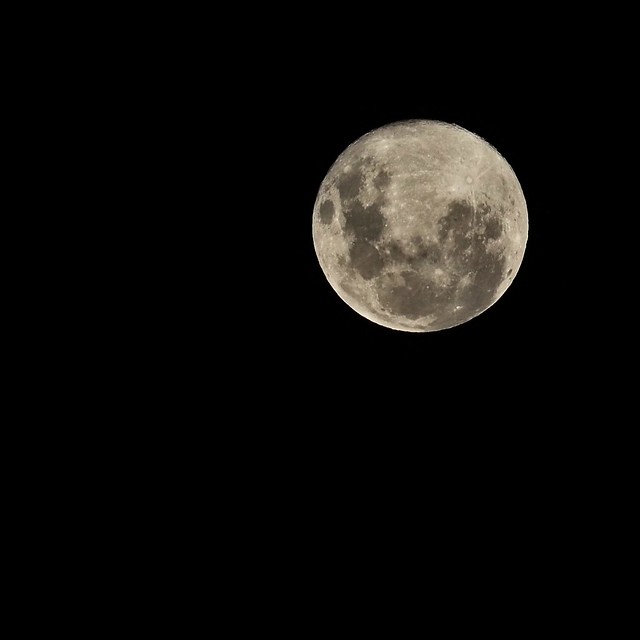
100/366 The Full moon from OZ
I must initially apologize in advance I'm sure you will see this image posted a lot tonight. This was taken around 7:30pm in Melbourne, Australia. I missed the moon as it rose above the horizon (because I can't see the eastern horizon from my place). I believe it had a golden tint . That colour coming from the earth's atmosphere, that the moonlight must travel through as it rises above the horizon.

I thought I should share my experience photographing the moon with a standard camera (I've used my baby Mirco Four Thirds model the Olympus OMD 10iii, if you want to see my exif data click on the image above and it will take you back to Flickr).

The first problem is the moon is well lit compared with a dark sky and the camera's selection of the best exposure (to achieve an average grey) is heavily biased by the black sky and tends to leave a very blown out moon with no detail. If you think about it the moon is being lit by the sun and is roughly the distance away from the sun as the earth so the illumination is the same as daylight here. A good exposure to get detail on the moon is very close to what we would use on a sunny day on earth (if you want to talk in M for manual terms, start around ISO 200 f8 and 1/100 second) Start around there and experiment a bit. I actually started there but using Apeture Priority and dropped the Aperture a little because I was using my telephoto (I wanted a bit more light) and it surprisingly gave me a speed on 1/800 using a spot exposure reading but that was great because I was handholding. An advantage of my mirrorless camera is I can see what the exposure setting looks like before I take the photo and I used the EV (exposure compensation) to then darken the brightness of the moon till I got good shadow definition of the moon's mountains and craters.)

The second problem is focus and most automatic focus systems will be hopeless at night, and you will usually end up with a burnt-out blur. The only solution I know of is to use manual focus (and if you have focus peeking that will be a great asset). However focusing at night can be very hard so a good solution is to do your very best but take a few photos, either with slight tweeks to your focus ring or dropping focus and focussing back it. Statistically, you should find at least one is in nice clean focus.

A bit of trial and error and you should find this a fun project, just a little cold in southern parts of Australia. You should be able to do it from your backyard if you are in a Covid19 lockdown and you should get something you are proud off,  BUT expect there will be a lot of other amazing moon photos posted on social media.

I will check at around midnight but I'm not expecting a "pink" moon then.
  (late update no pink moon, just a very bright full moon)  

Tuesday, April 07, 2020

Stay At Home Photowalker


Photowalking while you are staying at home may sound a bit counter-intuitive. However, you can practice your photography around the house just as easily as you can at an exotic location. At home everything is familiar and you will need to start seeing your place in a slightly deeper way (develop the Photographer's Art 0f Seeing or an Artist's Eye)

This particular post will become a nice landing page that will send you off to other posts in here, a series of tasks or maybe other weblinks worth a visit. I will also be joining in posting about doing the projects and issues I discovered along the way. The list of links will grow over time, so this is one post worth returning to.


  1. Chasing Newton's Rainbows of Colours, this is a very simple week long project.
  2. The Window, an ongoing project to help start seeing familiar things differently.
  3. Photo Scavenger Hunt, something for the whole family.
  4. Surreal Selfie, that tells much more of your story than a standard head-shot selfie. 


As with any new training regime please pace yourself.

Sunday, April 05, 2020

Pace Yourself


Don't go too soon, race around trying every single home based photo project idea. Mainly because we could be ineffective lockdown for a while, and that time frame will be determined by the virus infection rates and extent of the epidemic; not politician or self-appointed experts (please ignore the trendy but hollow projects, rumors and fake news flooding social media and the populist media, instead, find a  few reliable news sources, stay informed via them and ignore the rest. Follow your appropriate lockdown rules).

The second reason to pace yourself is that this will give you more time to experiment and practice. Just doing 1,000 hours is a bit of a myth and that practice might be counterproductive if you just repeating bad habits. However, if you use the time to gradually improve, discover new things and techniques you will emerge at the other end of this a much better photographer

Rich Sammon has great advice here as well -
"Surround yourself (you'll have to use social media oronline services to stay connected while the lockdown is in progress) with positive/fun people that can help you achieve this goal. Keep this adage in mind: Stay away from negative people."
Stay Safe & Healthy 

Friday, April 03, 2020

VIOLET Colour #photoassignment

Violet (that blue shade of purple) is not common in nature. There can be those fleeting moments at sunset, and a few flowers. However there are lots of manufactured materials that are coloured lilac to violets. The trouble is this not a fashionable colour at the moment. "Its so last year".

So capturing something violet might just be the hardest colour challenge of the week.

Thursday, April 02, 2020

DEEP BLUE Colour #photoassignment

Deep Blue (Indigo in  Newton's Rainbow) happens in a magic way when you take your image after dark. Particularly if you photograph during the Blue Hour (which is the hour or so after sunset (or before sunrise). The eye might see the sky as dark but your camera can capture a rich deep blue with the right exposure.

If you haven't photographed at night, try it tonight. First, a warning, your camera's automatic exposure settings may not work. So you will probably need to experiment with a lower f-stop number, a slower speed and/or a higher ISO.  Rather than give you general numbers, I would encourage you to change that mode dial to M (manual) and start experimenting. To begin make changes that give you more light, then refine in little steps till you capture that beautiful rich blue.

Wednesday, April 01, 2020

BLUE Colour #photoassignment

Looking in my camera bag I can see some important stuff for keeping my Camera Healthy and Clean, which just happens to be Blue. For the lens there are the blower and lens pen and that black microfiber cloth supplied with your camera. The blue "fannel" is also microfiber and ideal to wipe down the outside of the camera (every day after use). You can wash microfiber cloths in the washing. The Blue zip wallet has a spare battery and extra SD cards.

Camera hygiene can be as important as washing your hands as well.

Tuesday, March 31, 2020

GREEN Colour #photoassignment

There is lots of green in the garden at the moment but I haven't photographed the staghorn fern near the front door in a while. I noticed a new frond unfurling so I got in close.

When you look around the house and look, really look in detail its amazing what you might find to photograph, especially when you look close

Monday, March 30, 2020

YELLOW colour #photoassignment

I want to photograph something strongly yellow in my home. However most of the candidates I've photographed before.  Hmm. Suddenly it was after dark and this jaunty metal cockatoo was the only yellow thing I could see.

Still he takes an ok photo.

Sunday, March 29, 2020

Colour #photoassignment Finding Orange in the Sunset

This was a little easier, I was counting on a good sunset and waited for the strongest colour. Ok, I'm a little restricted in the view to the west but I much better views than a lot of folk in single room isolation or locked down. Still, there is beauty in watching the sunset.

Saturday, March 28, 2020

RED Colour #photoassignment


Don't Eat Me
I took the baby tomatoes from the fridge and placed them over a green cloth (the pale green makes the red look redder) and then got two hole center stamps out from the hole punch added eyeballs with a black felt pen. The tomatoes where cold so condensation on them held the eyes in place.

The Colour #photoassignment post.

Friday, March 27, 2020

Small #photoassignment :: View from my Window

Light Through My Window
If you are in a quarantined or in total lockdown situation. The four walls can start to feel like they are moving in. BUT most rooms have windows and what's outside and the path to light coming into the room changes a lot over the day and from day to day. So photographing those changes and looking for the devices moments is a nice way to use your camera, to expand your little room. It could also be a great photo essay topic. If nothing else it could be a good challenge of your creativity and great phototherapy.

Thursday, March 26, 2020

Indoor #photoassignment :: Chasing a Rainbow of colours


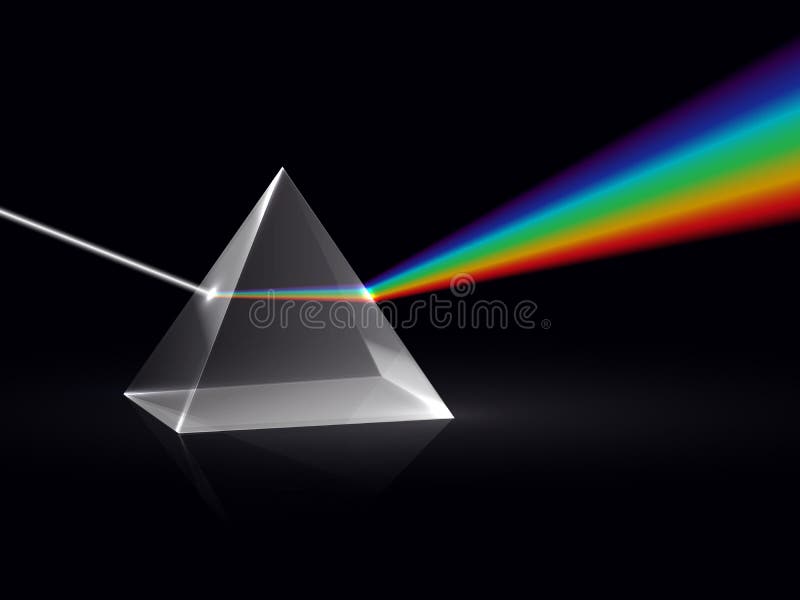
This is a week-long assignment for those confined inside (ie roughly half your self-isolation period). Issac Newton suggested there were seven colours in the spectrum/rainbow of colours he could split daylight into using a glass prism.

They are Red, Orange, Yellow, Green, Blue (a lighter blue a bit closer to cyan) Indigo (a darker blue) & Violet. Each day select one colour and find a place or object around your home that is full of that colour. (Hint you might be doing a lot of close ups). The colour need not be vivid it could be a paler or pastel shade it just needs to convey the essence of that colour.

A  lot of modern renditions of the rainbow only show 6 colours. Which colour have they left out?

If you don't have a glass prism handy and want to show the kids how light can be broken into a rainbow of colours. Find an old  CD, DVD or BluRay disk and look at the underside, it has a defraction grating built in which acts like the prism for the laser reading the disk. You will see at least two strong rainbow lines radiating from the center.  The number of line you see will depend on the number of strong light sources in the room. Again how many colour can you see?

Wednesday, March 25, 2020

Hmm Don't Do It


Our Prime Minister warned about panic buying/stockpiling, and his message was simple "Don't Do It".
I hope I'm not involved in the lead up to the lastest COVID19 delays. A number of on-line photo finishing services have sent emails explaining they are overwhelmed with orders and will have some difficulty providing everything within their normal turn around. So firstly I must thank them for a bit of advanced notice in these uncertain times.

So if you are doing as I suggested on Sunday and taking photos to put on some form of on-line photo service product, be patient. I'm sure  they will keep their doors open as long as they can comply to local restrictions (and we all know these can change from day to day.)

Secondly, I would avoid any overseas services, with the tightening of borders everywhere, the chance of product being caught in limbo is high. So if you are in Australian look to PhotoBook Australia, Snapfish as decent places to start (BUT check both companies source some specialist products from overseas) many local stores also offer either in-house or local fast turn arounds on photo printing and some special products, eg Ted's Camera, Harvey Norman, Office works, Big W and Kmart. There are possibly other obvious places I've overlooked and most offer on-line uploads but may required prepayment and/or store pickup, again check (shopping centers are open now but again could be closed at short notice)

I had thought of putting links to these companies websites but they will be so easy to find I encourage you to do that yourself, also look for special offers or deals, they might save you some cash, and in these times that's a good thing.

Tuesday, March 24, 2020

Making a Photo Essay


This idea really comes from Brookes Jessen (his Lenswork publications and podcasts are worth a listen) as different ways develop to share and show your photographs. Also you can probably get more interest from others when there is a story or common theme that links things together.

My current photo essay project
 is "Underfoot"
 So what is a photo essay? I'm not the arbiter of the term but what I am going to discuss is a collection of photos that tell a story or theme (in a visual way). It can be produced as a series of prints, a short small book, a slide show or better still a downloadable PDF for sharing via email or the web. This is an ideal photo project to undertake while you are in a period social distancing, quarantine or lockdown

What do you have to do to create a Photo Essay
  1. Think of a theme and plan out some photo ideas (you can change your mind as you progress).
  2. Take the photos (a smartphone is fine, I'll be using a small mirrorless camera, but compact cameras and DSLRs will be just as good)
  3. Organize and select those that best tell the story or represent the subject. (this might be a gallery app on the photo, built-in photo software on a PC or mac or up to a specialist digital photo package)
  4. Use Software or an App that lets to arrange the photos, and publish them (into a common distributable format eg. PDF, slide show or video)

Simple really.

As an example have a look at a couple of my recent photo essays. I've used Photo Mechanic & On1 to manage and edit my photos and the app Canva to format and export the PDF. I'll be posting a bit more on the last two points in the next days and weeks

Monday, March 23, 2020

Indoor #photoassignment :: Chasing Light


This assignment may suit if your social isolation or quarantine means you are confined to home. Keep your camera or smartphone handy and check out the light and/or atmosphere around the home. Find a place and time you like best. You will probably have to take a few images. Later in the day or after dinner sit down and choose just one photo.

You are allowed to come back tomorrow at roughly the same time and "stage" a second attempt (eg remove distractions. closer crop etc).

Sunday, March 22, 2020

Small #PhotoAssignment :: Making A T-shirt


I decided my today's photo assignment would be to make a tshirt (or in more general terms it could be any photo product, mug, calendars, mousemat, phone covers, tote bag... etc  that are available through any on-line service). I have a redbubble account and they do good stuff including tshirts (possibly a little on the pricy side).

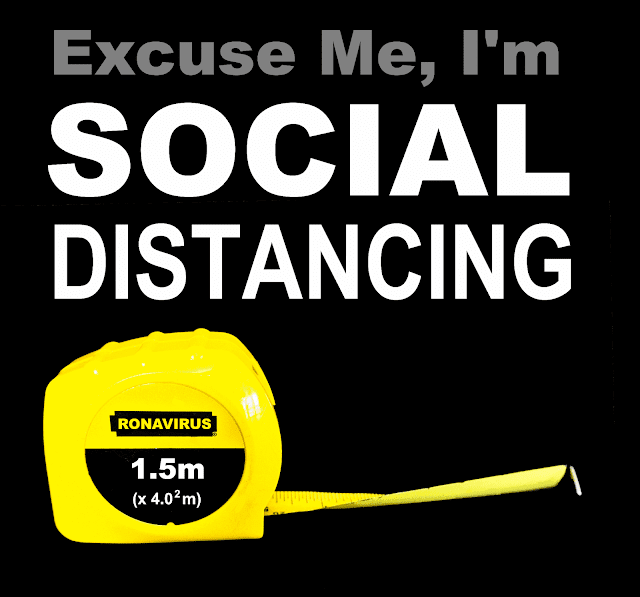
Anyway at 9:30am I mapped out a rough idea and took a couple of photos of a tape measure against my black coat. My idea was based on the Australian Government have issued clear guidelines as to what social distancing means (1.5m away from others and indoors each person requires 4 square meters of space). Very succinct and clear. So a few words and changing the text on the tape measure was all I needed to do.


I'm at my beach place and only have my little HP spectre which only has photography software loaded so I had to use ON1 and Paint,net to do the more computer graphics parts, which they did well.

Then it was onto my mobile modem and uploading to the redbubble website and choosing the items I think it might be suitable to print on. It was up and publically available by 11:30am.

Moral of the story :: It was a fun way to exercise my creativity for a couple of hours. So todays photo assignment is for you to make a photo product that someone in your family or friend might appreciate and get it created by an on-line service.

Also you can buy theTshirt if you like.

Saturday, March 21, 2020

Underfoot


I started my first photo essay project of the pandemic social distance phase following my own suggestion Yesterday. I'm collecting photos looking down at what underfoot when I'm out walking with my camera.


Of course, I am taking other photos as well but over this coming week, for now I'm just taking photos and keeping them in a separate album. At this stage its probably advisable to not cull anything until you have a clear idea of what you are expecting to capture. Being able to compare a variety of images (even some less than perfect ones) should help you on your way to a much more personally satisfying project.


Friday, March 20, 2020

Stay Healthy and Keep Fit


I'm starting my photo journey
 at the front door
Forget toilet paper and food in packets, concentrate on fresh food, fruit vegetables, and good quality protein. Eat well (prepared at home) and exercise. If you can get out take your camera out in the fresh air (it's getting less polluted by the day) but stay away from crowds. Not everyone has access to a large open parkland like me but just walking around the block or down to the local shops (high street) is exercise.  It is also a great opportunity to take photos. Start with snapshot to the path you take (perhaps looking down at the path) and key landmarks along the way. When you get home wash your hands with soap and water and give your camera a wipe down with a microfiber cloth (don’t use a spray or sanitizer on your camera, just wash the cloth after use) then put the camera away.

No need to show anyone the photos, but later that day or night review them and think what could I have done to get a better picture (Hint most often it will be to do with composition and framing, then perhaps tonal balance). Sharing your photos can come soon enough, but treat your first day as practice.

This mission is inspired by Rich Salmon’s recent book “Photo Therapy Motivation and Wisdom” here is the advice he offers on this topic given before the COVID-19  crisis.

“Exercise as much as you can and try to eat smart. The healthier you are, the better you feel and the more energy you will have when you are out photographing. Download a fitness tracker or utilize the step counter on your smartphone. Also, cut back on the carbs.”

Thursday, March 19, 2020

Coping with Social Isolation

Social distancing doesn’t mean you should stop photography.

In fact taking a little time for photography each day could be really good for your health (Body, Mind and especially Soul). Thus I have started this little series of blog post that has ideas for mini photo assignments while Self Isolating. Today's assignment will suit you if you're totally locked down or in quarantine.

The COVID-10 pandemic is set to become a very significant world event and remembering what you and your family had to do will undoubtedly become one of the more significant events in your lifetime. So it is a perfect time to start your view of what is happening as a visual record of those little things happening in your daily life. They could be the same as usual or new, that particular way you have had to adapt.

Don’t go overboard and photograph everything and post it to social media. Take a much more contemplative view.  Have the camera ready at a location you can find quickly and take a photo easily or alternative always be ready with the camera on your smartphone. If you are finally sitting down and enjoying a coffee consider getting up and photographing the cup your favourite chair the sun streaming through the window even the time. What about the family playing cards (even if they are not all enjoying it try to capture that). Aim for 5 or fewer pictures each day but make the effort to put them aside into an album that gradually grows. Look to include those little moments of joy and frustration as well as the daily grind.  When the lockdown or quarantine is over make a slide show for the TV, or a photo essay to print or even consider making a book of your lockdown to show your grandkids.

Today I'm blogging.


"what I'm doing right now," was the original catchphrase for twitter, and sounds relevant for today. Unfortunately, twitter, in particular, has fallen to a very untrustworthy common denominator now in a race to the fake news bottom. So stay away from social media just concentrate on creating memories for your future self and family

AN IMPORTANT CHANGE OF MIND ON USING SOCIAL MEDIA


In the last paragraph I wrote yesterday I implied it was best to stay off social media and I still think that might be a good way to avoid the mass hysteria and misinformation. However social media is a good way to stay connected to your friends and family while in isolation. So Yes definitely use social media BUT be safe there as well be careful who you trust and avoid passing on unsubstantiated rumors if you can. I still suggest not posting every photo you take, just yet.

Tuesday, March 17, 2020

Social Isolation and the Photowalker

The cancellation or postponement of large Photowalks need not be an end to your photography, in fact, social distancing and working from home could give you the opportunity to practice more. Firstly allocate some time each day, it could be a short art 15-30 minutes. Now go for a walk with your camera. It might take a refocusing of your mindset, thinking more locally even around the home or garden. If your town isn’t totally shut down and your feeling well take the opportunity to get outside.

I’m lucky I live close to a large natural park in the middle of suburbia and I walk in there two or three times a week, there is always something to photograph. See my Year in Jells Park album on Flickr. It need not be a park, it could be local road signs, letterboxes or interesting street trees. Your imagination can be let free, with a digital camera there is little penalty if you decide to throw everything away and start again. The key is to really look around before you take the picture, so you are not taking the obvious snapshots but photographs that interest you.

If you’re in a total lock-down or confided to a 14 day self-quarantine, or suffering Flu like symptoms and need to self isolate, look for favourite spots in your home or garden, places that catch a special light. Start looking I’m sure you will find them. 

Perhaps do a series on your favourite chair.


Friday, March 06, 2020

The Risks of more Megapixel, pin sharp fast Lenses and Pixel-peeping

The Risk of more megapixel, pin sharp fast lenses and pixel peeping is producing boring photo, putting pressure on storage, taking longer to process and not forgetting more expensive gear to start.

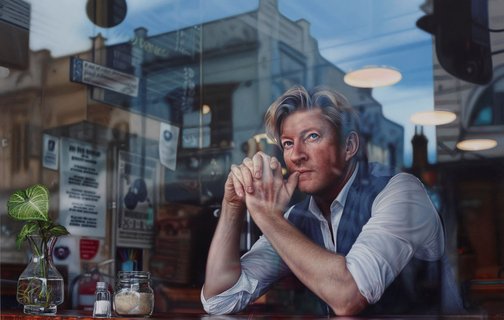
Photorealist painting from last years Archibal Prize

It is the same as for Photorealistic paintings, the work is technically outstanding but the Images soon become boring. Often very boring. Frequently the brilliant technical specs get overlook because their is nothing for the viewer to work out and keep their interest. In the art world there is a nice example in last year Archibald prize. The technically well executed and large Hyperrealist painting of David Wenham by Tessa MacKay was pretty much overlooked by the judges. Yet it was popular with the public and won the packing room prize, which is judged by the gallery staff who receive, unpack and hang the entries. In this case the artist has looked at a strong composition of building over the road seen through the glass window and painted reflections of the interior. So there is a fair bit to see but once you notice the detail becomes tedious and it back to being boring

Getting back to photographs, whilst other “purist” photobuffs, you tube watchers and owners of the latest and greatest cameras will enthusiatically discuss bokeh and edge to edge crispness. The average public viewer will look instead at the subject perhaps to composition and/or colour and perhaps interesting patterns or textures then they will move on. Capturing their gaze to look a little longer which usually depend on print size and viewing distance. Further weather you can interest them at that scale

Viewing distance and print size.

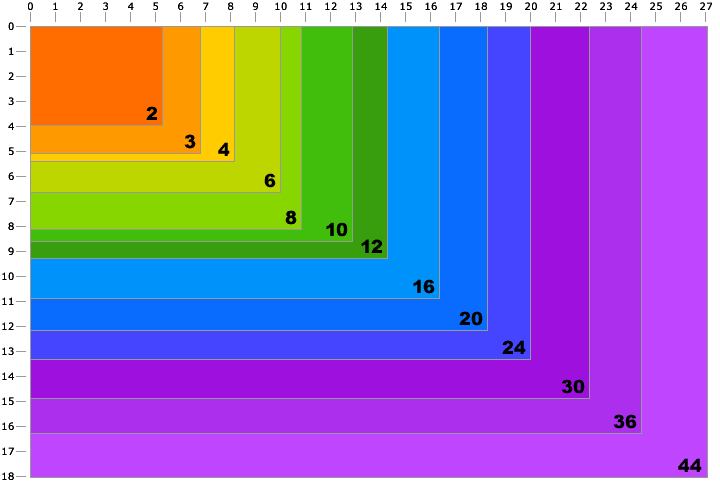
I have written about this previously, and that is a good summary. The issue here is you must concern yourself with the viewers eyesight media for display and type of illumination, print sharpness usually isn’t a real consideration.  There is also a lot written about this on the internet and a lot of it is only partially truthful and/or bias. The chart on the left show the relationship between common sizes (in Inches BTW) and the megapixel count of the image and assumes that you will want to print at 300 ppi (pixels per inch).  Each coloured rectangle then has the number of megapixels required for a given size. You will probably be surprised how few megapixels are required for common sizes. So what happens to all the extra detail capture on a full frame/high megapixel camera? Well they just get averaged together and that detail disappears

Capturing the Viewers attention

  1. On instagram/Facebook were images are displayed on small screens and this is potentially the place you can show your work to the potentially greatest number of people. Both Instagram and Facebook now use algorithmic methods to display your post, and they may very well limit the display to 20 cases and stop there if no one interacts with you post/picture. Thus if you are looking to become famous for your photographs you need to be already famous (ie have a lot of friends that follow and interact with you).  The images displayed  are tiny (and thus not detailed) and are normally held close. Unfortunately the viewer also has the ability to scroll through the images quickly. You might only have half to a couple of seconds to get them to stop and take a long look. This favours bold composition, strong colours and tones. #hashtags and clever titles.
  2. #72/365 My $10 PhotobookSmall prints. Portfolios and Photobook, larger Ipads and Tablets  have and arms length or less view distance and because they can be picked up and handled  they are likely to get the closest scrutiny. Thus they do need the required level of detail (eg 8 megatpixel for  10” by 8”). They should be designed the allow the viewer an extended period to inspect (this might include captions and perhaps a short paragraph of so to provide context.) They are likely to be the very best way to get anyone interested in your photography, having the massive advantage of social media sites on small screens in that they are something tangible and physical.
  3. On a wall (could be in a gallery or your home). This is the reason usually give for large sensors and High megapixel counts, it in theory allows for big prints (often gigantic) but this is probably the most challenging way to promote your work. Firstly large prints can be expensive to create and frame and it is likely to have the smallest number of viewers. Further the potential buyer is likely to consider these larger image as a décor items not art (ie does it make the couch)?

Friday, December 13, 2019

Chasing likes on an algorithm can be the enemy of innovation & creativity.

Today I found a blog post by Dave Morrow "Why Your Photography Business Will Fail & How to Succeed"

The beginning of the article gave me important extra insight into something that has been bothering me for a while now. It nicely summarizes the idea that Big is Power, it follows social media viral hype, looks for short term gain and elevates those with millions of followers, likes, clicks, and shares. Unfortunately this "Big is the goal of the masses. It's their undefined version of success" (I'm quoting Dave) When you add this to an algorithm that focuses on severing up things that might keep you on the screen a little longer you get lost in a bubble of wanna-be celebrity and replicants, things may get to look glossy but artificial (they probably are) and endlessly much the same (eg. @insta_repeat)

Yet the internet and social media should in theory offer the opportunity for the innovators and creatives to show their work to many others. Moreover the capability of desktop computers and even smart phones with apps that link directly to social media sites enable distribution of work in a single click. A creative should be free to experiment and post anything they like.

Why doesn't this happened? It just like shouting into the wind, the original and creative messages usually gets lost and quickly blows way.

There are ways to overcome this and Dave suggest the answer lies in thinking and acting Small. I must agree. Small lets a creative person target works they care about, experiment, become proficient in the craft required to create their work. They should also look to find other like-minded people (through on-line groups, perhaps blogs, #hashtags or even You Tube or Instagram) and correspond with those similar souls through comments, DMs and personal emails. Establishing trust here is all important. Finding an audience that appreciate the originality and creativity is as important as the work itself.

"The creator’s only cost is time, hard work, and a long term belief in their own ideas." (quoting Dave again)

Saturday, December 07, 2019

2:1 :: a Second Photo Essay

2:1 is an aspect ratio which I like, but others seem not to like or even consider.

It not in the standard list of photo output sizes of popular photo editing software, few camera can take it in a single image (without multi-image stitching and or cropping) and its not displayed well in most social media sites.

Yet this format is pleasing to me, it looks normal. We have two eyes after all.

My search for creative expression that is not beholding to the Online Aesthetics of Social media continues…

Visit my photo essay page