Monday, December 03, 2018

PhotoProject :: Overexposing to the right

Something I have been continually remining myself of is, that colour quickly loses it brilliance (vibrance) as the light increases in digital images, put another way colours stay richer in the shadows. I’m not sure I have the full technical explanation of what is driving this observation yet, However today I had the opportunity to put my observation into practise.luminance histogram

It was very grey and overcast and a number of Rainbow Lorikeets were enjoying a good feed on the silky oak in my backyard, However they where on the dark side in the shadows and silhouetted against a grey but still bright sky. A recipe of black birds hidden in black foliage against a white sky. So I set my camera to just focus and take the exposure from a central spot and zoomed in on the birds. Immediately the sky was blow out but because my little Olympus is a mirrorless camera I could see the immediate results into my view finder and the beautiful colours of the Lorikeets was showing, Great, but these little parrots jump around a lot so I had to up the speed (and significantly up the ISO) to get them sharp and colourful. I even started to adjust the EV to +1 in this case. Being able to see what was going to happen when I pressed the shutter was amazing. Basically I was shooting to the right, shifting the shadows up into midtones albeit overexposing the sky (which doesn’t really matter pictorially in this shot).This is the Jpeg straight out of the camera (no lengthy post processing required (other than cropping and scxreen capture of the histogram).

OLYMPUS DIGITAL CAMERA

Sunday, December 02, 2018

Seeing Colour :: Through The Camera Lens

Let’s move onto the more Scientific/Enginering aspects of how the camera captures light of a specific intensity and wavelength. My schematic sketches of the camera cross section is meant to represent both traditional DSLR and newer mirrorless cameras. Both have exchangeable lens elements that focus an inverted image onto the sensor (or in the case of older SLR film). The DSLR however has a mirror that reflects the light up into a prism whose job it is to turn the inverted image up the right way and back through the view finder. So the DSLR user sees optically what the lens is focussing on. Whereas the mirrorless camera (obviously doesn’t have a mirror) and the image is captured on the sensor (often continuously) and this is sent to a graphics processor in the camera where the data from the sensor is converted into a conventional image (a jpeg) and this is displayed in a small screen behind the view finder (or alternatively the LCD screen on the back of the camera). The diagrams do not include the shutter and both systems have a shutter which control the length of time the sensor can capture light to give the required exposure.

The camera sensor (or film) collects the light that falls on it and the more light the closer to white the resulting image will be. In conventional SRGB Black is given the value 0 (zero) and white 255. This is usually called luminance. In a digital camera there are a multiplicity of small compartments each collecting its own luminance value.
How does this create colour, well it doesn’t for each compartment, but instead each set of 2 by 2 compartments have a set of coloured filters (known as Bayer Filters) over them. Each allowing only Red, Green or Blue Light to pass through. In a process known as demosaicing sets of these 2 by 2 colours are combined into single pixels with 3 colour. See the Cambridge in Colour page for a more detailed discussion of bayer demosaicing.

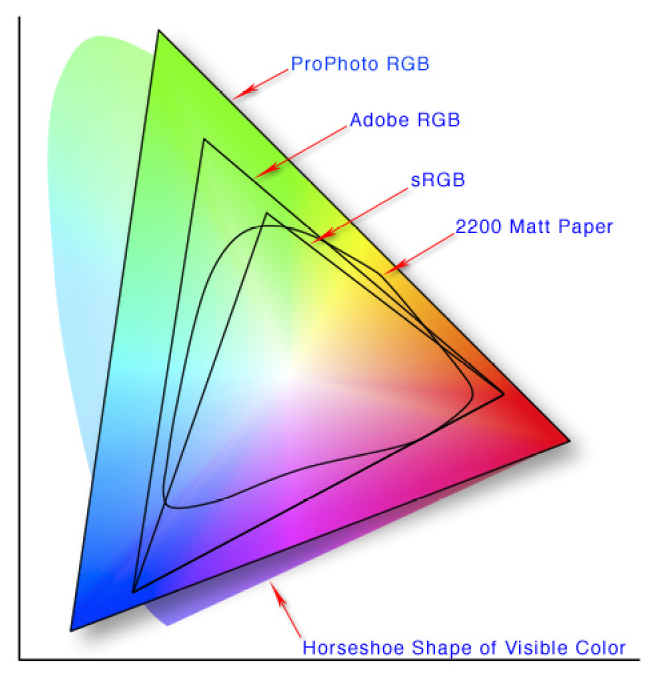
The best way to consider what is happening is to use the CIE chromaticity diagram, Unfortunately I have not been able to locate and camera manufacturers publishing their colour gamut, they seem to prefer to say they have better “colour science”. They all seem to offer a close fit to sRGB colour space and some offer the extra colour space and bit depth of Adobe RGB &/or ProPhoto RGB
I will again hand over to Craig Blackwell, To continue the journey of how the RGB colour space can be used to create colours.

Saturday, December 01, 2018

Seeing Colour :: Spectral Colours and other basics

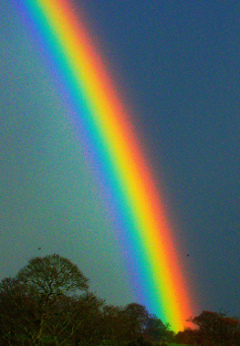
Let’s begin taking a look at the Spectral Colours. They are the colours in white light that can be split out using a prism, discovered (or at least first analysed) by Issac Netwon. They are the colours of the rainbow.

As an aside How many colours are ther in the rainbow?

There is actually a broad range of colours and each corresponds with a given wavelength of light. The light passing through the prism (or drops of rain) gets refracted (bent) according to the wavelength. the short wavelength bent toe least, medium wavelength greens and yellow slightly more and the long wavelength reds bent the most.

Craig Blackwell, an ophthalmologist, has prepared a series of videos that provide great summaries of the technical aspects of understanding the basics of colour, then colour matching and finally leading to the chromaticity diagram. I will include videos from his series as I move through the various aspect of seeing colour.

For now we will start at the beginning.


Next investigate creating all colours just mixing Red Green & Blue