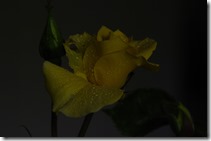
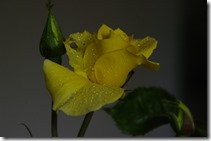
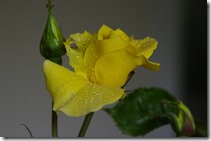
Its a very overcast day after yesterday’s strong wind but with that calm before a storm feel. Not an exciting time to take a few photographs (yet). What I did notice was a new yellow rose had a few buds about to flower but had been very dried by the winds so I gave them a light spray of water and took a couple of bracketed photos of the new buds.


The close up simple composition gives me a great opportunity to compare three of the HDR programs I have used recently, and specifically to discuss what I like to use the HDR Technique to do. I have written a fair bit about HDR. However few people realize how often I use it. I think that is because I am just trying to create an image as I remember the scene, rather that what the camera recorded. The images above are all a bit dark, but that usually doesn't matter within the HDR process. If I was to process just one image I would choose the one on the right and lighten it a little and increase the contrast. Since I have a RAW file that would be simple.
However here are alternative ways to process these photos
Picturenaut
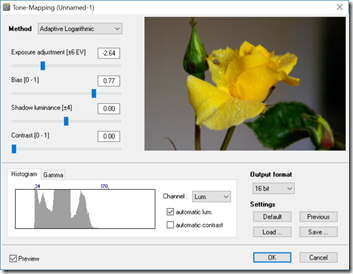
 This was my go to program for a long while because it was easy to use, free and could process RAW files (which I reasoned gave the HDR process more dynamic range to work with). Importantly for someone that usually hand holds while taking the bracketed set, it has a decent alignment correction. The ghosting (removing ghost from people or things that moved between exposures) work for small movement but my experience was it could misbehave so I only used it when I saw obvious ghosting without it. I also found that it would often need the EV setting of the images updates (ie they would often just all read EV=0). In the table beside each file used.


The HDR image (which can be saved) is very dark like my original photos but when I select Tone Mapping I generally select adaptive logarithmic method and accept the default settings and save it was a .tiff file. Preferring to then finish the result in either Lightroom or OnOne.
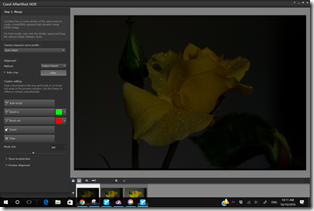
AfterShot HDR
 When the HDR was added to aftershot in version 2 I became an immediate convert. It is also handles alignment (mostly ok). It also handled RAW files (unfortunately version 3 of aftershot Pro does not pass raw files nicely into the HDR merge program, so I must maintain a Version 2 copy just to do HDR) and it is vary easy to set up you just select the files you wish to use and then right click and select to Edit With AfterShot HDR\Exposure Merge


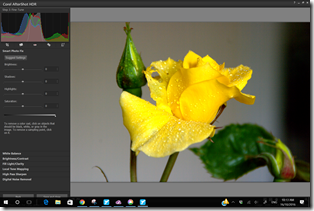
The ghosting has to be fixed by masking away the ghosts you don’t want (on specific images) which can be a little tedious but can be much better controlled than the automatic methods. Again the aligned image looks very dark. However when you process the three images into one the image generally looks much better exposed (its not magic the dynamic range is being stretched to fit the image)


I have the presets turned off and generally only make some minor tonal adjustments. My preference is to add a little contrast and deepen the midtones and/or shadows. In AfterShot there is an extra step where there are as a number of basic edits to finish the image but again I prefer to save the resulting photo as a .tiff file and then do my finish in Lightroom or OnOne.
Nik Efex HDR Pro
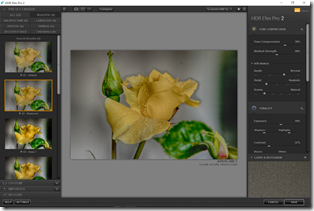
 Whilst I’ve had Nik software since google offered it for free download. I was a little slow to try out the HDR merge features. I have been working through the various screen via the rather big collection of presets. To my taste a lot of these are just hideous, those strong halos around constraty edges and super crunchy detail and lurid colours are off putting. Still I like enhanced colours and a little extra contrast so I can see a few presets that are getting me close to the nature feel I am looking for. These include default, balanced, Soft Colour and soft Landscape presets. Nik Efex HDR needs to be run from Lightroom and it has to be started a little differently to other plug-ins. Instead of the normal Edit In option, you have to export the photos to Efxex HDR Pro via a specific option in the export menu (shown on the right). Lightroom does take a little time to prepare these exports.


I am still experimenting with how to do minimal tonal adjustments, but already have discovered that I need to slow down the drama (mostly) and often experiment with structure which is a bit like lightroom clarity and OnOne’s dynamic contrast. Again I prefer to save the .tIff image at this stage and do the tonal finish in lightroom. Perhaps with a little more practices I’ll gain more confidence. For the moment Nik’s Efex HDR pro remains an interesting diversion rather than a go to tool.
In the end I choose the Aftershot Pro .tiff image as having the closest to my feelings looking at the water droplets on the new buds. I finished this in OnOne 10 using the perfect eraser to get rid of the hole in the petal and a small curl of another bud below left, crop in a bit and add my favourite big softy vignette to bring the rose forward from the background a little more.

All of these steps take considerably longer than just processing a single image but I tend to think the extra time spent is worthwhile and creates a stronger and more real image.


